Secret "Garage" Space
I’ve said it before and I’ll say it again - I wish we had a garage. Oh the projects I could dream up and tools I could store… One day my friends, one day…
Being the eternal optimist that I am, there’s no use dwelling on things that are unchangeable at the moment. Better to make the best of the current situation. In comes this project. A little backstory: the one bathroom in our apartment has both a stand-up shower and a bathtub. During quarantine in 2020, I attempted to take a bath and it was an epic fail. The water never got hot enough and it only filled up about a quarter of the way before it started draining. We only use it to wash Walker every six weeks or so, so for the most part it sits around unused.
That’s a lot of wasted space!! When we first moved in, Berto had the idea of putting a piece of plywood over the top, but I couldn’t see the vision. It wasn’t until my mom visited and brought it up again that I started to see it as a possibility.
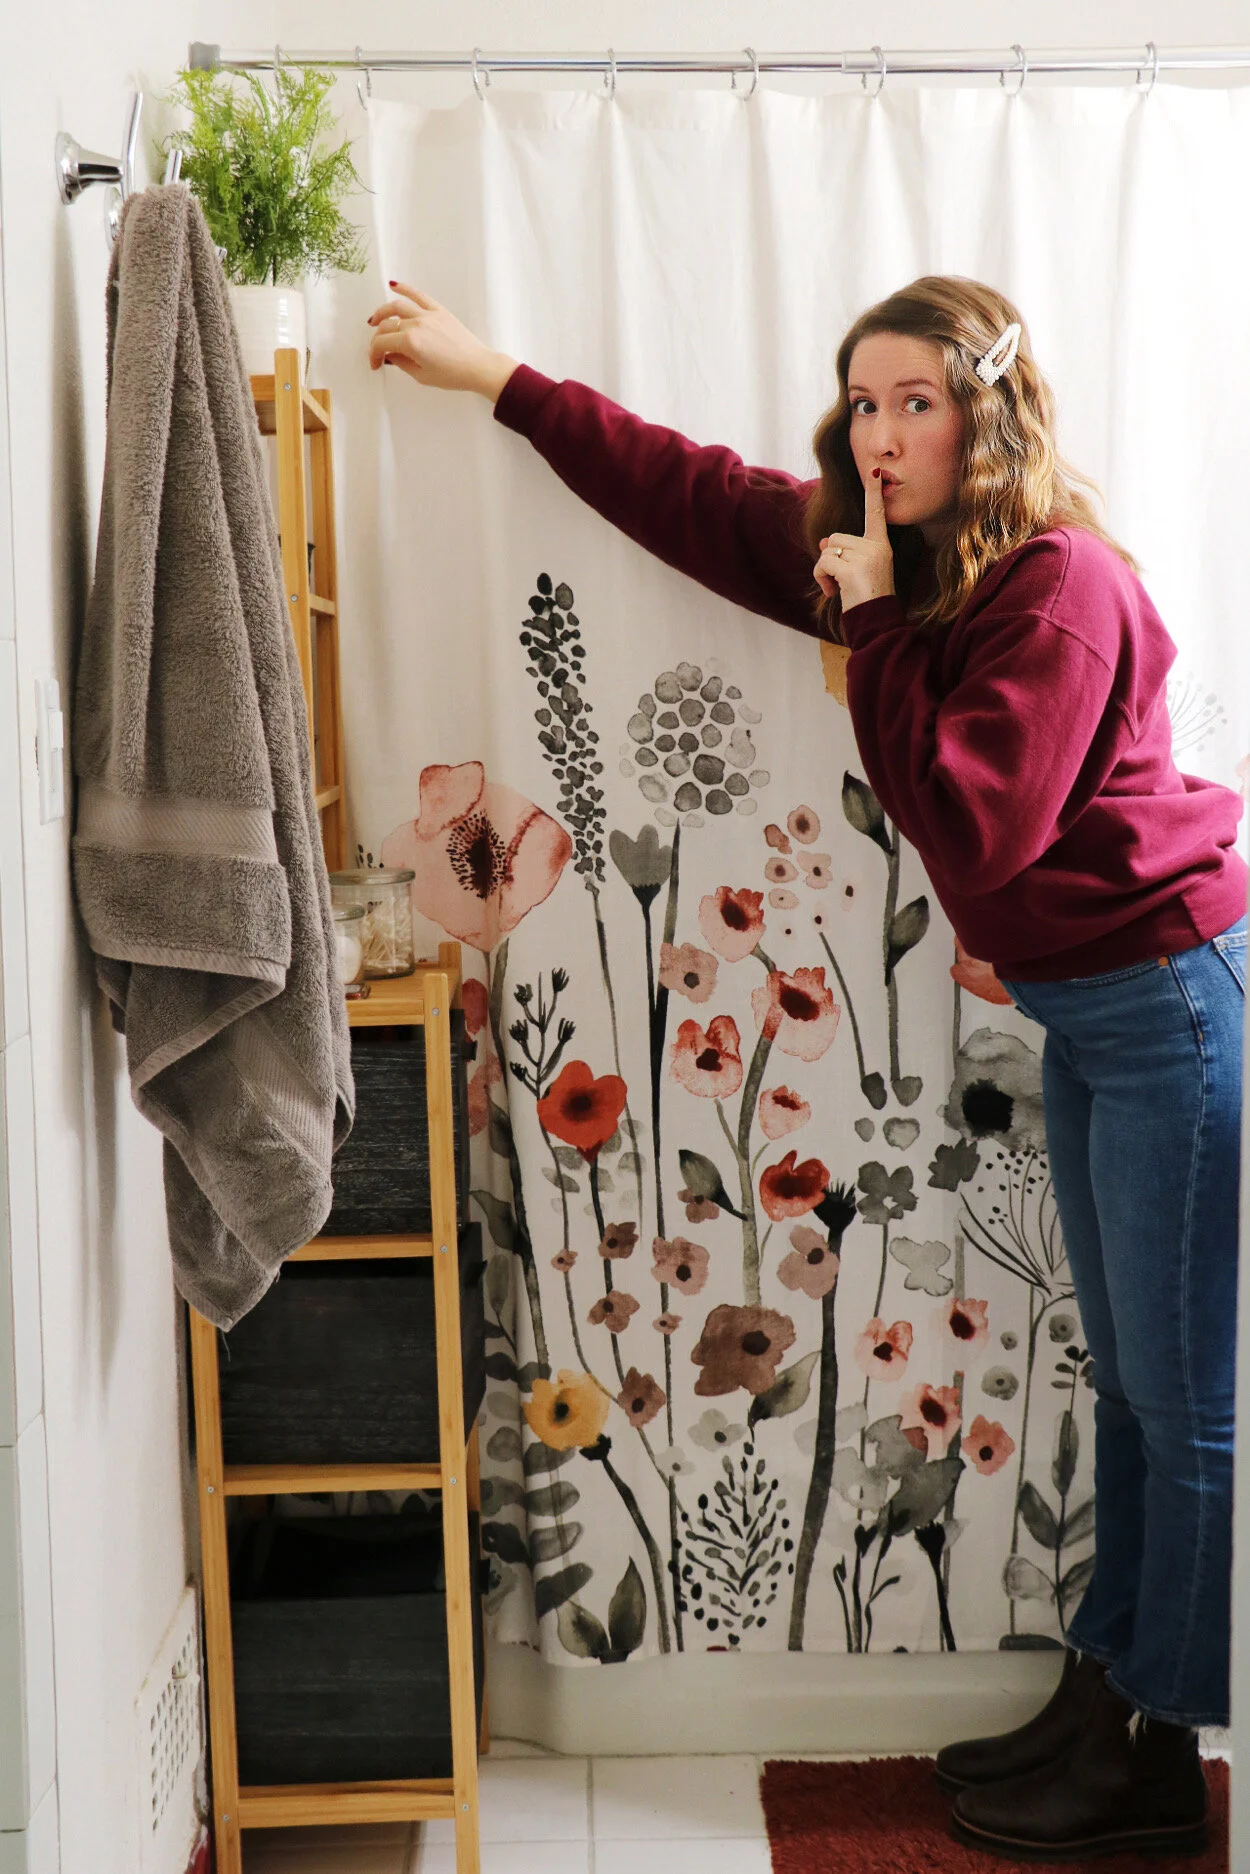
Ultimately, our need for more storage won out and we decided that converting the tub into a vertical “garage” was the perfect first project for 2021. What sold me was the way we would cover it with a shower curtain. That way, no one would ever guess there was a bunch of tools and boxes stored there.
A lot of bathrooms = bath tub showers = shower curtains = secret storage.
It really took someone explaining that to me that plainly to wrap my brain around it. It was a “duh” moment after that!

Now here’s how we pulled this off. It all started with a LARGE piece of thick plywood. The piece we got from The Home Depot was enormous so thankfully, we were able to get someone there to cut it to size for us (otherwise it wouldn’t have fit in the car!).

First, we used a spade bit to drill two holes on either side. This makes it easy to lift off the tub when/if we need to use it. Make sure to sand the edges - no one want a splinter!!


Next we cut leftover poplar wood I had from the Vintage Ironing Board Nook Turned Spice Cabinet project for the tub lip piece and the brace piece. The thought behind the lip piece was to prevent the wood from slipping forwards once places onto the tub. And the brace was for exactly what it sounds like, and to also be a place where we could attach support legs. Which brings me to…

The legs were securely attached with two brackets and then felt pads were added any place the wood would touch the tub (i.e. the corners, the legs, the front of the lip piece). Then it was time to see if it would fit!

Berto did the body weight test and it held very securely. Now time to add a shower curtain in front and to start organizing storage. The curtain we chose was very affordable from Target and I love that it picks up the rest of the colors in the bathroom (especially the red tile).


Now that I’m seeing it all up, I think I could go even further and add a shelf or two, some hooks - really, the sky is the limit now that we have so much space freed up! I love having functional space both here and in the hall closets, and I’m excited to start my next project with the new ease of getting out all my tools. It wasn’t the most glamorous project, but definitely one that will have a high impact for our day-to-day lives.