Christmas Candle Forest
For a Christmas craft that will make a huge impact while also staying affordable, this Christmas Candle Forest will always be in my top holiday project. In fact, this was probably my favorite holiday DIY to date. I loved working with new materials, and I actually liked that I failed a few times before finally getting it right, because it makes me appreciate the final product that much more.
RE: FAILING = using too hot of water so my candles completely melted AND THEN not cutting the ‘tree branches’ the proper direction so the tapers just looked like someone hacked into them. It was a mess and I ruined about 6 tapers. Whoops!
But you, my dear reader, will not make the same mistakes because you can use this post as a guide! First things first, you need to gather your materials.
Materials:
Wood base
Taper candles
Sandpaper (if using raw wood)
Spade bit + drill
Clamps
Disclosure: My content is reader-supported, which means that when you purchase through links on my site, I may earn an affiliate commission. Learn more here.
Step 1:
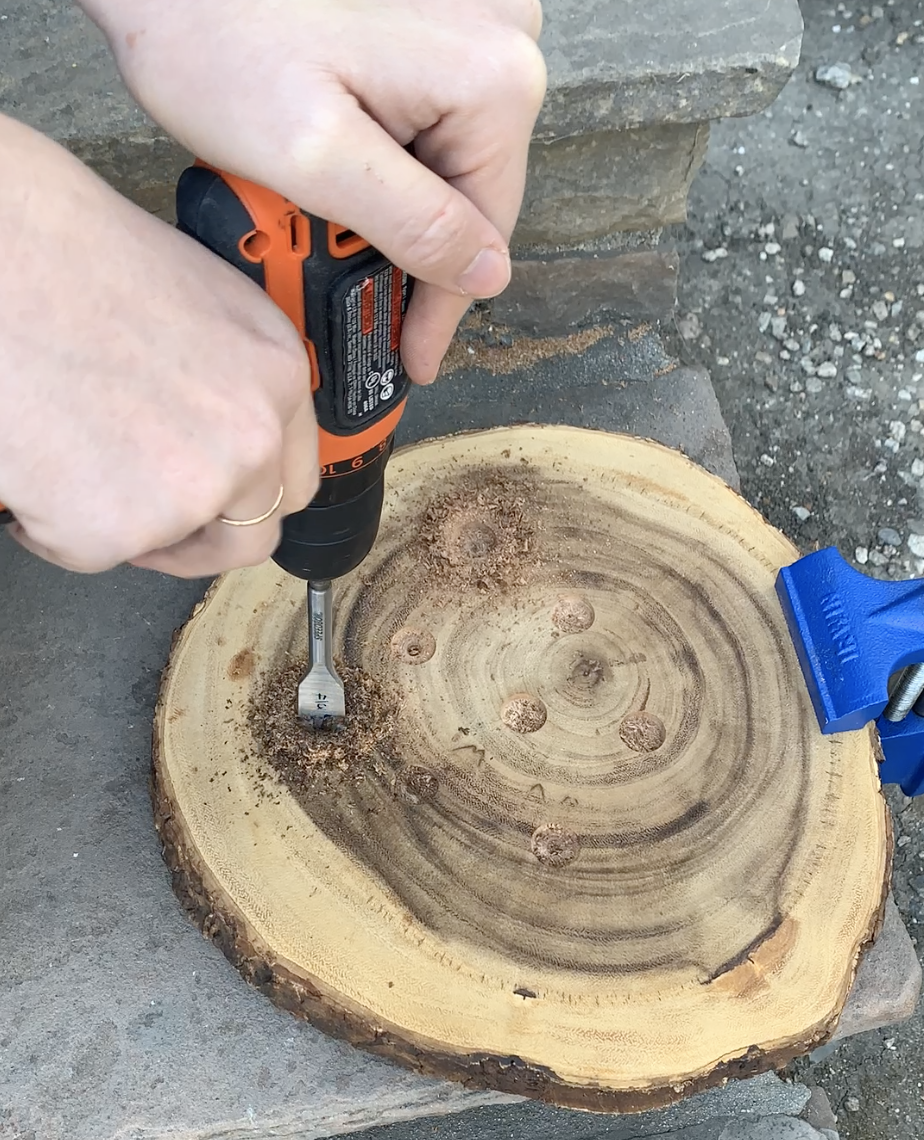
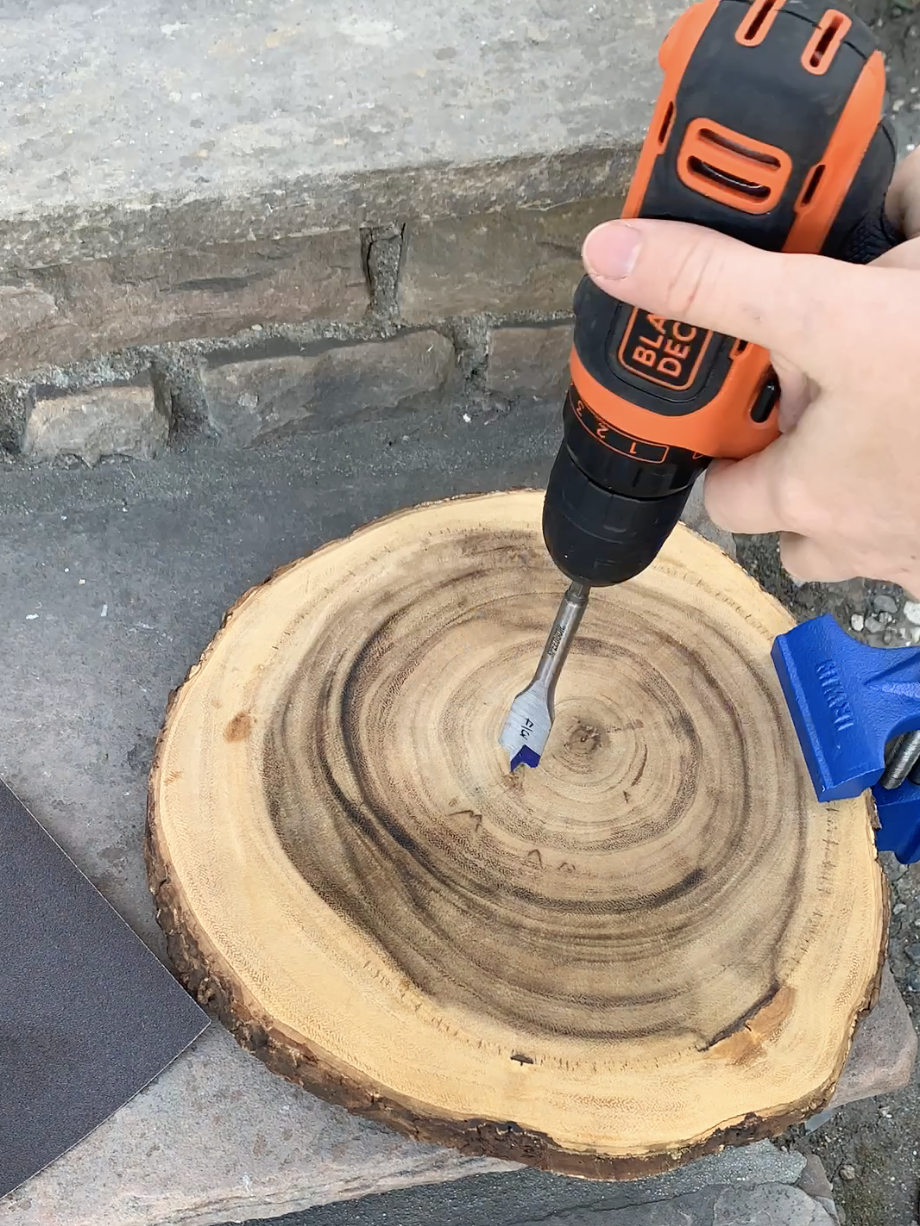
Clamp down your wood piece. Start to drill holes - I picked spots at random. Be sure to avoid drilling through to the other side. You want to find the fine line between deep enough holes so that your taper candles will stay standing, but not so deep that you drill through the wood completely. The spade bit I used with 3/4”.
Because the wood I chose was a charger with finished and treated wood, I ended up not needed to use the sandpaper. If you happen to pick a base that is a raw cut of wood, I recommend sanding the edges of the holes and then even applying wood conditioning oil for a polished look.
Step 2:
The temperature of your water is a crucial step to nailing this project. Get a tall vase or canister and fill 1/3 with boiling water, the rest with cool tap water. Submerge your taper (I did one at a time) and let soak for about 10 minutes.
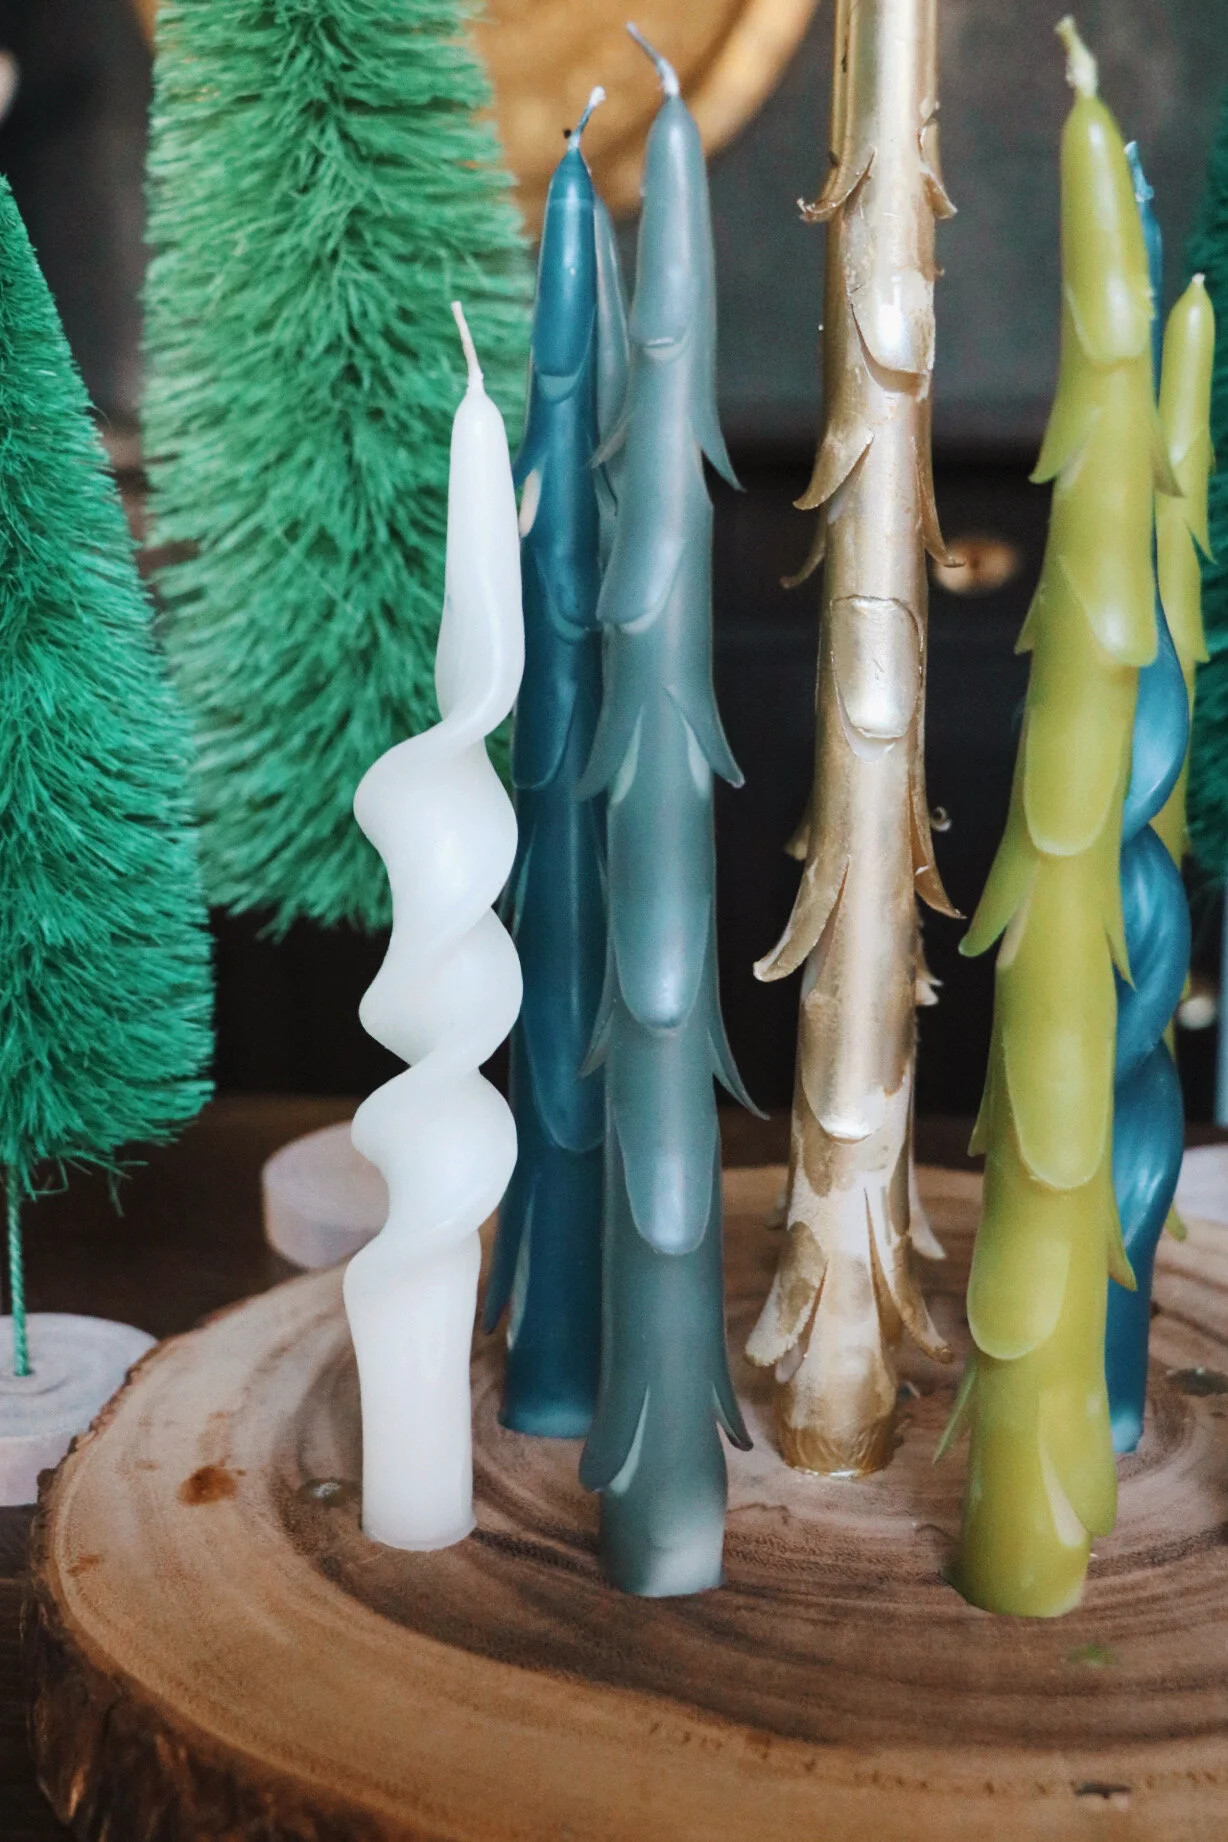
Step 3: TWISTED TAPERS
If you want to try the twisted taper look, roll out the middle section of your candle until it’s fairly flat on both sides. You can use a rolling pin or a can of coconut milk like me (because I don’t own a rolling pin - ha!). Slowly twist the candle as many times at you like. The grey tapers turned out perfectly, while the blue-colored ones cracked a bit. So choose your colors wisely! Ultimately, I re-did the blue one for the final look because the cracking was bothering me, but it’s up to you on how you want the final product to look! Let the taper cool completely.
Step 3: TREE CARVED CANDLES
Starting from the bottom end of the candle, make small, alternating cuts and gently push outward to mimic the look of tree branches. Work quickly before the candle cools down. Let cool completely before moving onto the next step.
Step 4:
Melt a little section on the bottom of the candle and immediately put into place on the wood base. This ensures it’s super sturdy in the pre-drilled holes. Keep adding candles until you fill it up!
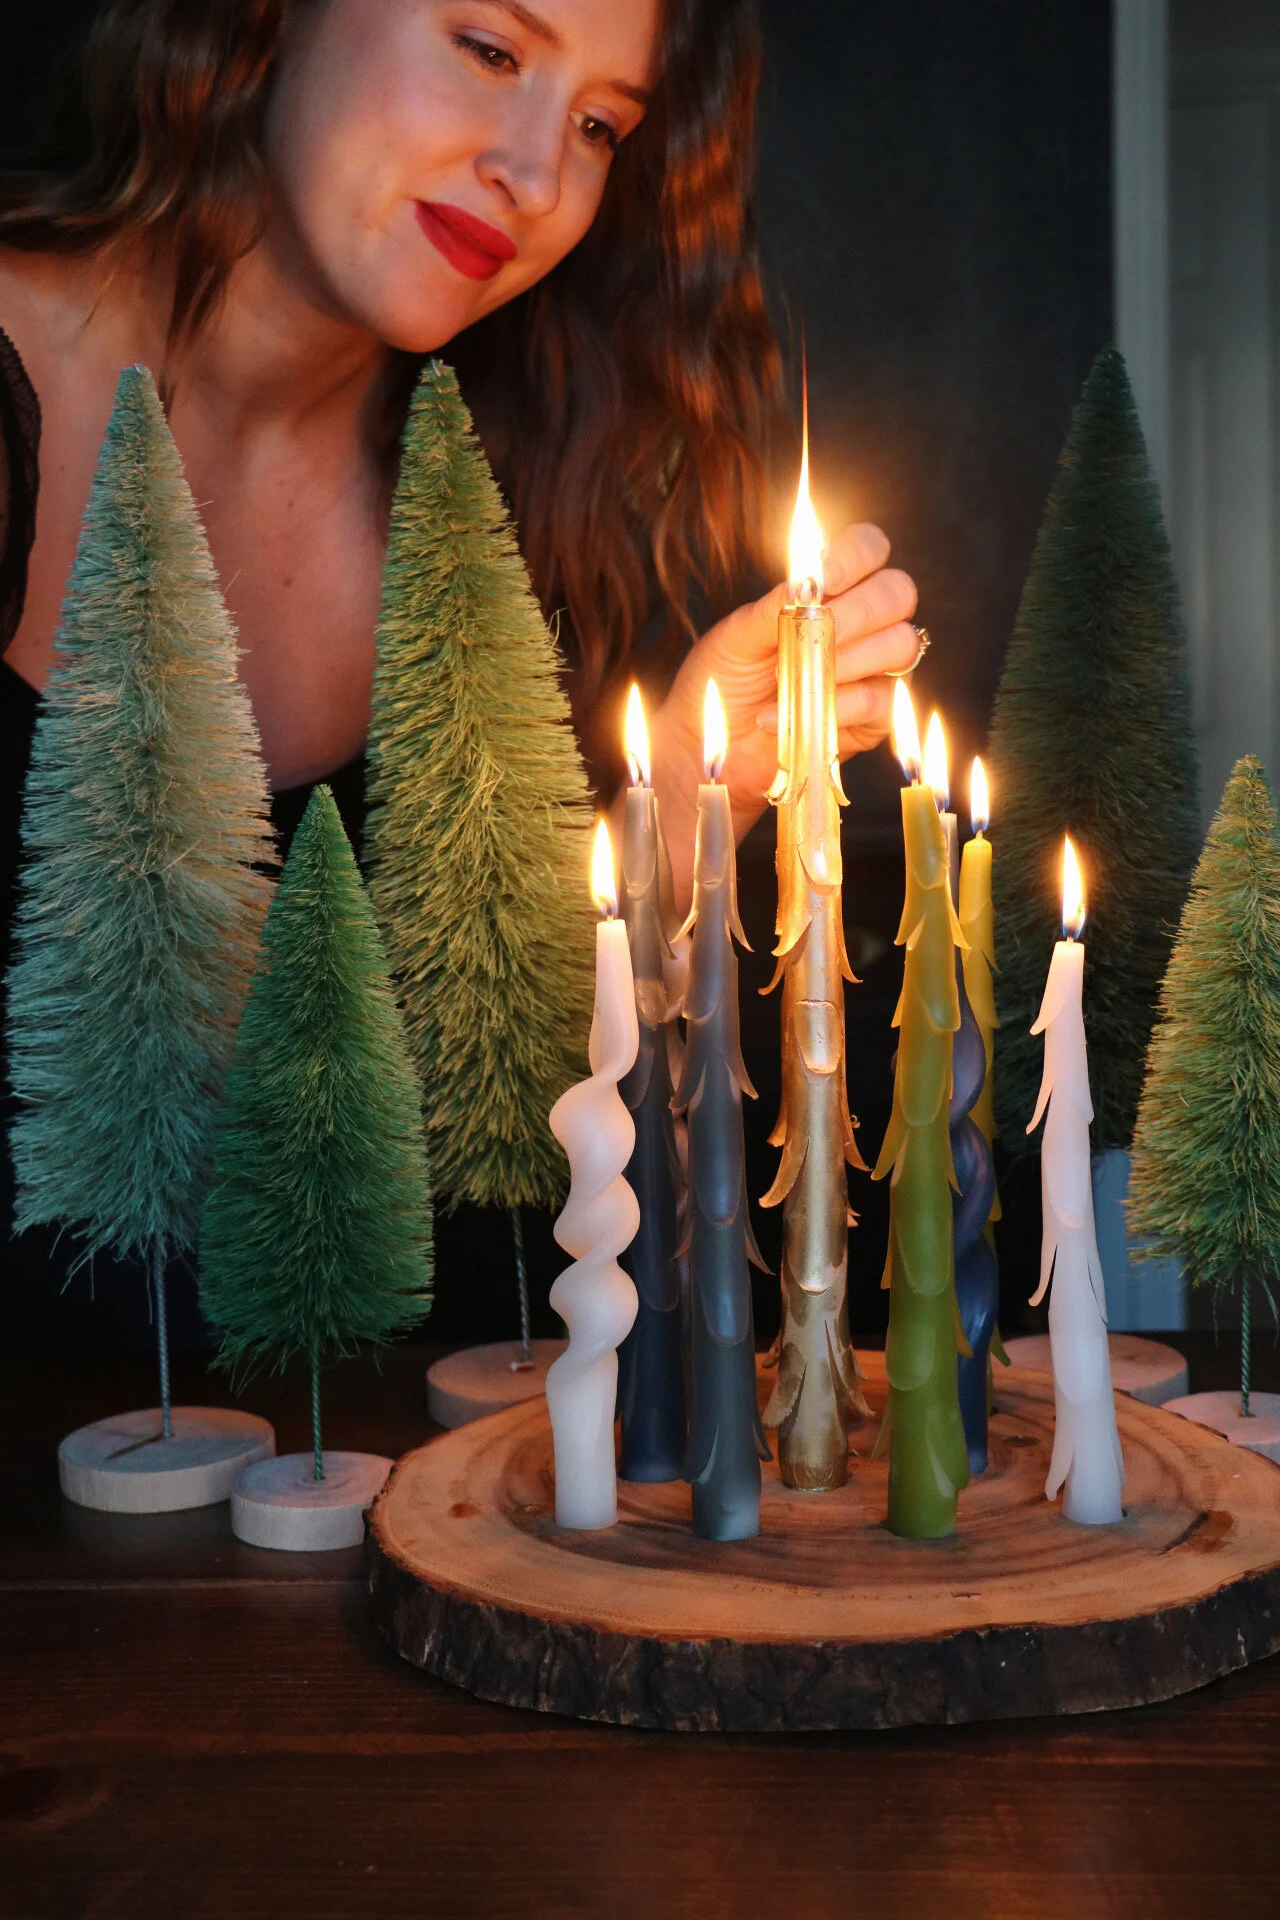
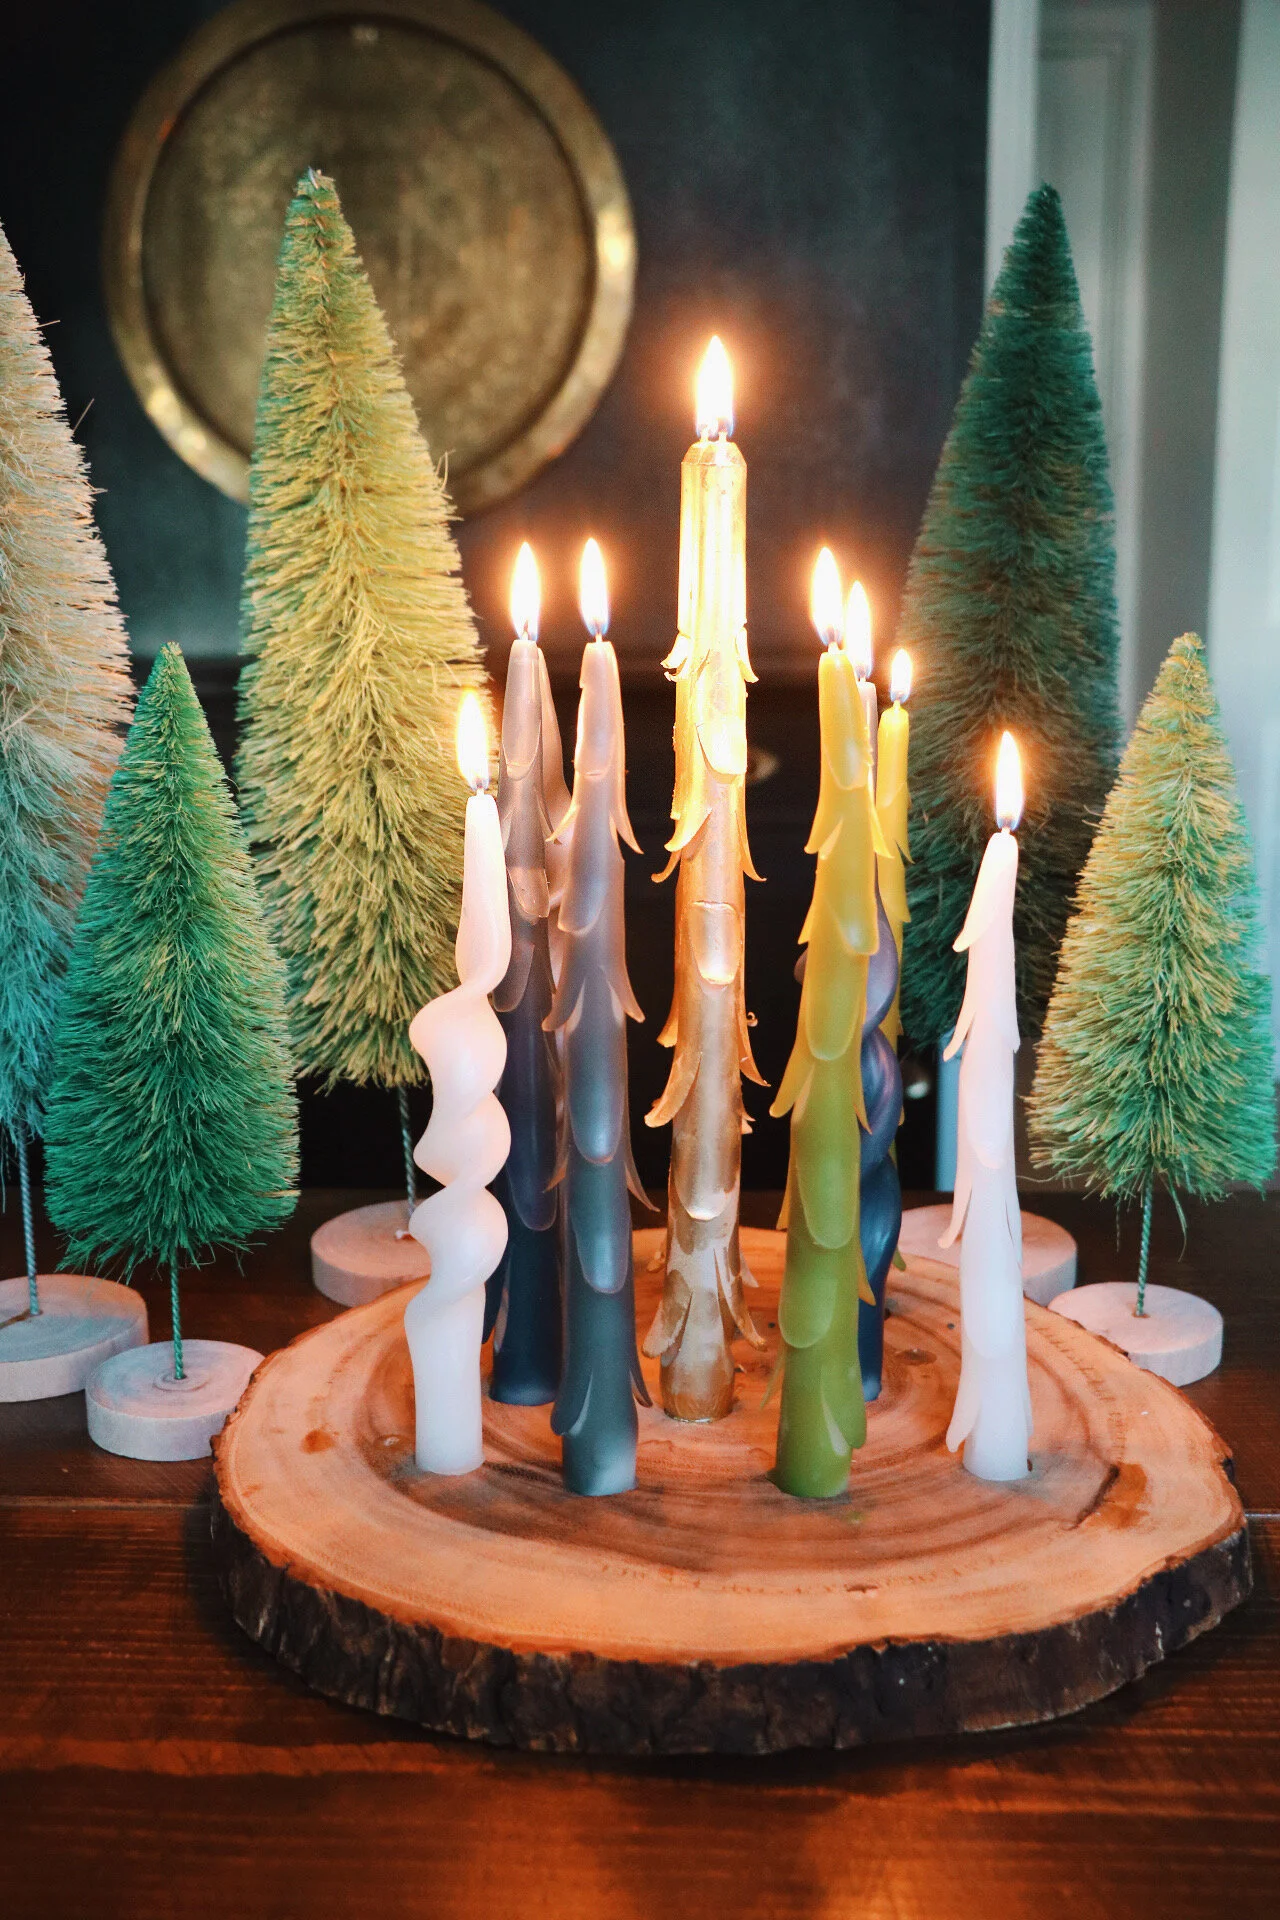
I added a few bottle brush to complete the whimsical forest scene. I think it looks so magical with the candles lit. All of the various shades from the candles and the trees compliment the other colors throughout our home and while they aren’t traditional Christmas colors, I think they look very festive.
Now the real questions is - which technique is your favorite? Are you team Twisted Tapers or Carved Tree Candle?!