Side Table Flip
Fun fact - this side table was the first piece of furniture I bought after college. I felt like a real adult, buying furniture, decorating my first apartment. But as I’ve moved in with my guy, and honed my style, this side table wasn’t working anymore. (In case you’re curious, I gravitate towards Industrial and Modern Glam for my interiors). Instead of purchasing a whole new piece, I thought I could flip this one, which already fits perfectly in the space. Scroll on to see how!


Here’s what it looked like before.
It falls more into the “rustic” category, which doesn’t go with my house at all. Paint and new hardware would completely change the vibe. I have a lot of black metal and tan leather throughout the rest of the living room, so I wanted to incorporate that more, or at least have it feel more cohesive. There is also a lot of color going on in the space (think blue velvet and green) so teal doesn’t really add anything. Too muted to be a pop.
The art/sconce above it is too big for the wall. I needed to replace it with something more proportional. Over Christmas, I had a cute woven piece hanging there, which was a bit more narrow, and it looked significantly better.
The decor on top of it is fine, but I can do better. It kind of became a catch-all for things that I didn’t know what else to do with.
Underneath was just a mess. Functionally, it did not make sense at all to have a chicken wire basket with a fur blanket… such a challenge to access. What was I thinking??
Overall, the goal with decor is to be for intentional and simple. I don’t want to overwhelm the small size of the table. I was excited to see what I could come up with. But first, it was time to work on the table!


Walker was eager to help. He’s been promoted to DIY Darling Assistant.
First, remove the hardware. Now normally, I would remove the drawers fully, but there was a catch in the back that prevented me from doing so. Weird, right? Since this was originally painted and not stained, I didn’t have to worry about fully sanding off the teal color. A light once-over to get the sheen off was all I needed. Last step is to whip off with a damp cloth and you’re ready to paint!

The plan was to paint the main body of the side table in flat black, and then use high gloss for the legs in the same color. I thought, “wow, this will really make a huge difference!” Spoiler… it did not. You literally couldn’t tell the difference between the finishes. Oh well - you live and you learn!


After becoming slightly overwhelmed with the options of black paint (who knew there were so many??) I went with Tricorn Black by Valspar. I’ve learned that when it comes to painting walls, its better to spend more on paint, but since this was such a small project, I wanted the cheapest option. I only got a quart, and it was plenty. I’ll have to find a few other projects to paint the same color!

The whole painting process went super quick. I was thrilled with the way it turned out! I let it dry over-night, and then installed the hardware. You can find the leather pulls on Amazon. Inside, I added brown-marbled contact paper from Target.


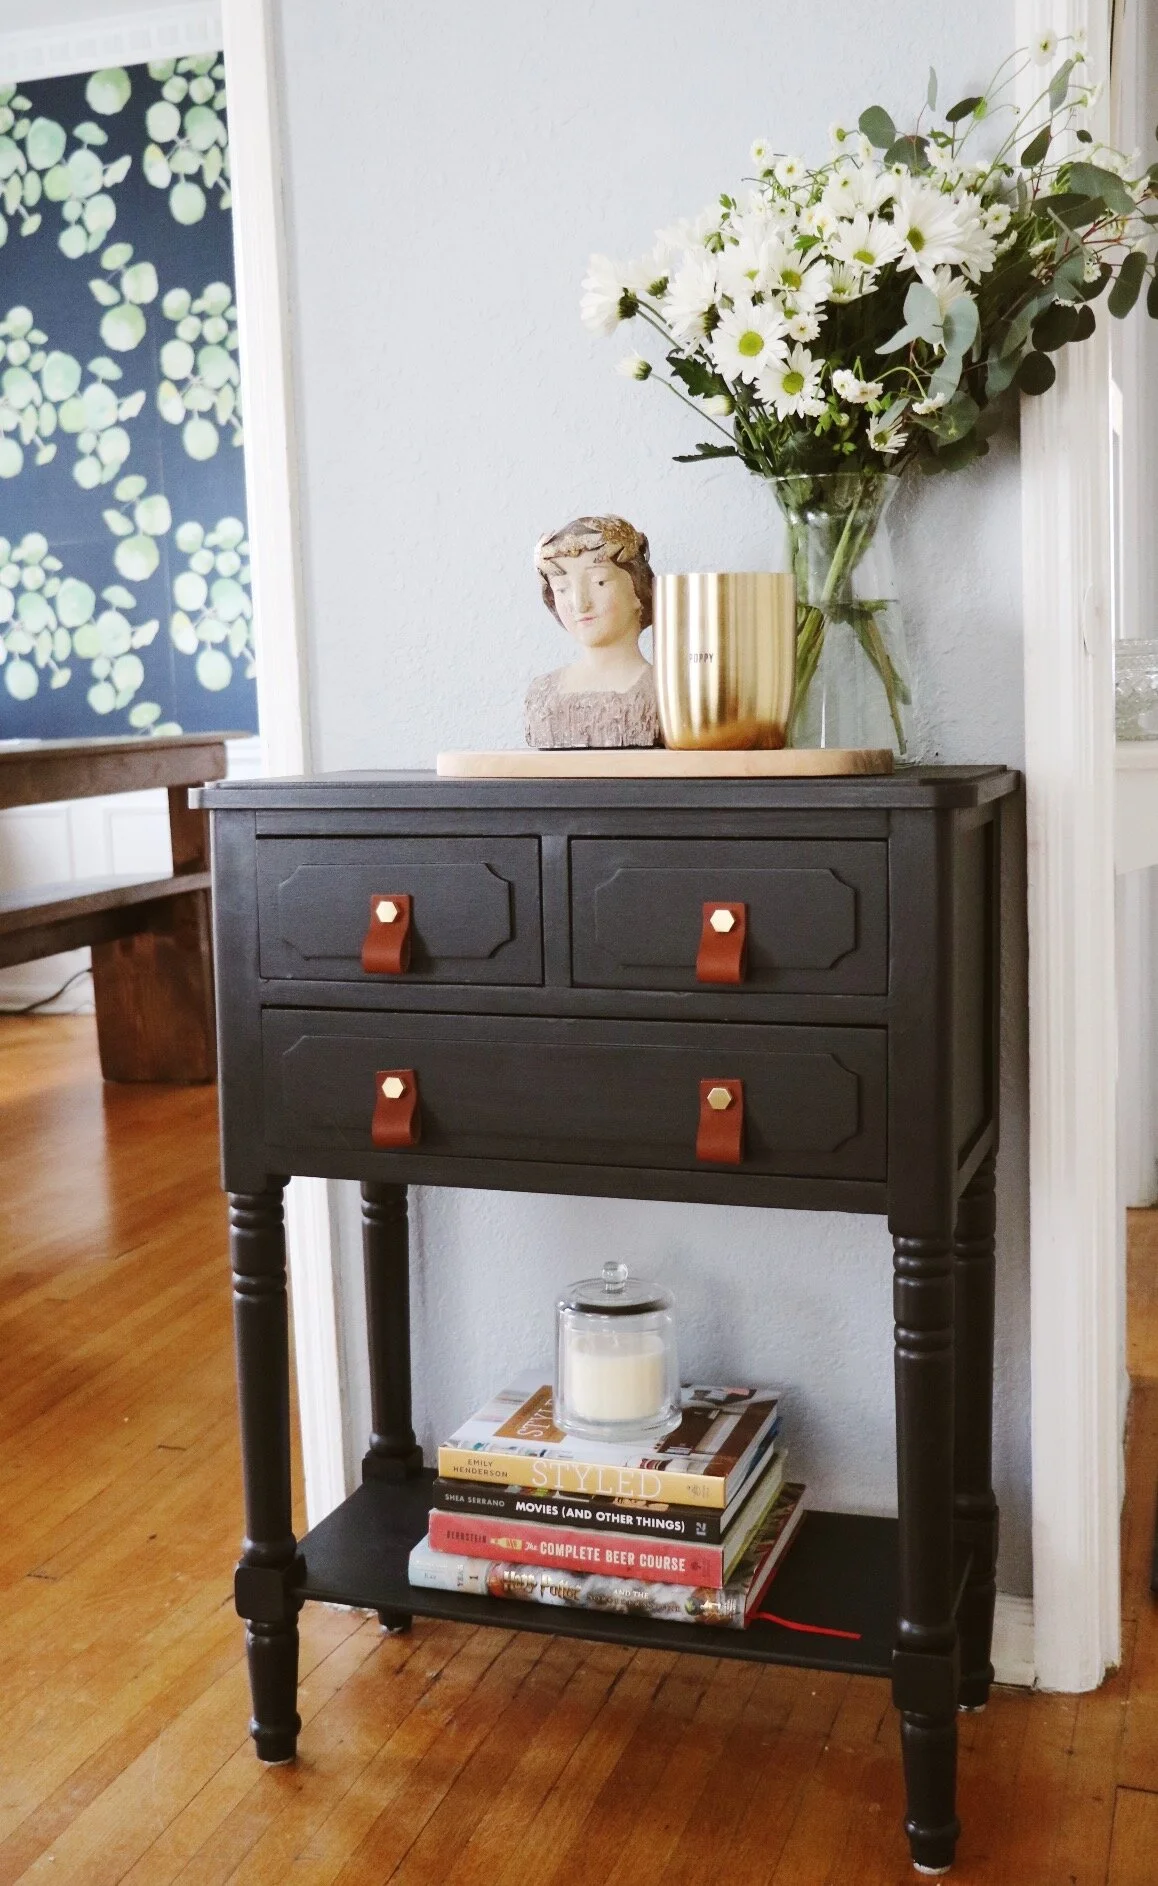
You guys. I am obsessed with how this turned out. What a difference paint and pulls can make, amiright? So much sleeker and cohesive with the rest of the room. It nods to the other metal accents in the space, without actually being metal. And the leather goes so nicely with my leather chairs. So So happy.

Now, onto the decor!

I used a mixture of old, new and vintage items. The coffee table books I already had (aka my ‘old’ items), and I really like how they are a true reflection of our interests - Harry Potter, beer, movies, interior styling. It doesn’t get any more accurate than that! Add a pretty glass candle on top and you are set. It’s so much cleaner and intentional looking that what I had previously. Using negative space was helpful to not overwhelm the small table. Very pleased.


For the top, I had done a poll on Stories and wood tray + candles won as the most popular option. The original wood tray I ordered off of Amazon was the perfect size and shape for the table, but unfortunately, it got stolen right off my front porch. I watched the whole thing go down on our new Ring doorbell… and to make matters worse, it was the LAST one on Amazon so I couldn’t replace it! I hope the lady who stole it enjoys it and really needed a wooden tray to make her life better.
Anyways…
The wood slab I ultimately used was something I had lying around the house. I think I’ve used it for cheese board displays before, but I like it better here. The ‘poppy’ candle is from Target, as well as the glass vase. Those were my ‘new’ items!
The vintage bust is my favorite element for two reasons. One, I got it in Portland while visiting one of my best friends, so it will always have the memory of our flea market shopping day. Two, it marks the beginning of my voyage into vintage incorporation into my designs. This *hopefully* adds personality, and helps to avoid the home-stage-y vibe that can crop up when you buy everything from the same big box store.
And there you have it! A side table flip that’s affordable and easy - plus it’s a project you could do in one weekend. I’ll be keeping a lookout for a mirror or art piece for the wall above it, but for now, I am so pleased with how it looks.