Vintage Ironing Board Nook Turned Spice Cabinet
Out of all the kitchen refresh projects, this one was my favorite. It was not originally on the to-do list but I am so glad inspiration struck and I got it done! Read on to see how I turned an old ironing board cabinet into a spice cabinet.
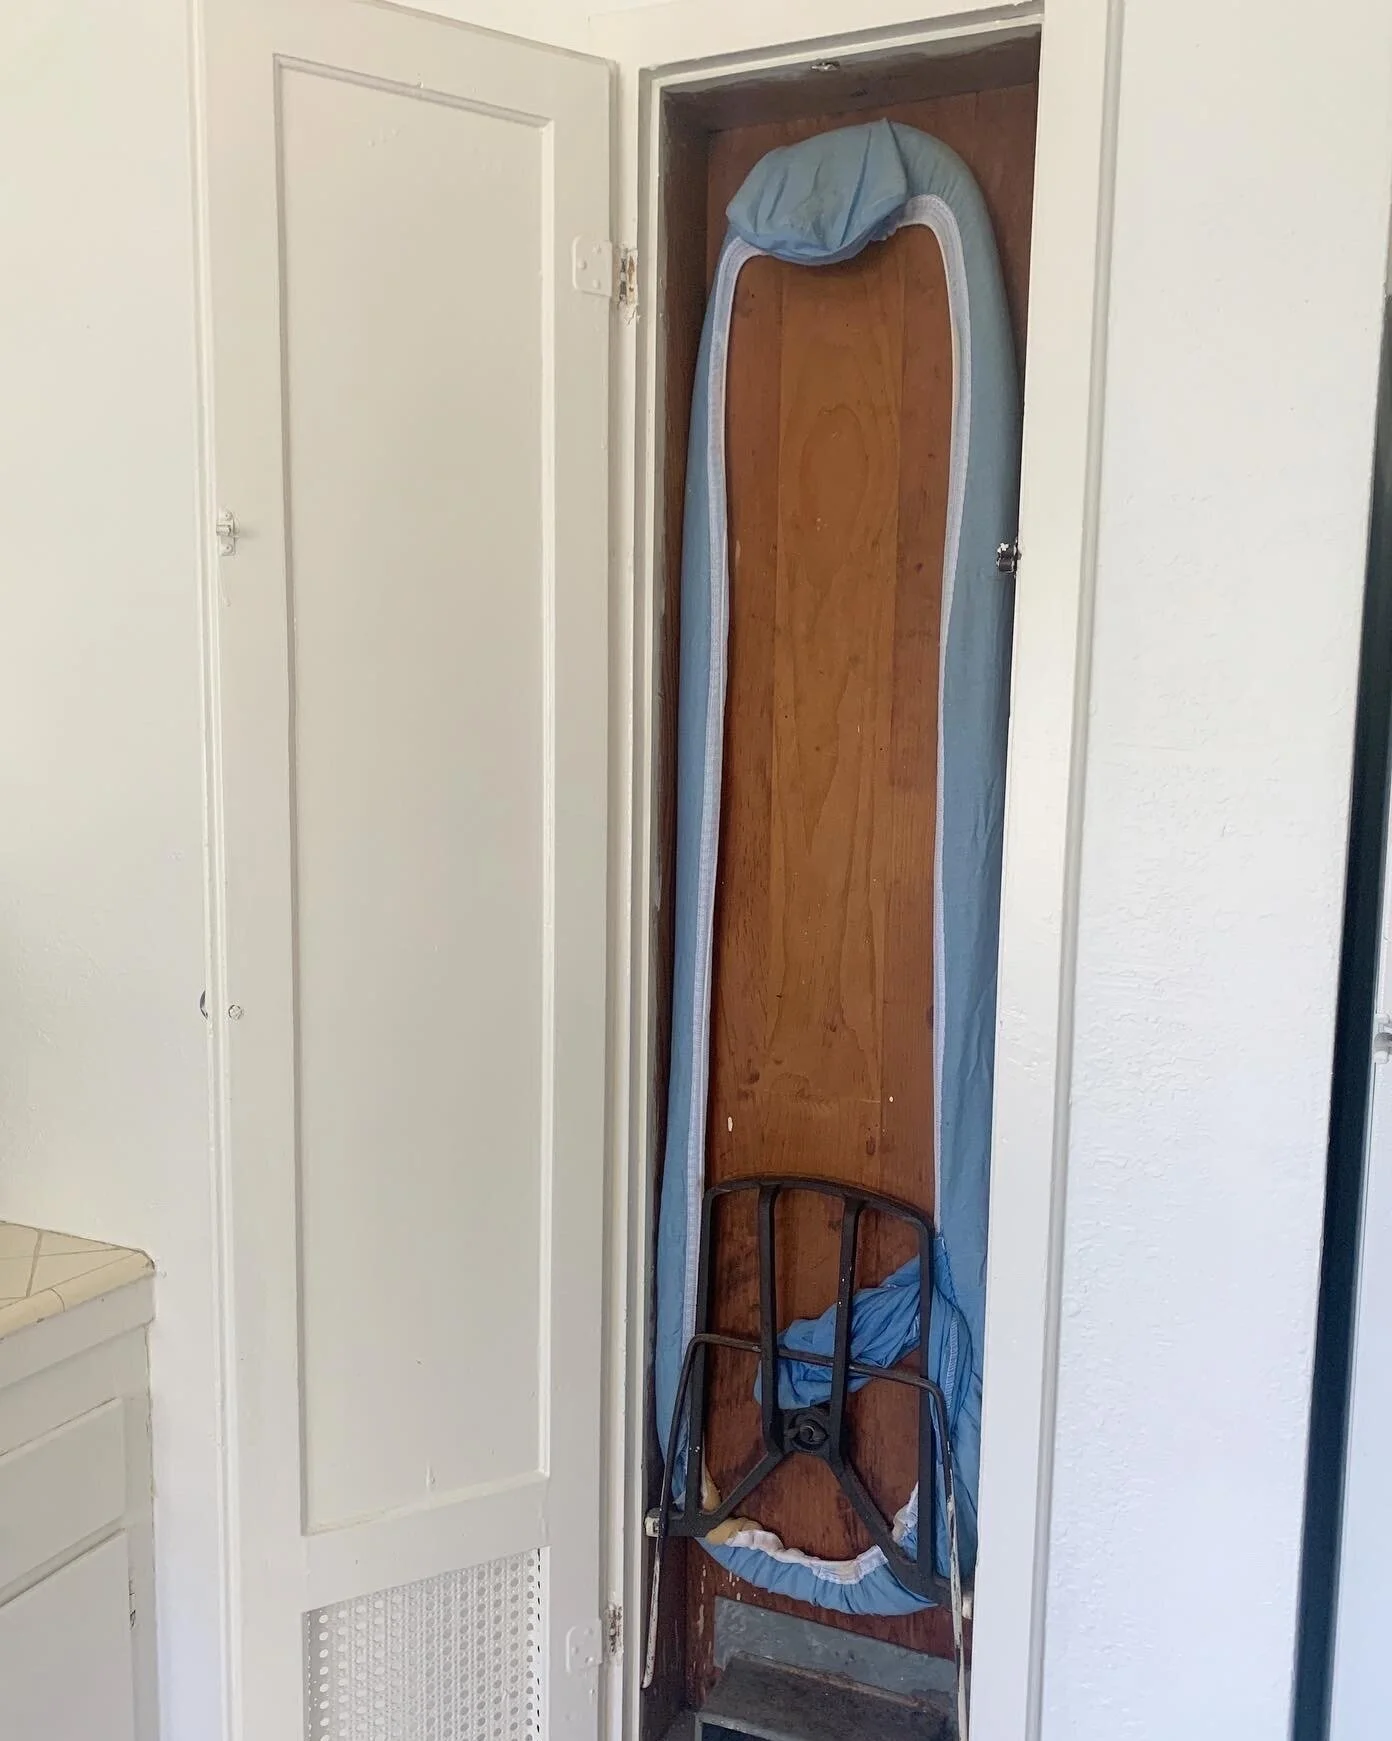
From THIS…
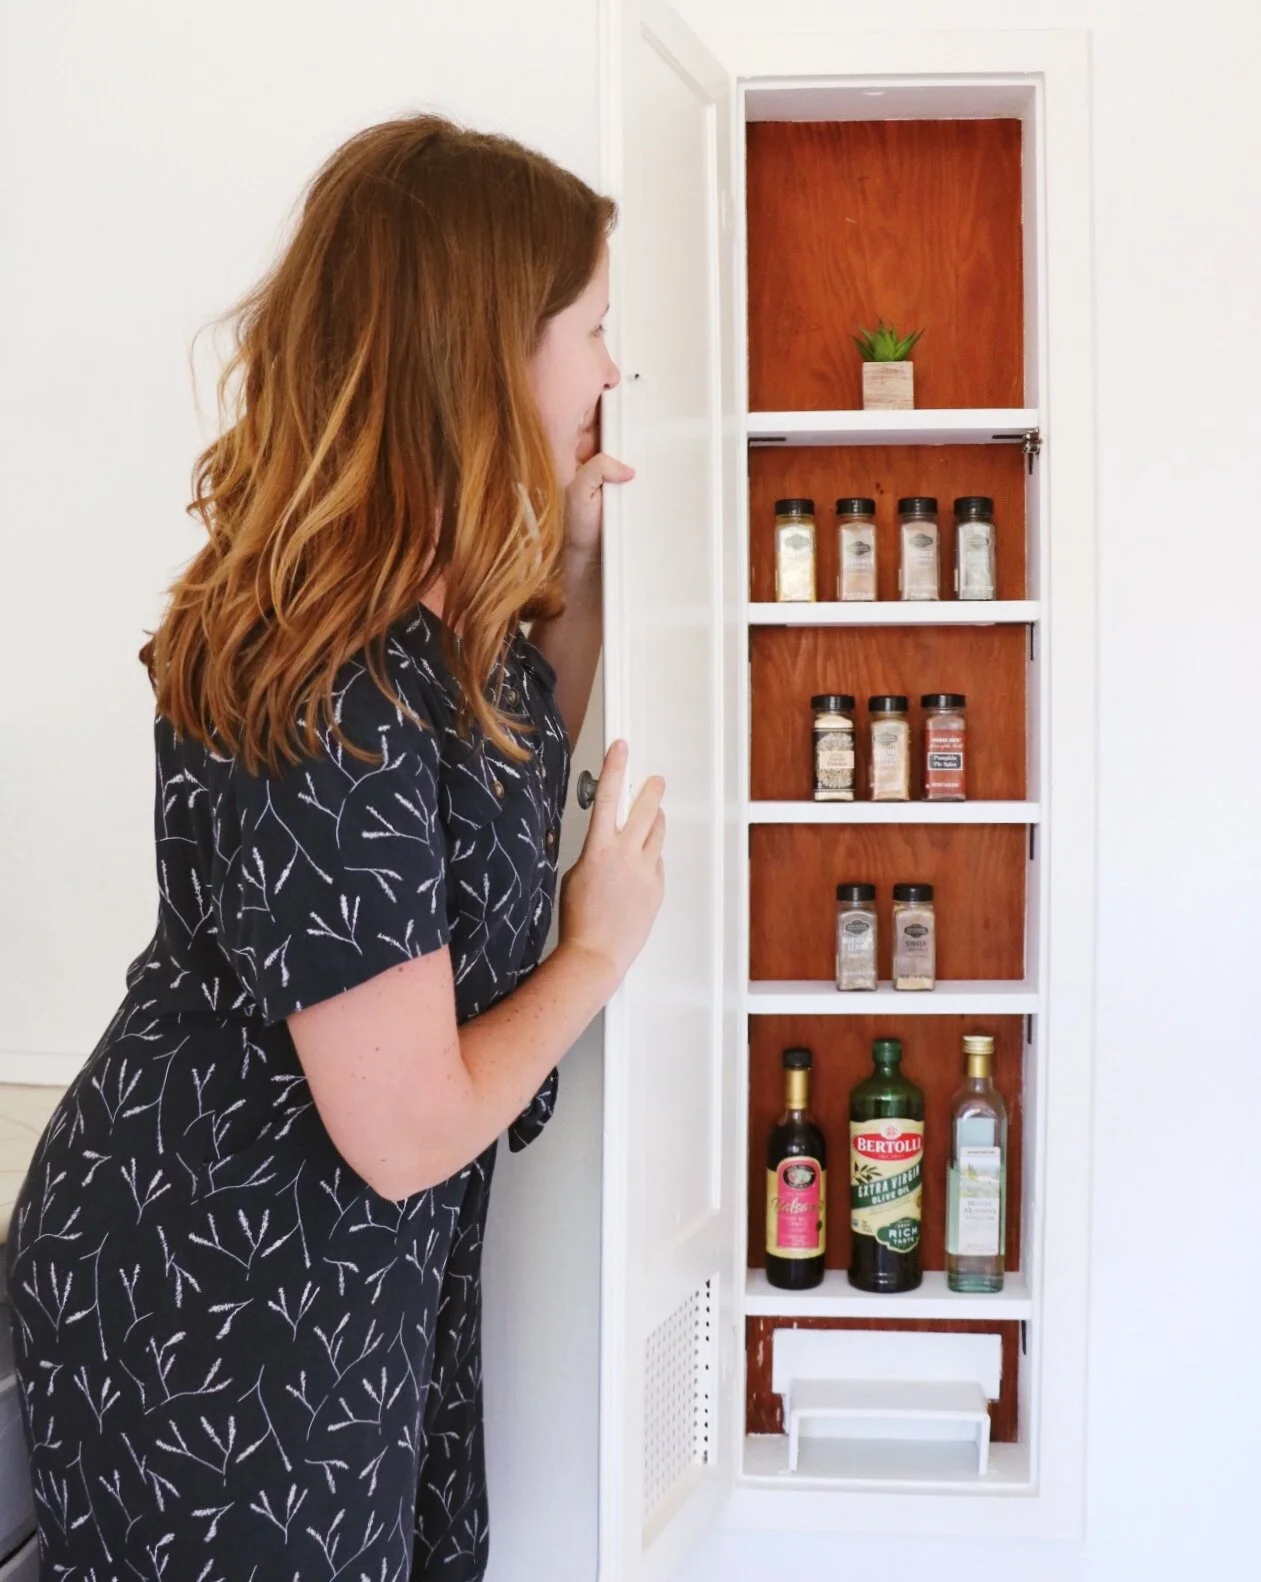
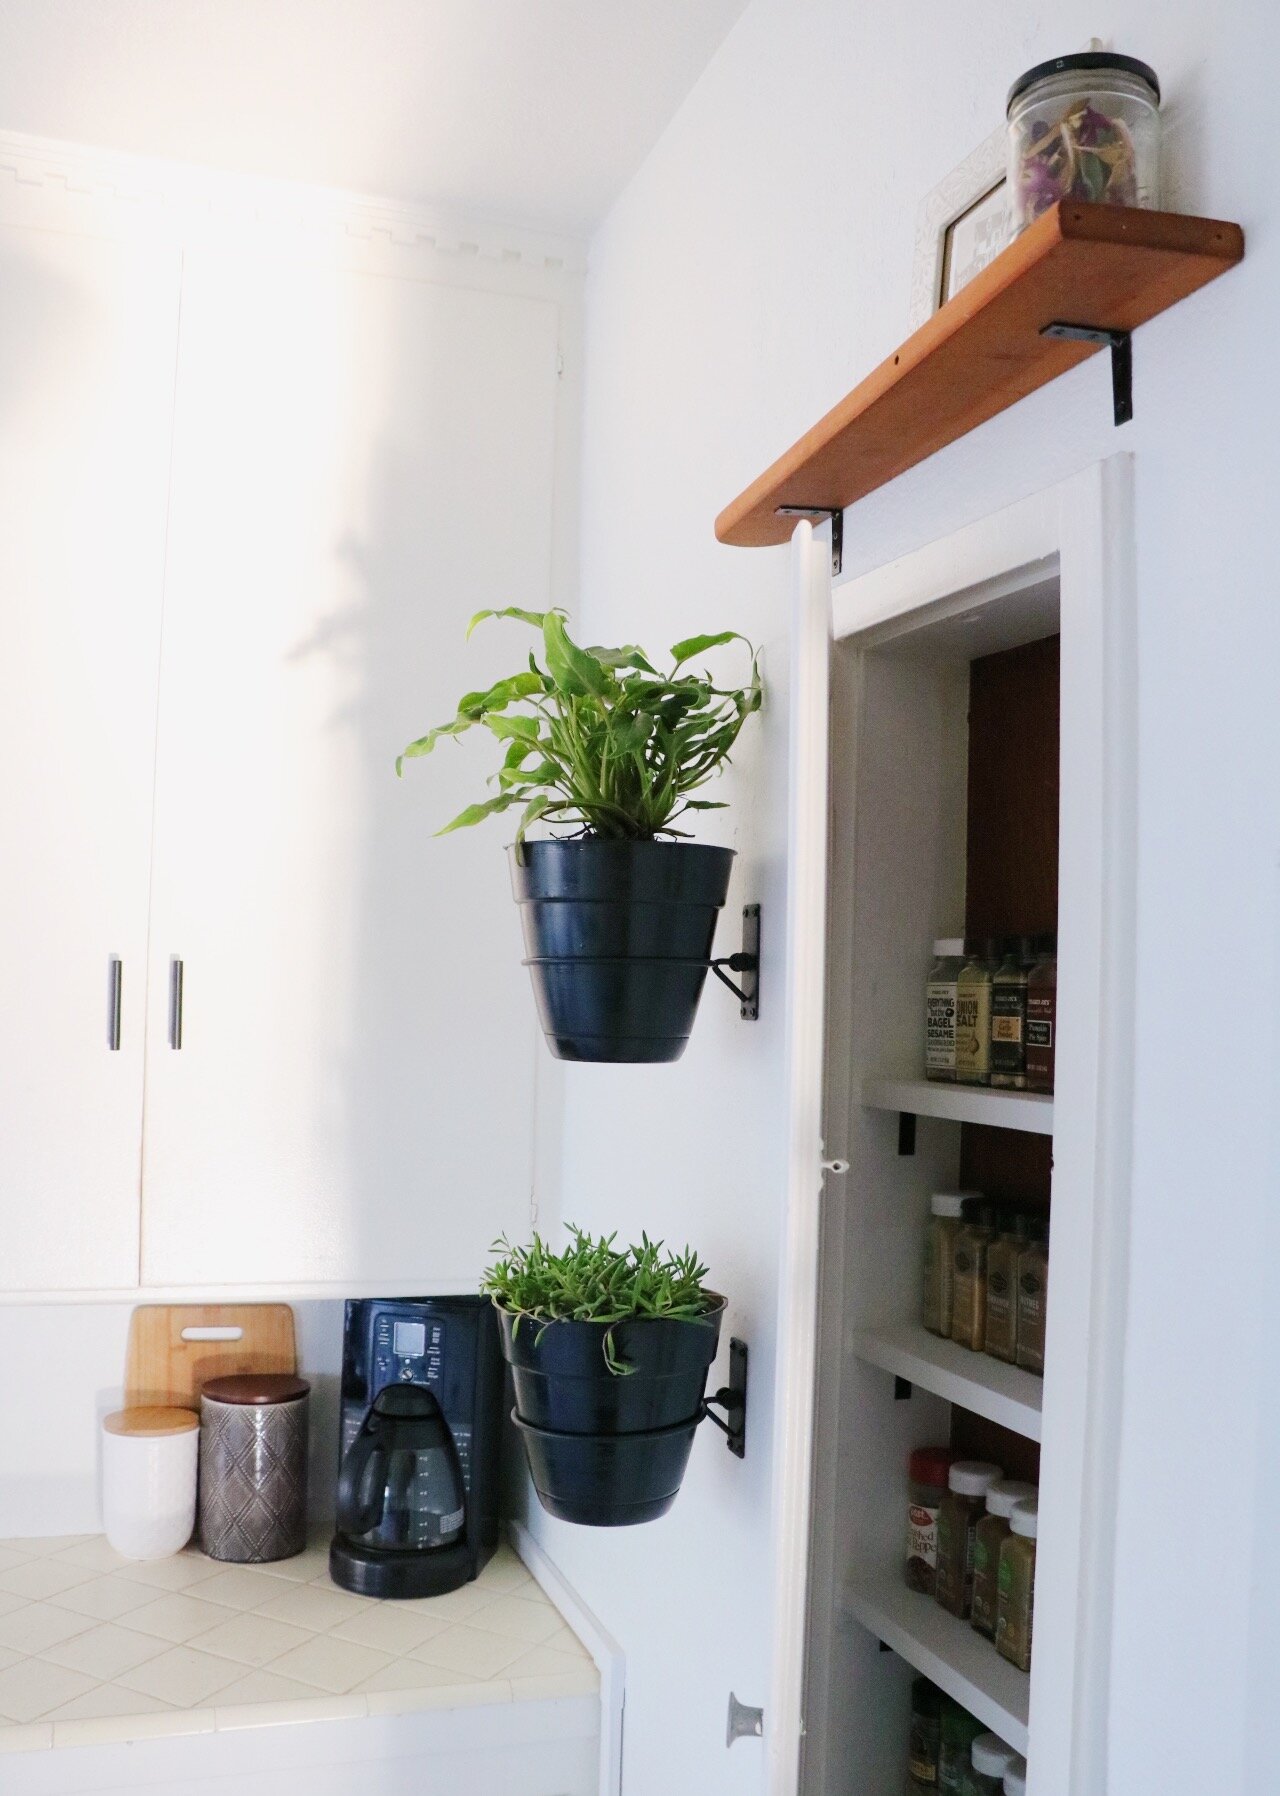
…TO THIS!!!
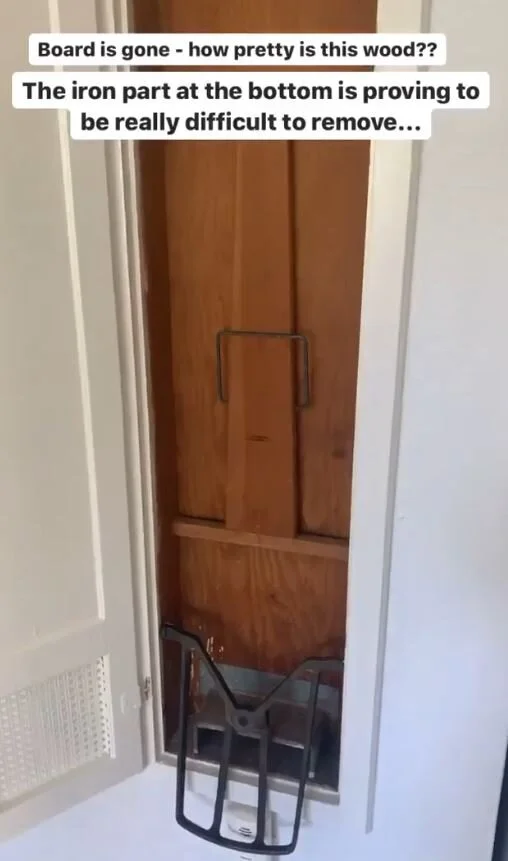
First things first was removing the old ironing board. Turns out, ironing boards made in the 1930’s were actually made with IRON. Or partially. The board part turned out to be a beautiful piece of redwood that I refurbished + a wood sleeve that is now a decorative shelf. But the support was SOLID IRON that appeared to be built right into the framing of the building. It took a lot of creativity to get that hunk of metal out of there.
Which then left a giant hole. A quick trip to Lowe’s and a quick online tutorial on how to use wood filler and then it was like… what holes??
Clearly it’s not a perfect patch job. A second wood filler coat was needed after this one completely dried over-night. Then I went over the whole area with a sanding block to get it as smooth as possible. Then, I painted the sides of the cabinet Pure White by Sherwin Williams to match the rest of the walls in the kitchen. It made SUCH a difference!
Before starting the project, I thought that putting a fun removable wallpaper to the back of the cabinet would be a great idea. Then, as I got going and uncovered the beautiful redwood, I started to question my original design plan. Sure, the wallpaper would be fun, but maybe it would be better to highlight the original charm of the building?
So, of course, I posed the question to the DIY Darling community. And the results were pretty split down the middle. I decided to take a few days to think on it…
I decided to let the natural wood shine through. But this poor wood really needed some love - which is where a healthy dose of wood oil conditioner came in.
WOW WOW WOW what a difference this made! After cleaning your wood surface, apply a liberal amount of this conditioner. Wait about 20 minutes, letting it soak into the wood, and wipe off the excess with a clean rag. If I’m being honest, it wasn’t until this point that I realized the wood was REDWOOD.
Now it was time to turn this cabinet into a functional spice cabinet.
This almost feels illegal to post. WHO HAND SAWS WOOD THESE DAYS?!
This girl. This girl does. When you live in the city and you don’t have a garage to store power tools in AND it’s a global pandemic so Lowe’s won’t cut your wood, you get creative. Let’s just say I got a reeeeally good arm and shoulder workout this day.
After cutting was done, I painted the shelves my favorite Pure White by Sherwin Williams. I used black corner braces to attach the shelves to the cabinet.
They are intentionally unevenly spaced - I wanted the lower shelf to have enough room for taller bottles like olive oil and vinegar.
The key to making these shelves look built-in was using caulk on the sides.
Pretty remarkable difference right? Definitely worth doing this step.
And just like that - I was done!
Disclaimer - I have WAY more spices than this. I just wanted to get a pretty picture. Understandable, right?
Overall I am so happy with how this turned out. Reaching over to grab a spice from this cabinet while cooking brings a smile to my face. This seemed to be the most popular project on Stories as well. I think everyone loves a good Before and After. Does anyone else out there have a funky kitchen cabinet, or old ironing board nook? Would you attempt flipping into a spice cabinet? I’d love to hear from you!

