Custom DIY Roman Shades
When I started working on Berto’s office, I knew I wanted to incorporate a custom DIY Roman shade for the window. To me, it felt more masculine and fit the aesthetic of the decor.
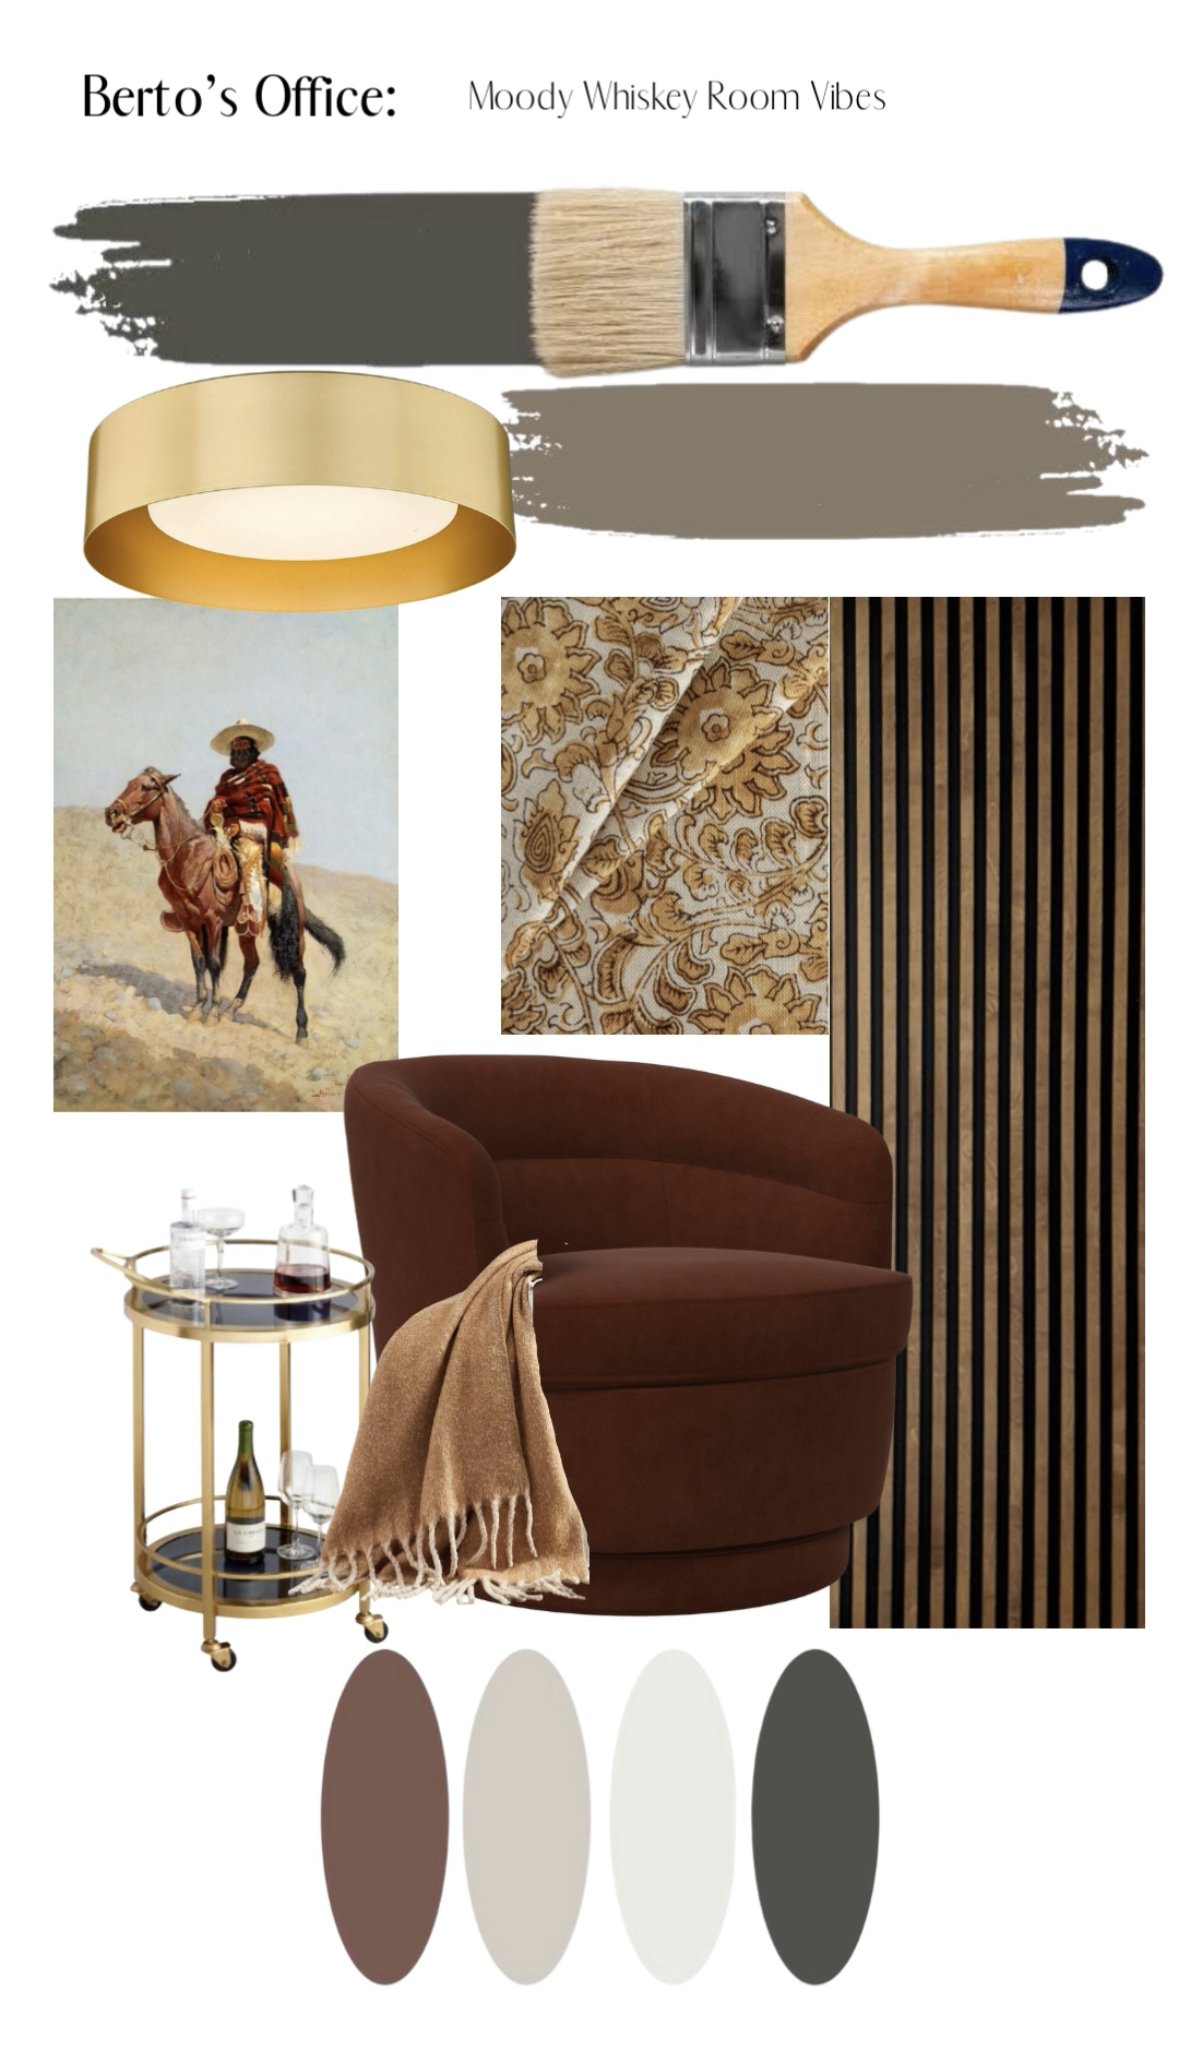
VIBE: MOODY WHISKEY ROOM OFFICE
Finding the right fabric proved to be more difficult that I thought. Originally, I was going to go for a tartan or plaid to really lean into the old-school vibe. But then I remembered that the client here was my husband, who is Mexican (not Scottish or English), and would appreciate decor that reflected him. Duh. When in doubt, always remember who you are designing for.
I found this phenomenal vintage vaqueros print and pulled colors from it to influence the rest of the decor selections.
The fabric is from Tonic Living, and I love how the yellow-gold color complements the art as well as making the paint color lean warmer. It took some time to find a drapery fabric that was unique, colorful and had a pattern. It feels Mexican-inspired, almost like Aztec sunflowers or something. I dig it. Berto digs it. Win-win!
Read on for step-by-step instructions on how to sew your own Roman shade!

Materials for Custom Roman Shades:


Drapery fabric (my window is 60” wide, so I needed 2 yards)
Liner (same amount as fabric, so 2 yards)
4 wooden dowels, 1/4” in diameter
Wood, 2 x 3 x length of window
French cleat (for mounting to the wall)
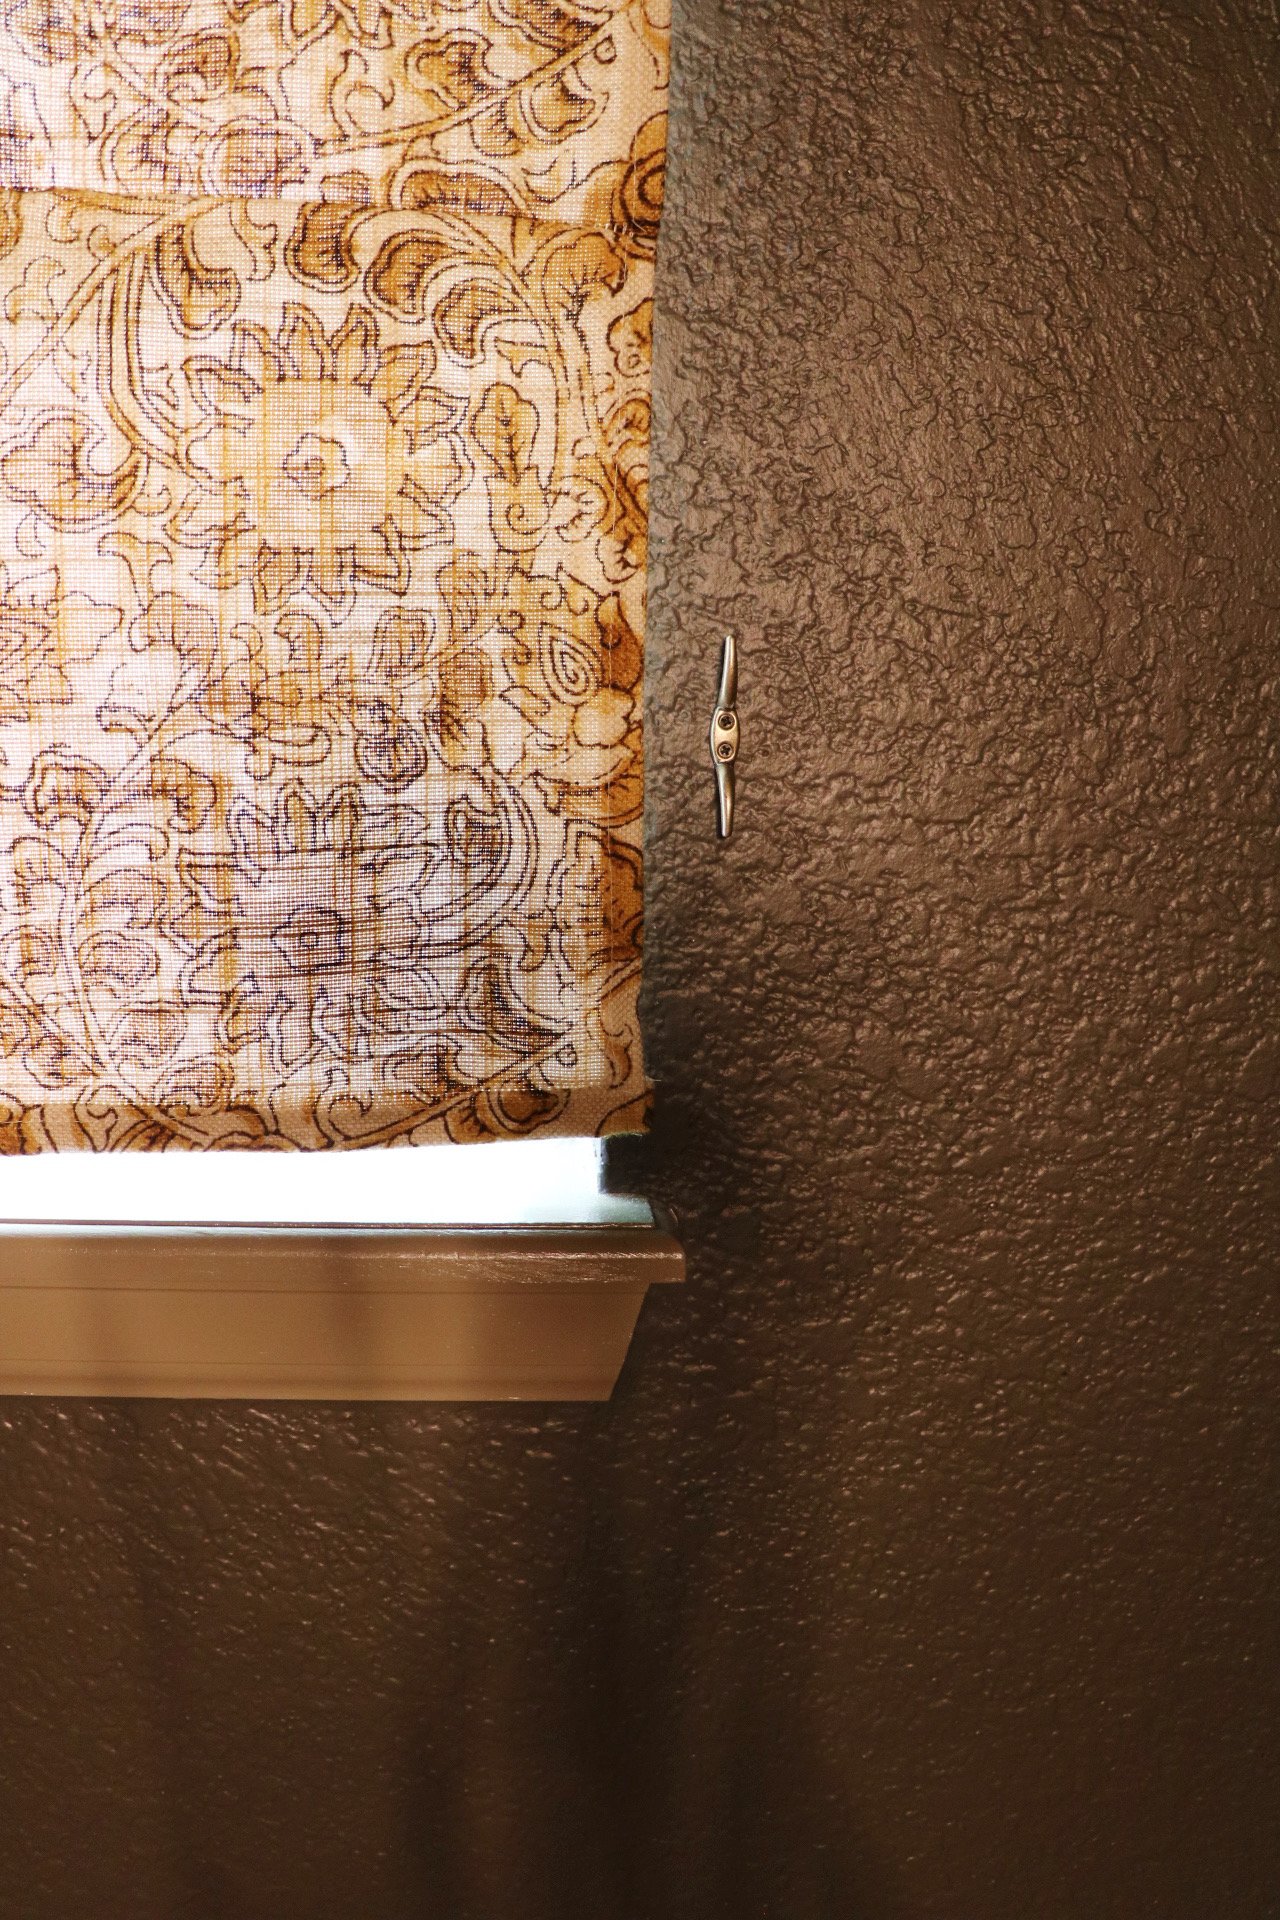
Brass cord cleat
Sewing machine (I love my Singer)
Needle + thread (be sure to use a thread color that matches your fabric)
Disclosure: My content is reader-supported, which means that when you purchase through links on my site, I may earn an affiliate commission. Learn more here
Instructions:

Step One:
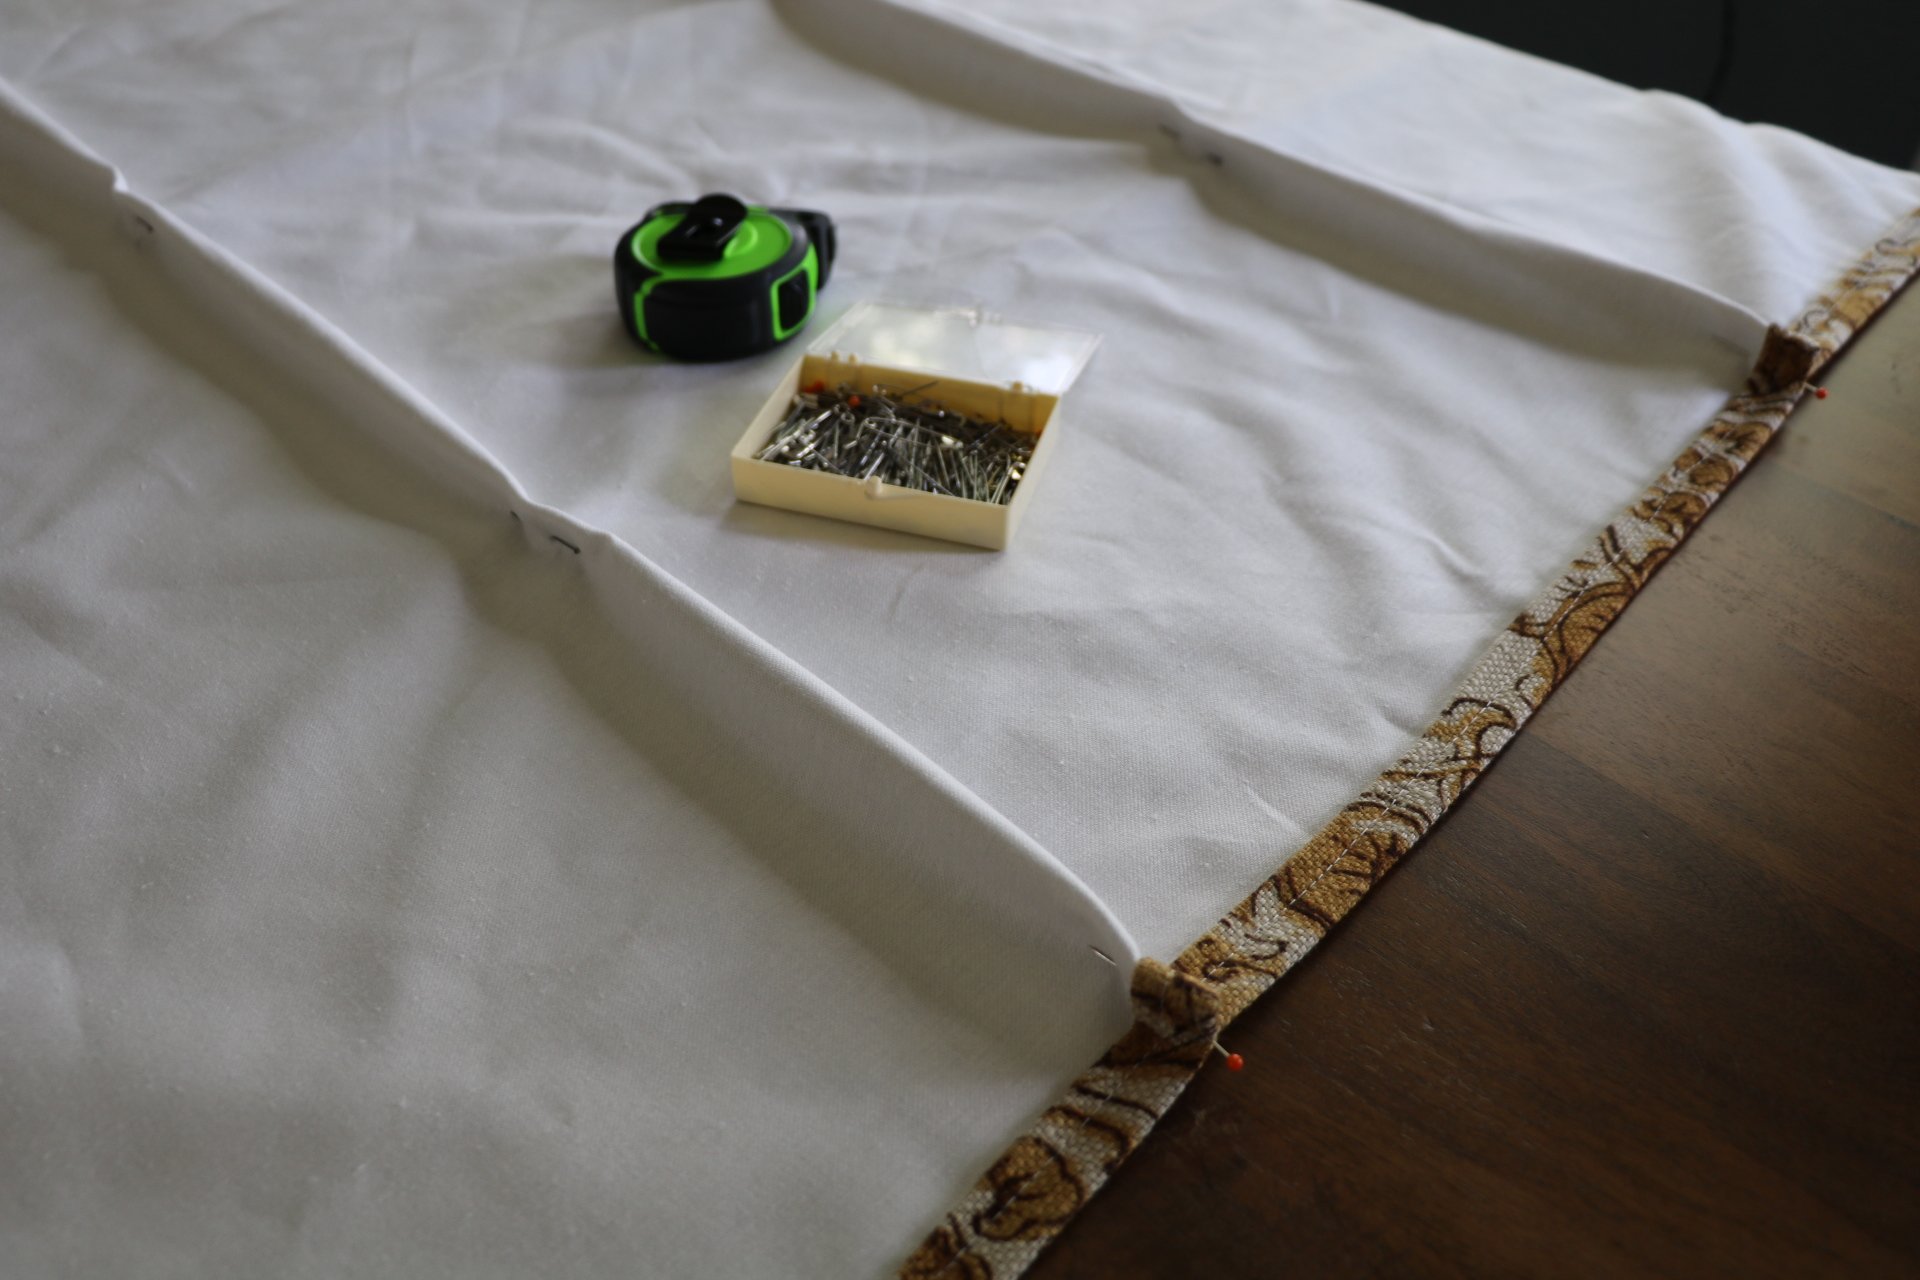
Measure twice, cut once. My window was 60” x 60” and I measured out my fabric about a million times before taking the scissors to it. Cut your fabric 2” wider and 7” longer than the window.
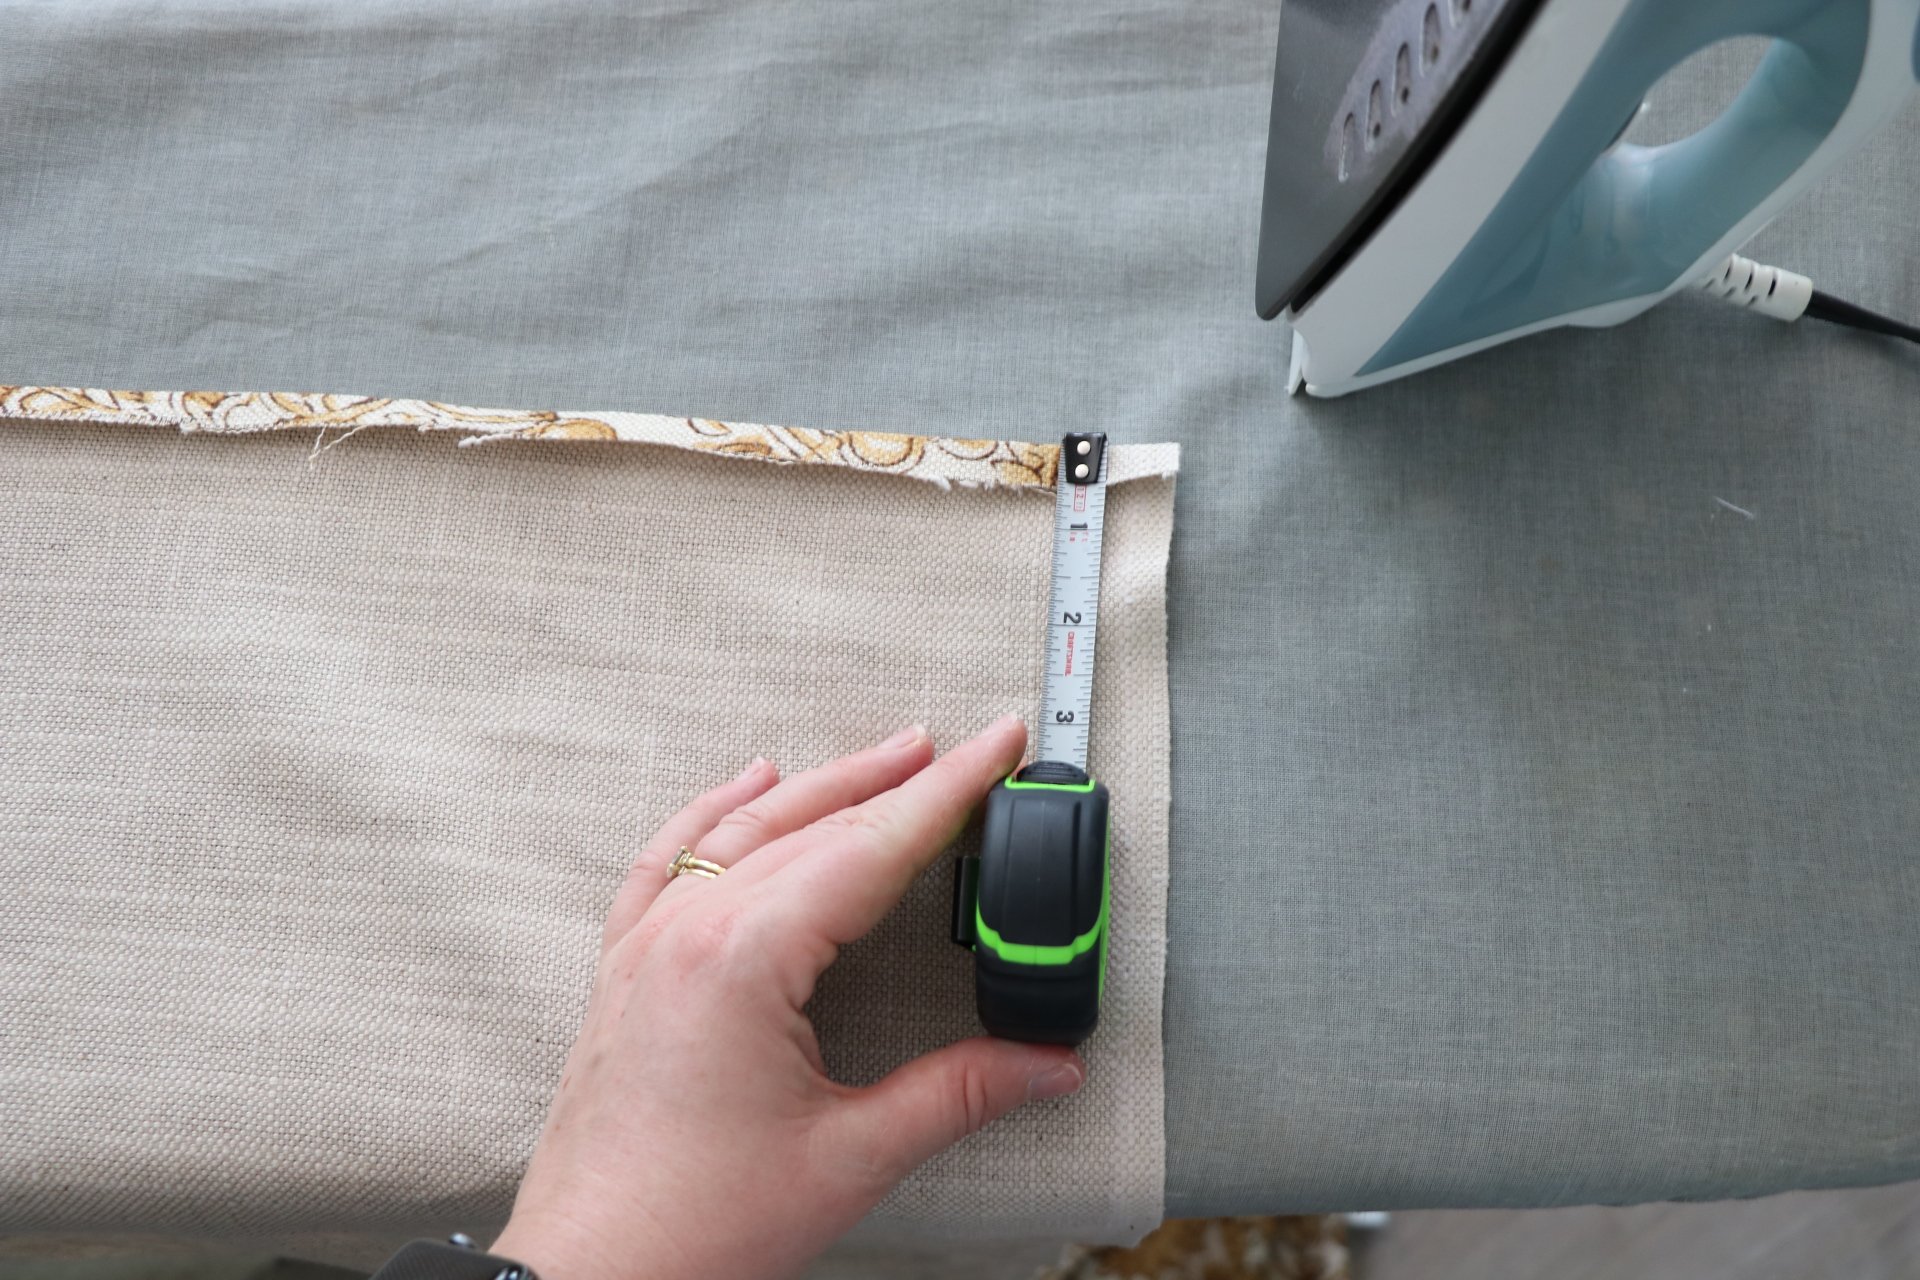
Next, fold the sides and the bottom of the shade over 1/2” to the wrong side and iron.

Step Two:
Cut the lining so that it rests just inside the folded-in sides. Fold the decorative fabric another 1/2” and iron and secure with pins. Sew all hems with a sewing machine. Leave the two ends of the bottom hem open so that the dowel will slide through later.
Step Three:
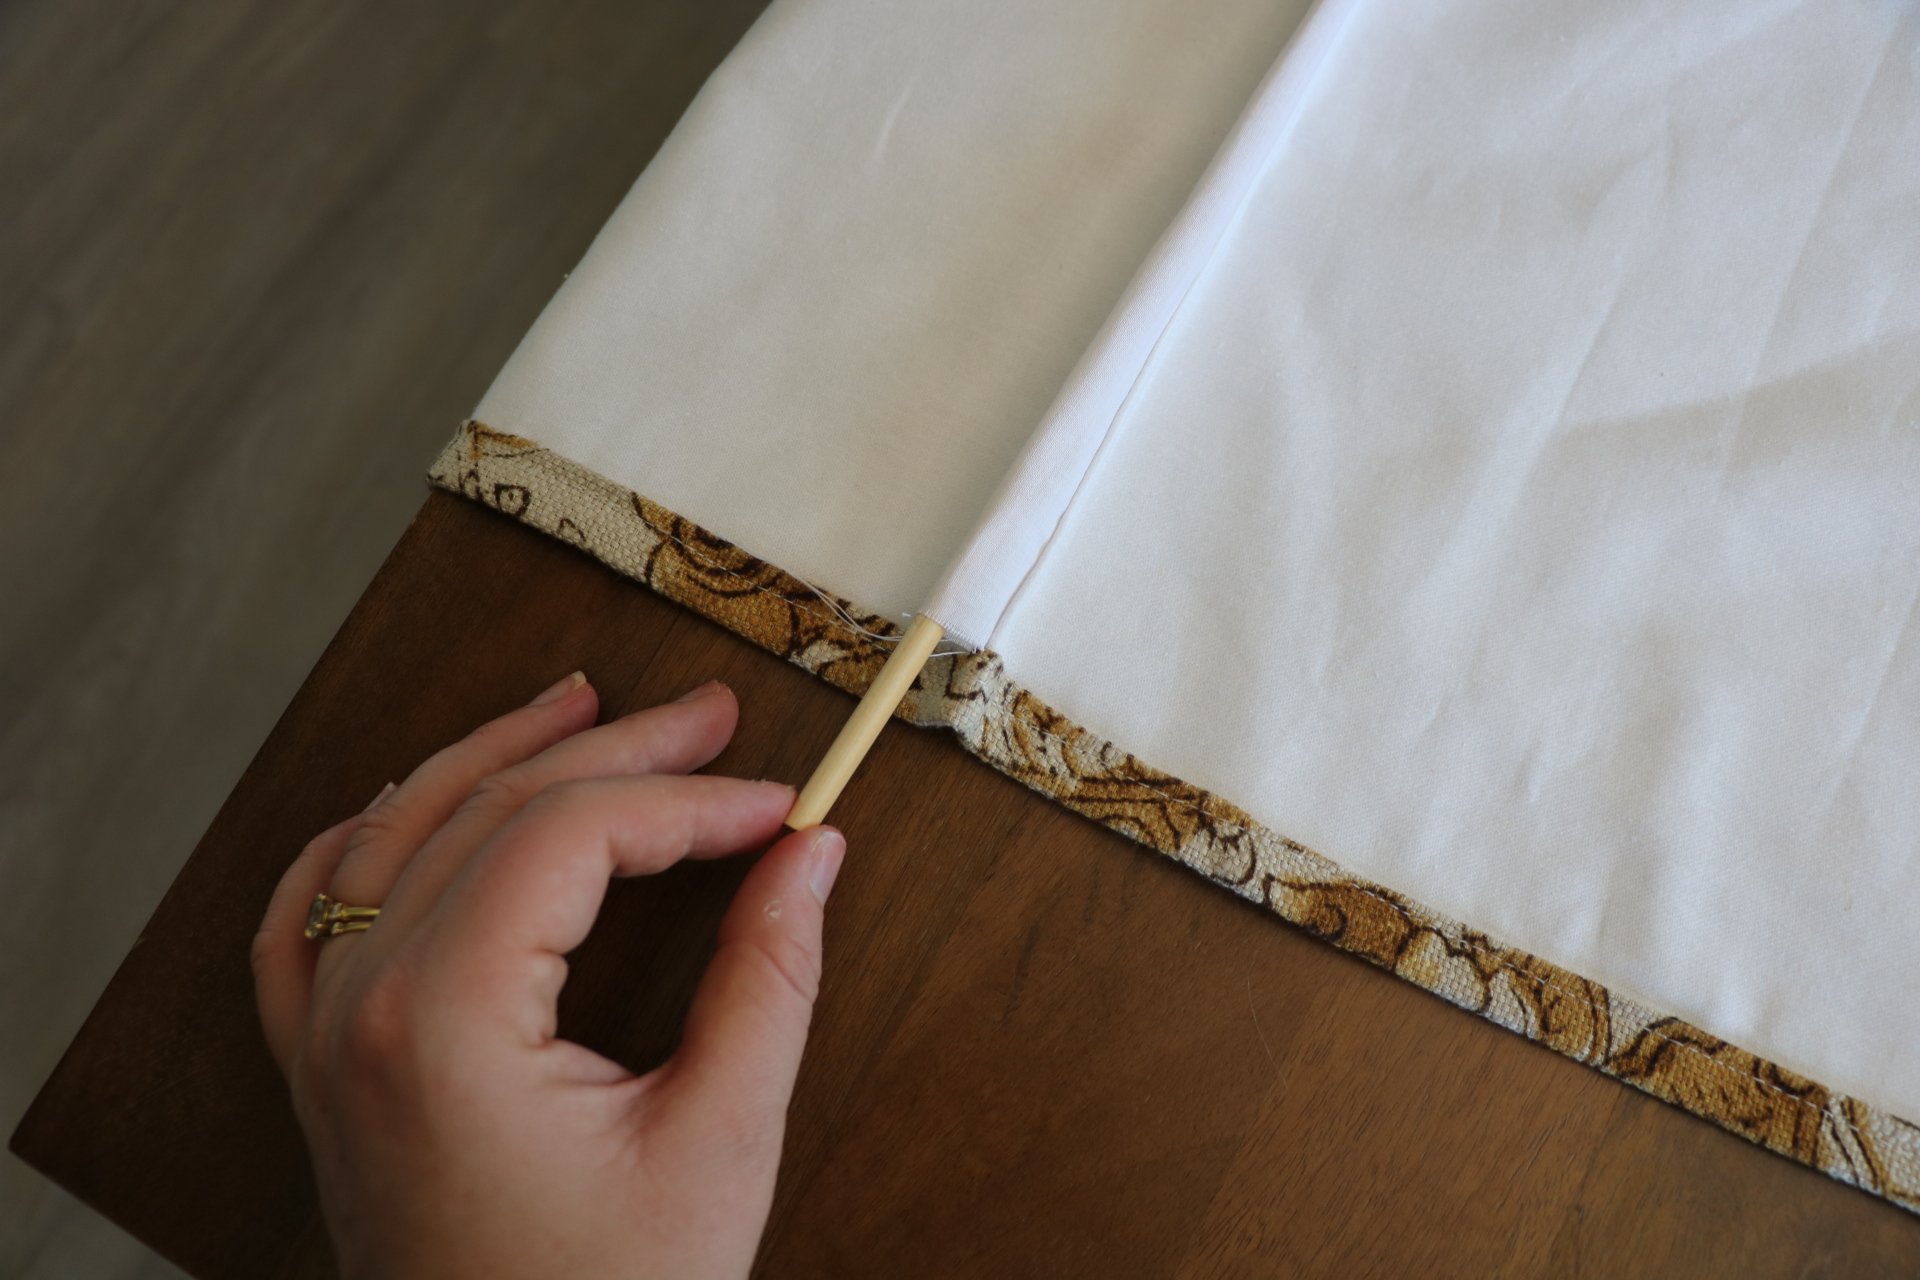
For the dowel casings, subtract 3” off the top of the fabric (this represents what will be stapled to the wood). Divide the remaining amount of fabric by 4. That number will be how far apart you sew each dowel casing. Mark each spot with a pin.
Fold your fabric/liner right side together at each pin. Sew a 3/4” seam per pin location. Insert a dowel into each casing. Remember to insert a dowel at the bottom hem.

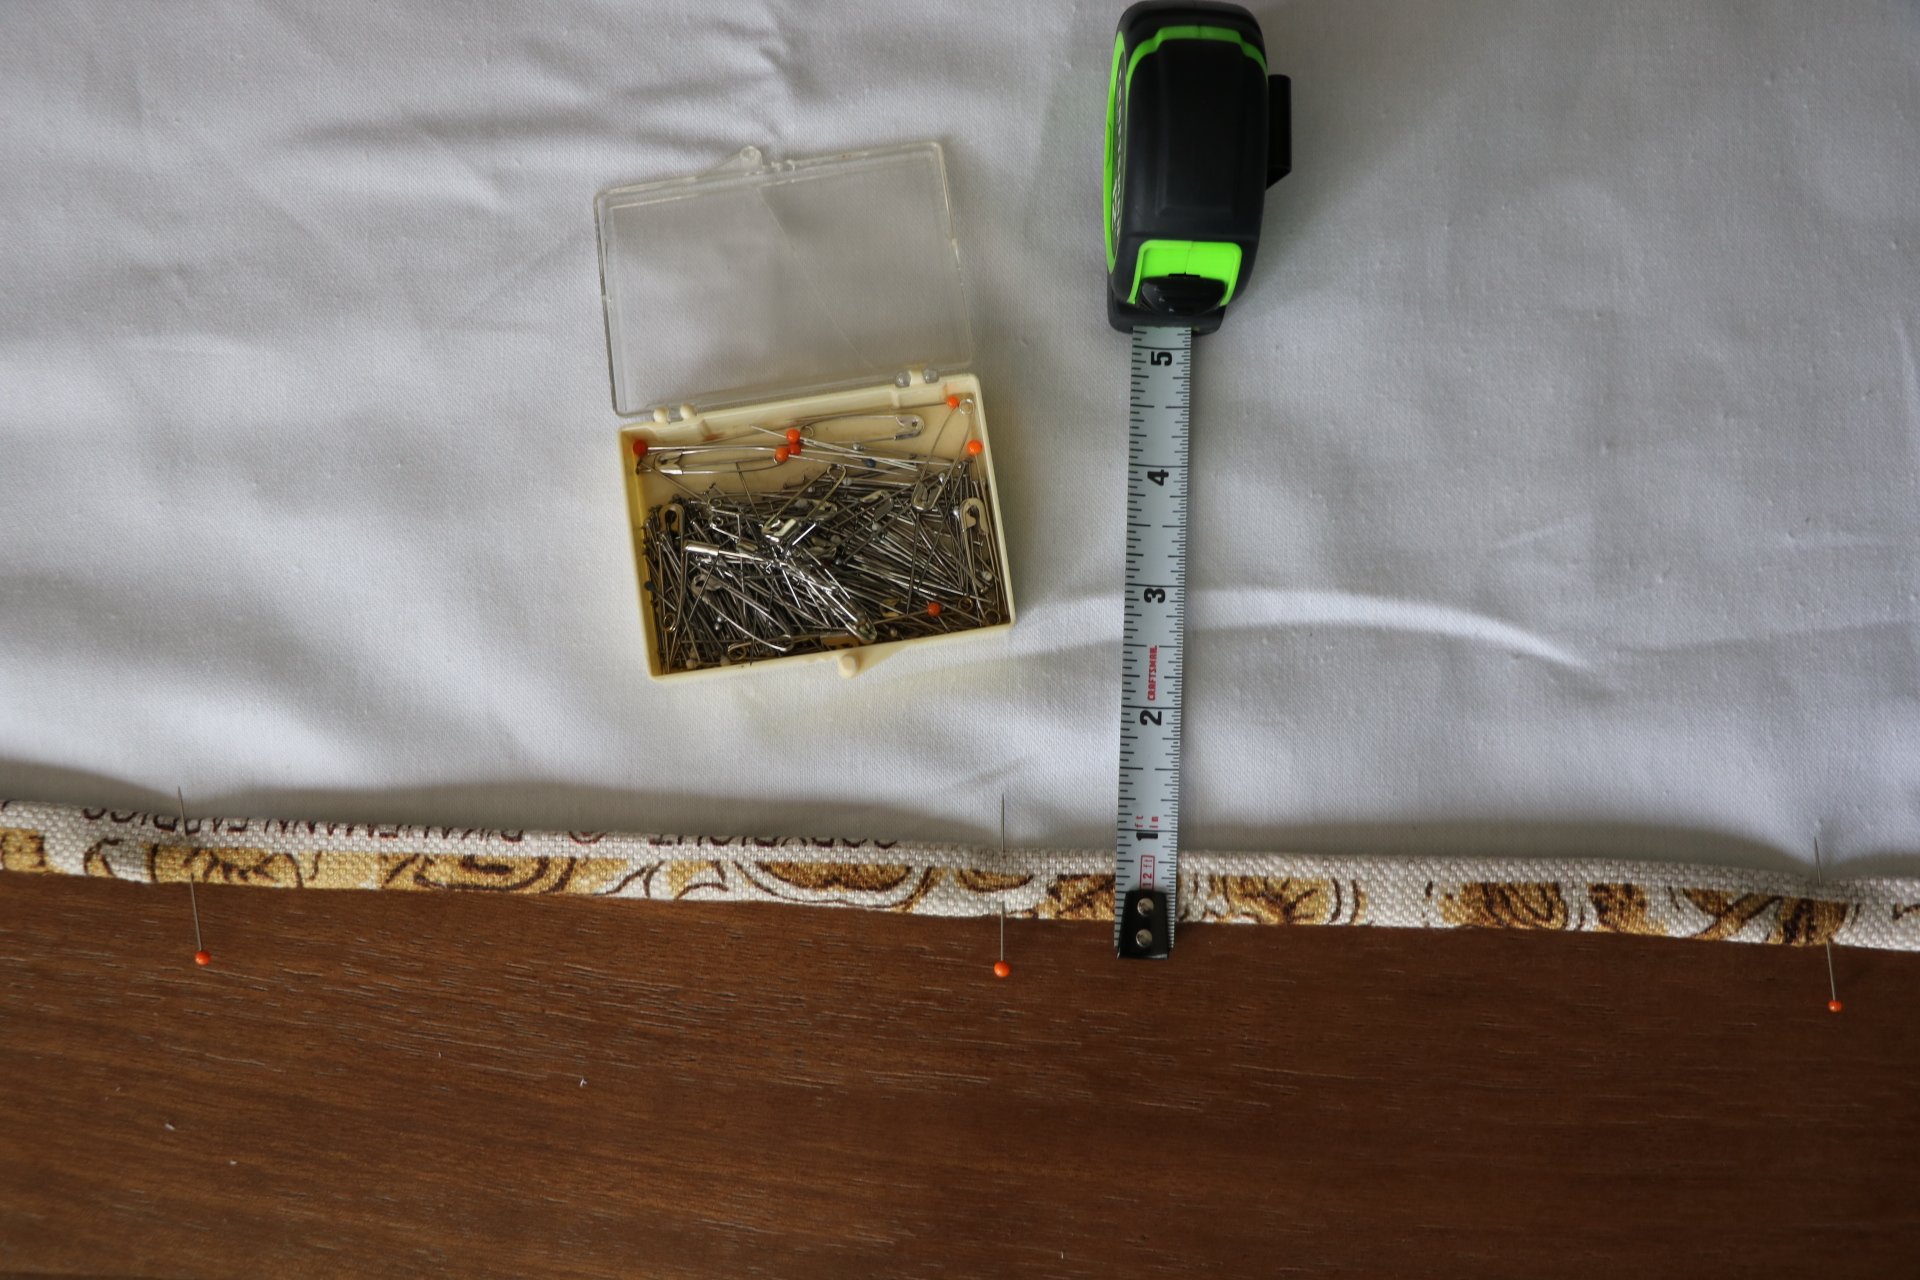
Step Four:
Measure 3” in from the end at each dowel on both the right and the left sides. Hand sew one small plastic shade ring per spot. There should be four per side.
Step Five:
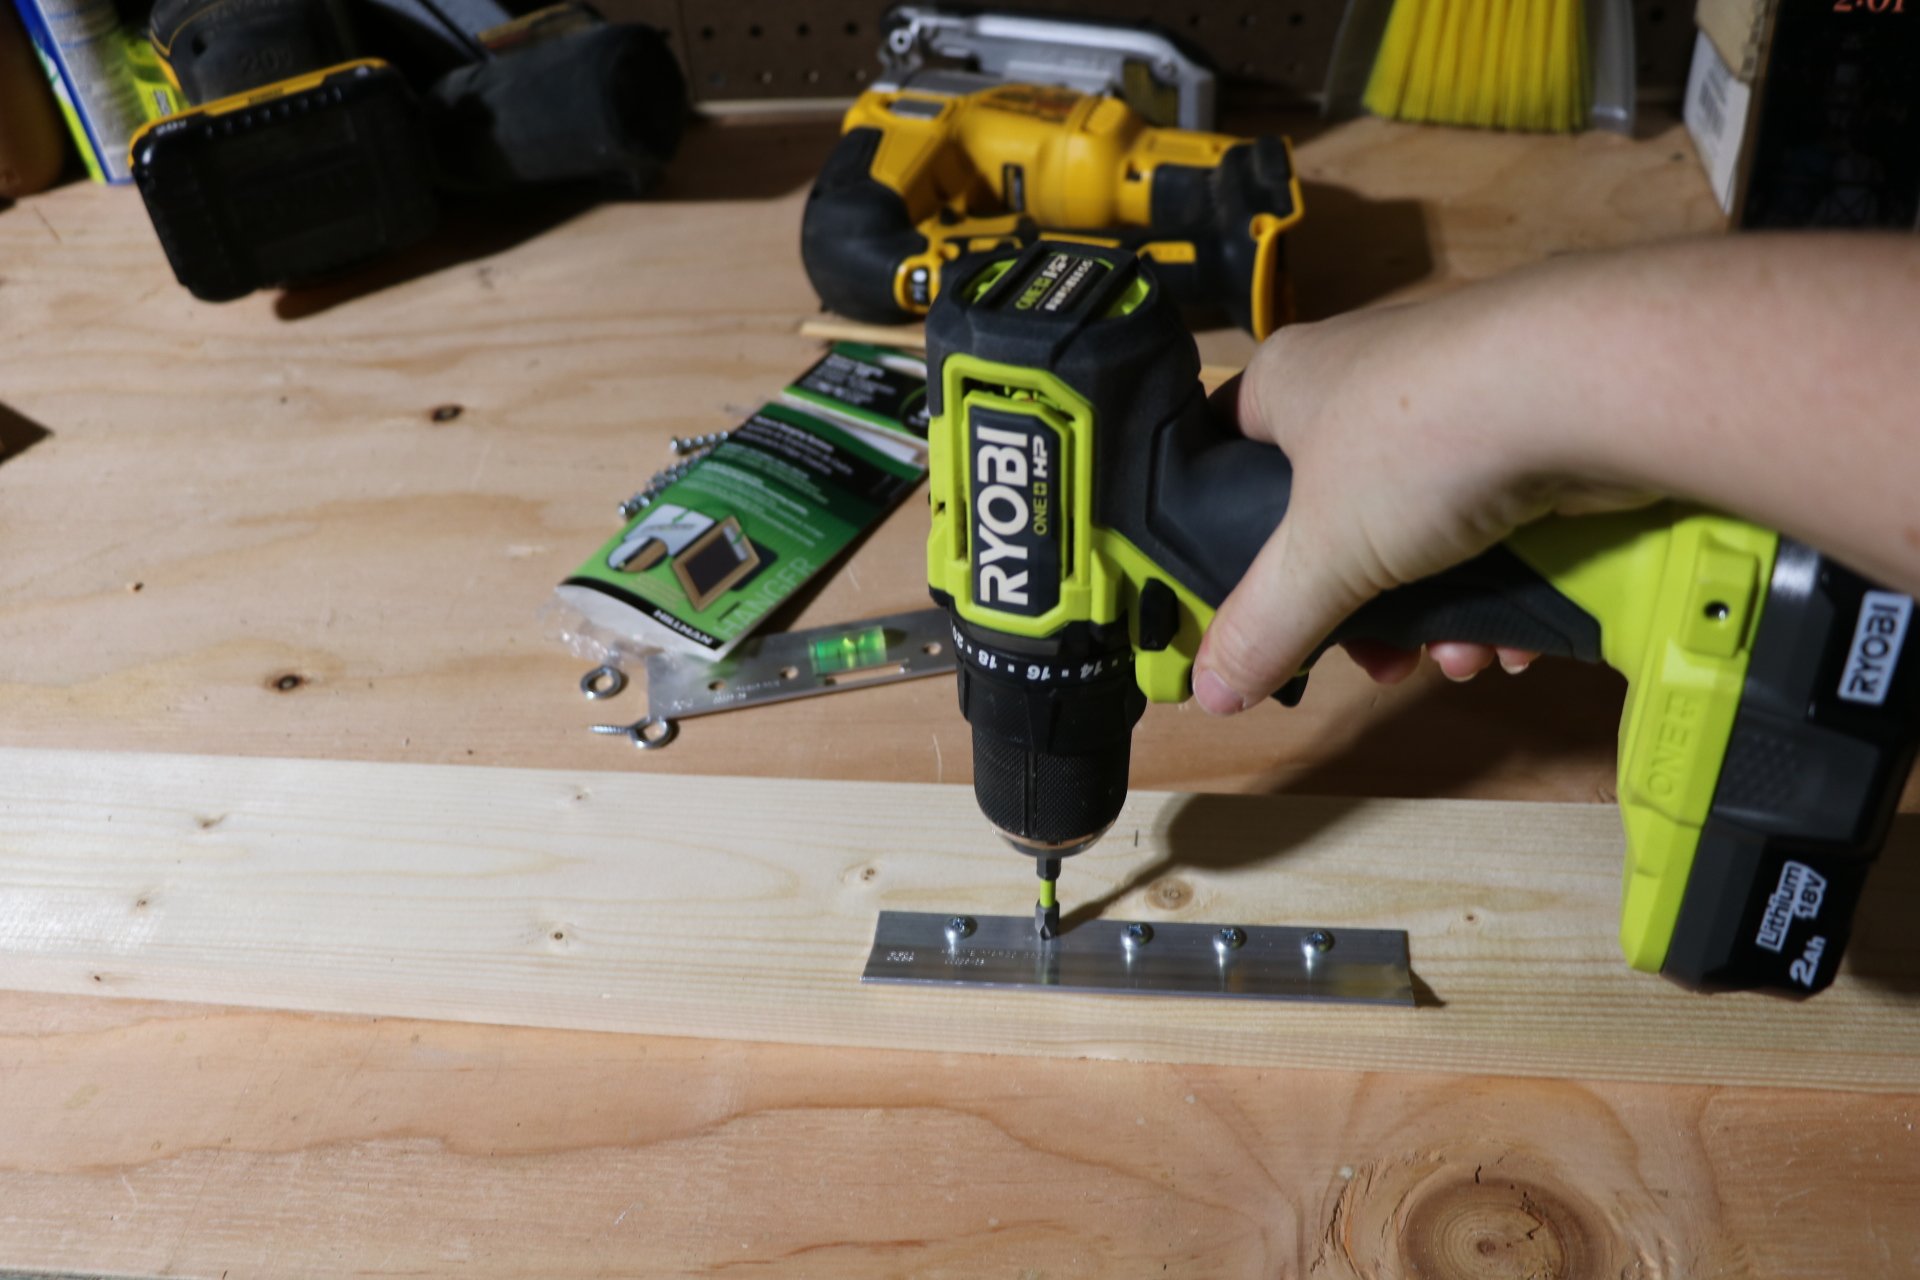
To make the mounting wood piece, cut the 2x3 to the size of the window. Lightly sand the edges to remove any splinters. In the center, screw in a French cleat (attach the mounting side of the cleat to the center of the window).
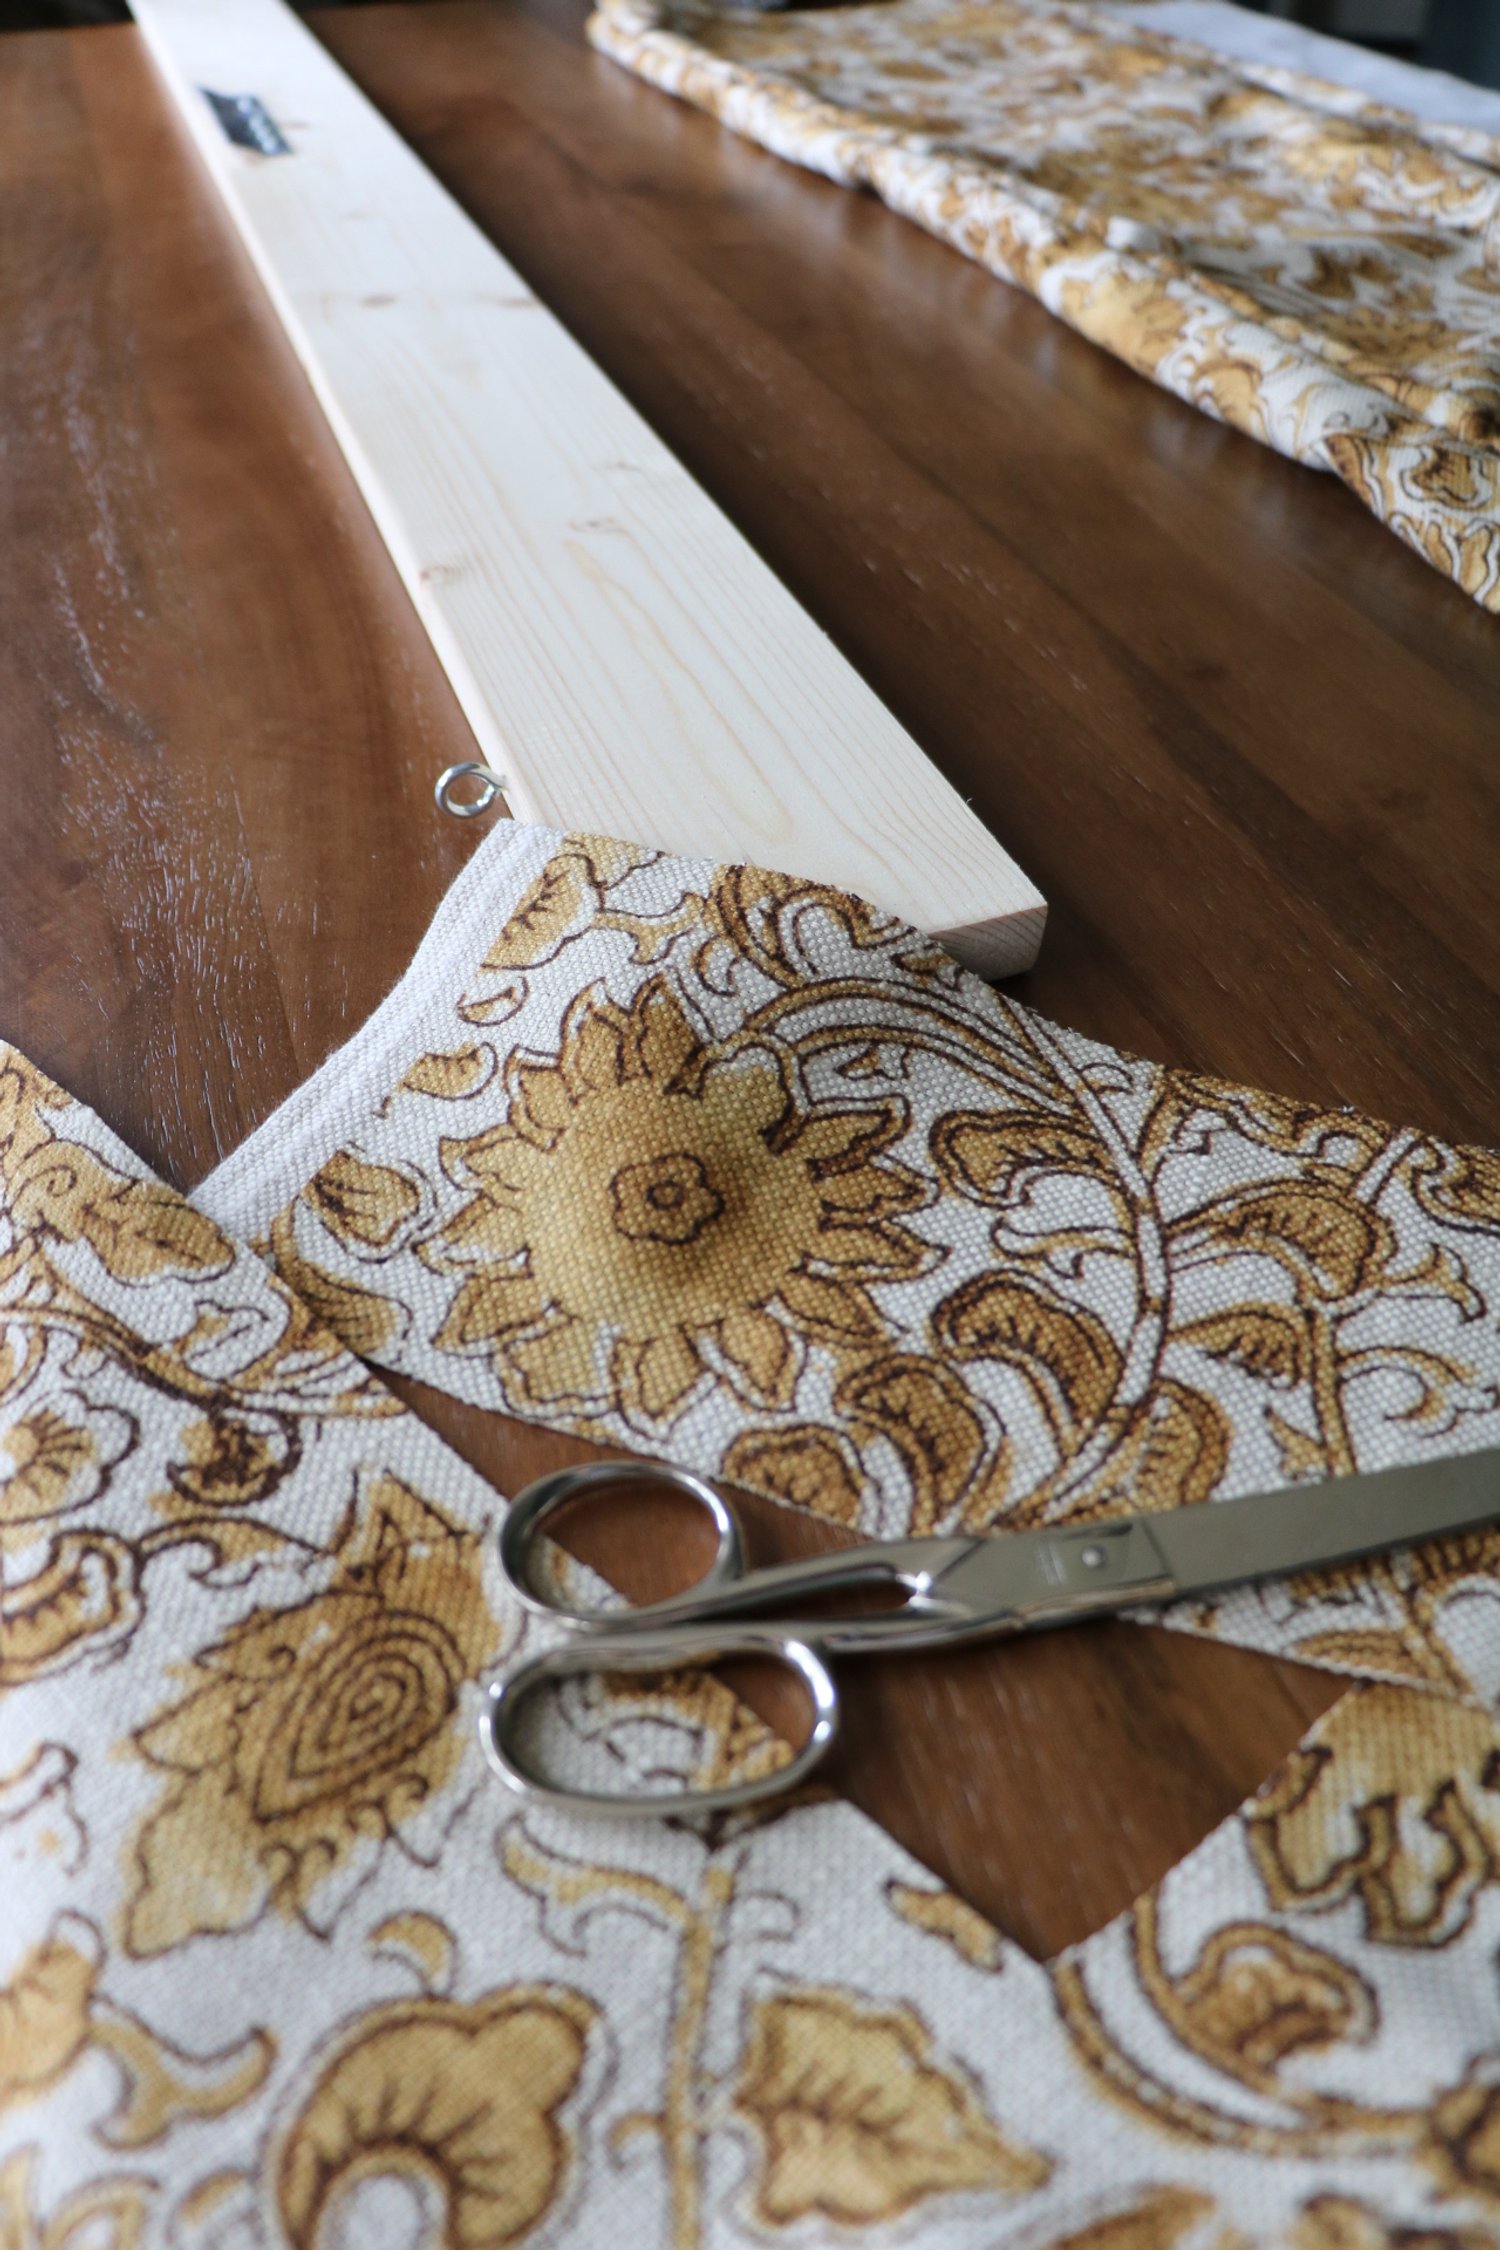
Attach a screw eye hook 4” in from each edge of the 2x3.

Step Six:
Take a bit of scrap fabric and cover the ends of the 2x3 wood, securing it in place with a staple gun. Wrap it like a present - this will ensure that no raw wood shows when you hang up your shade.

Step Seven:
Staple the fabric shade to the 2x3 wood by wrapping it over and securing it into place using a staple gun. Be sure to pull the fabric tightly and evenly.

Step Eight:
Lay your shade on a clean, flat surface. Tie one end of the nylon drapery string onto the bottom left ring. Thread it upwards and through each small plastic ring, through the left and right screw eyes. Let it hang out the right screw eye with about 6” of extra string.
With a new piece of nylon drapery thread, tie one end to the bottom right ring. Thread it upwards and through each small plastic ring and up through the right screw eye. Let it hang to the same length as the first string. Tie together. This is how you’ll pull the shade up and down.

Step Nine:
Mount your shade above the window to the previously screwed in French cleat.
Install the brass cord cleat to the bottom left corner of the window wall. This will hold the drapery string when you want it to stay open.

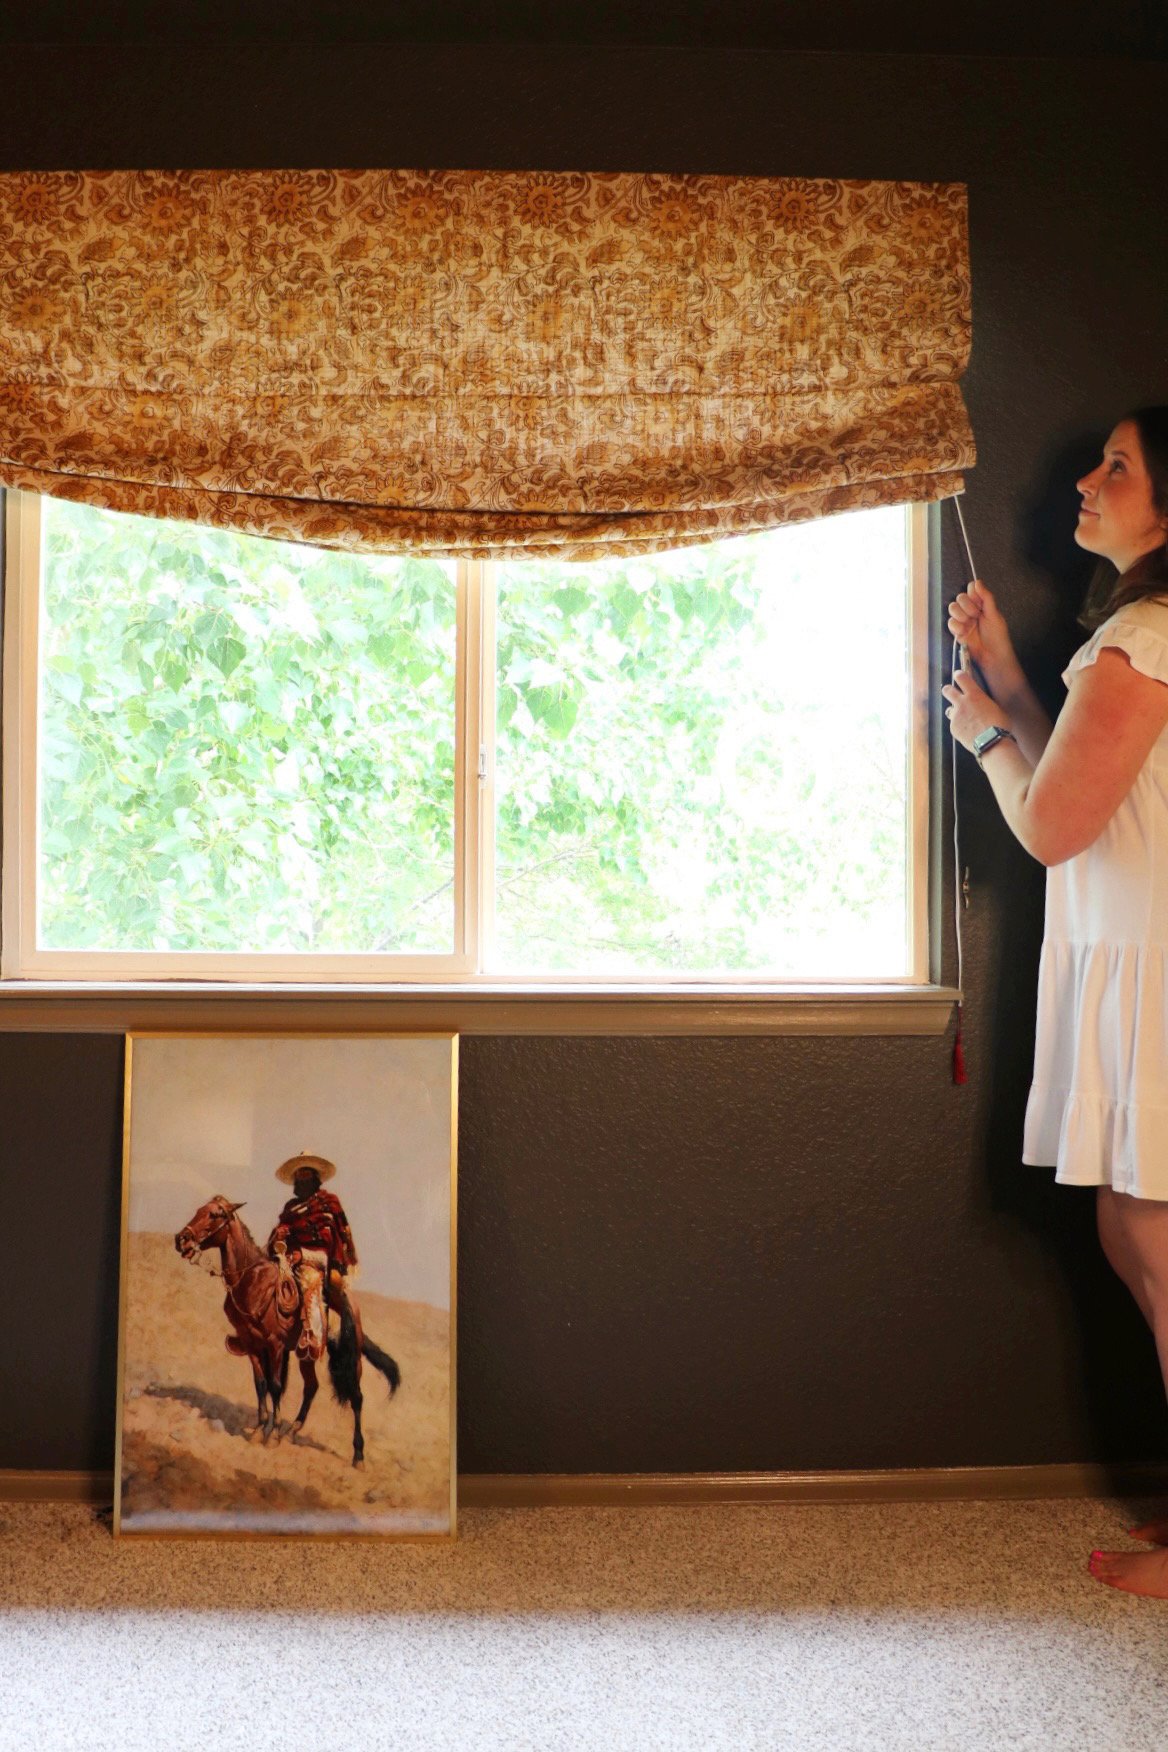
I am so pleased with how this turned out! In total, it took me about 2 days to complete this project. I know there are a lot of steps but I promise it will be worth it!
For reference, a Roman shade purchased custom-made will run you about $300 minimum. My custom Roman shade cost about $80.
Let me know in the comments if you give this DIY a try!