DIY Slat Wall
Ever since starting the design for Berto’s office, I knew I wanted to install a DIY slat wall. I thought the wood would look amazing against the dark Urbane Bronze paint color, and really add warmth and texture to the room. Also, I liked the idea of the wood stain tying into the desk and shelves on the opposite wall.
The good news is that a slat wall is relatively easy to install! The prep takes more time than the actual installation. Continue reading for a step-by-step walkthrough on how to make your own.

Materials for a DIY Slat Wall:
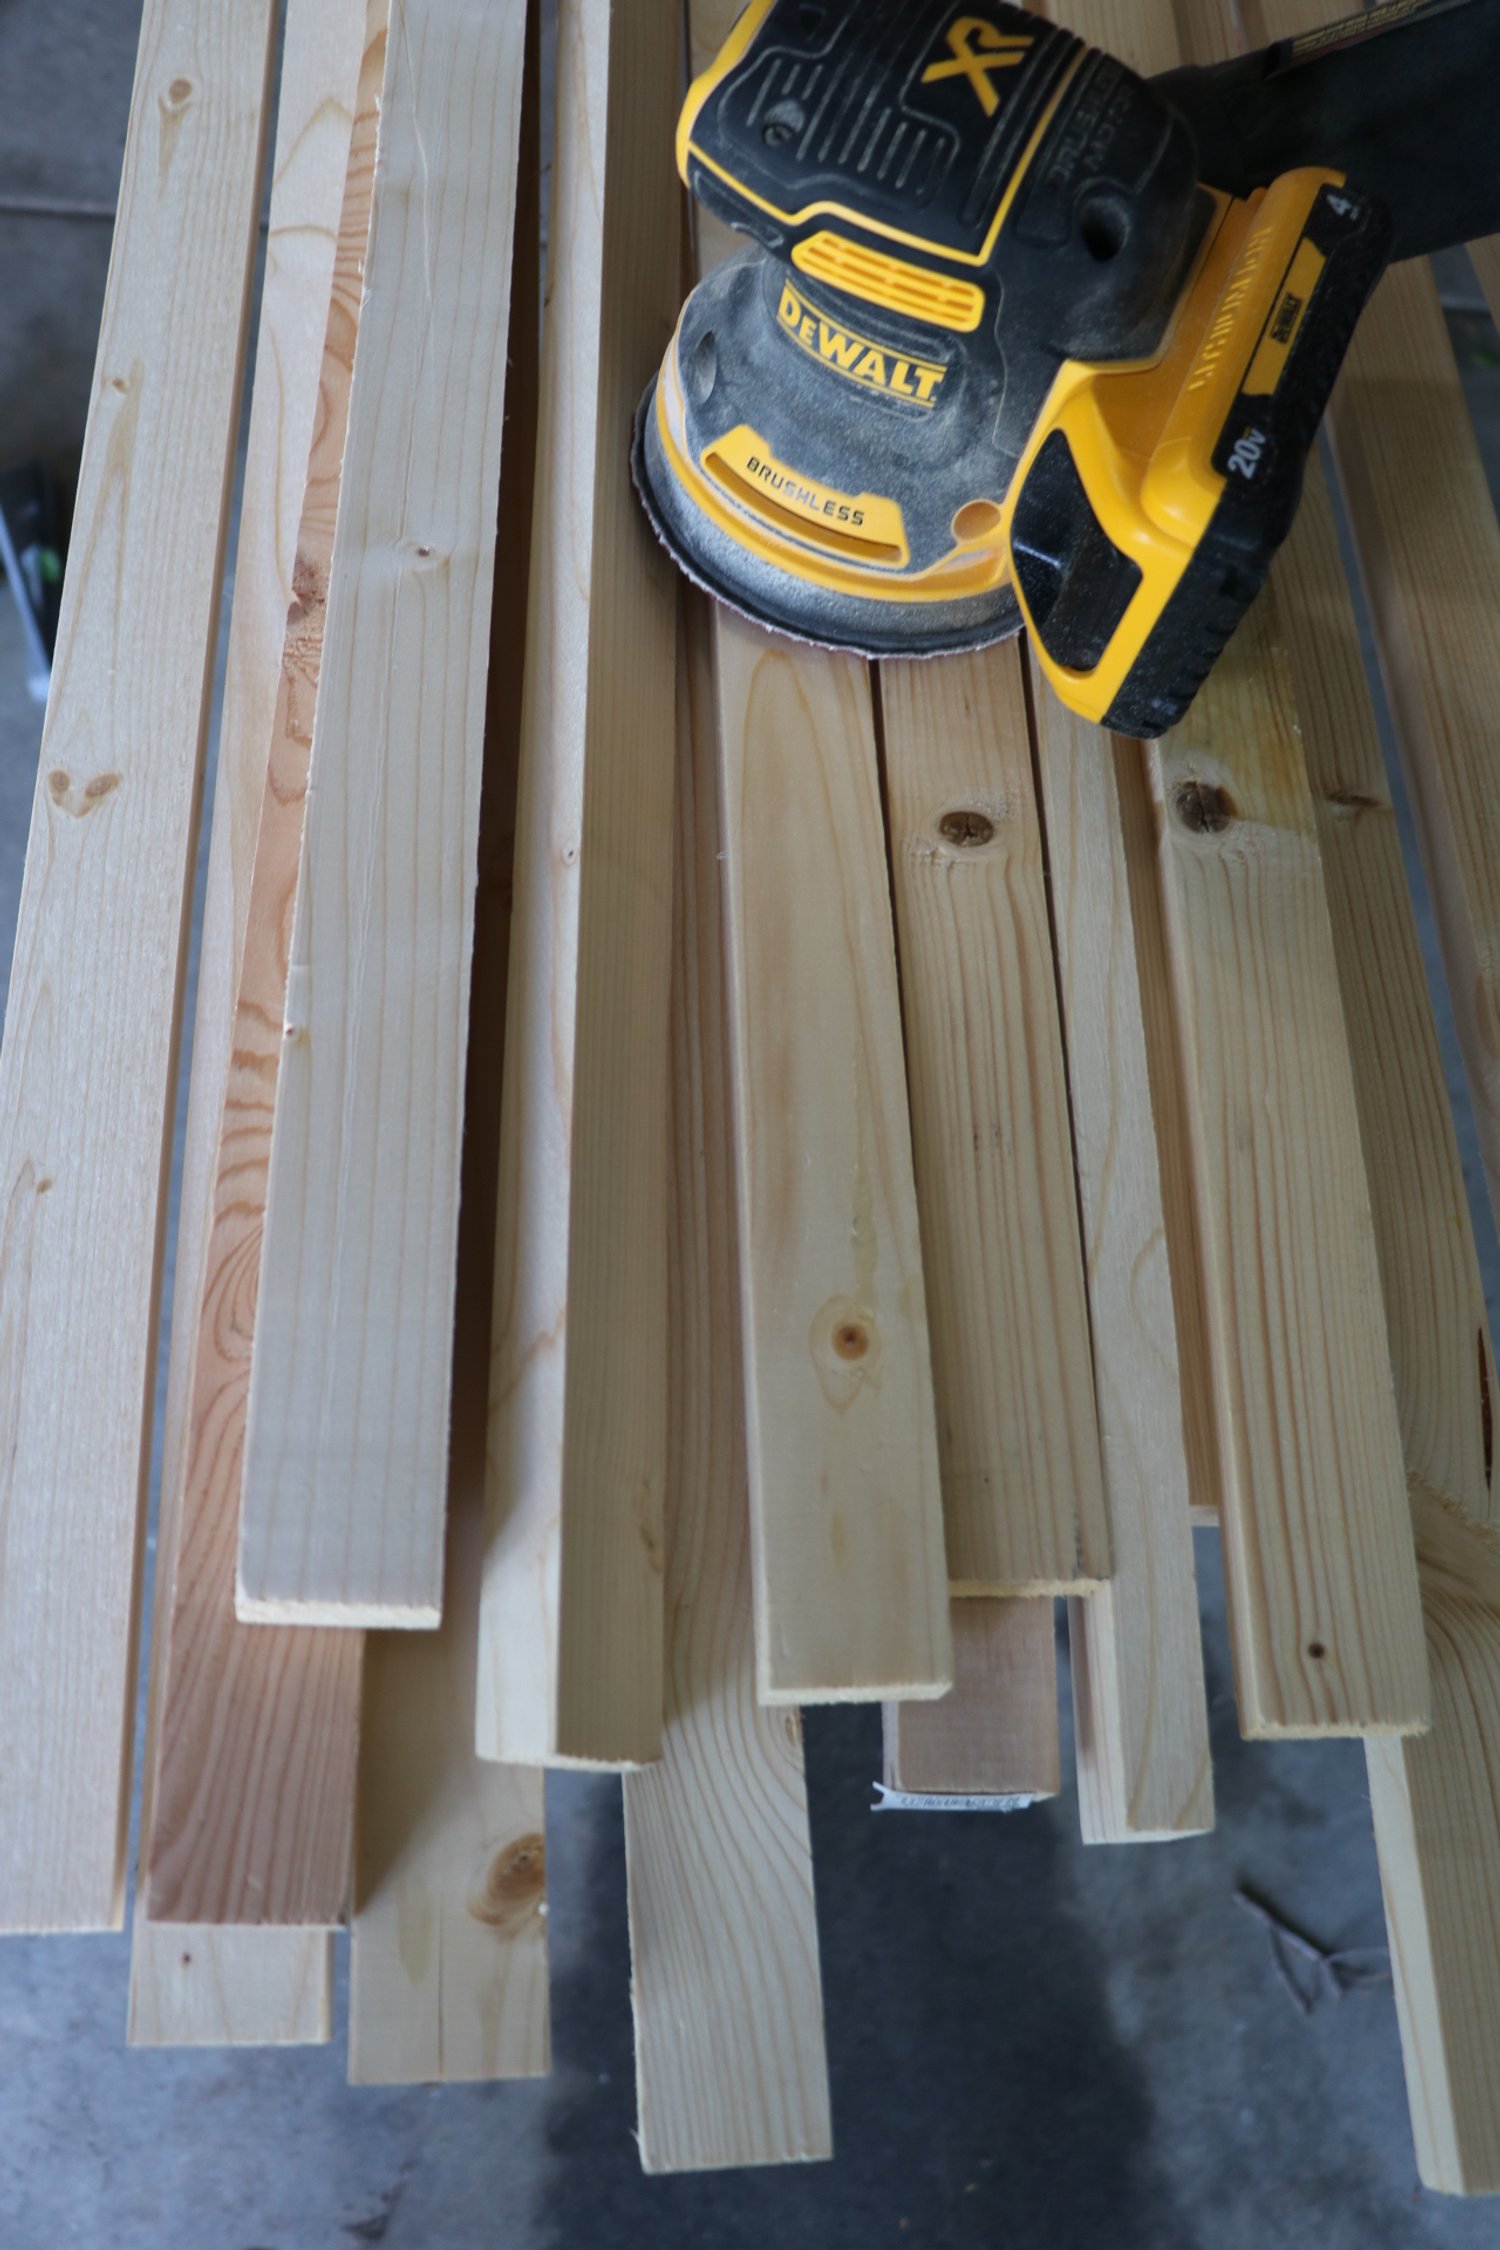
1x2’s (I used 28, cut to 92.25” each)
Orbital sander
Sawhorses
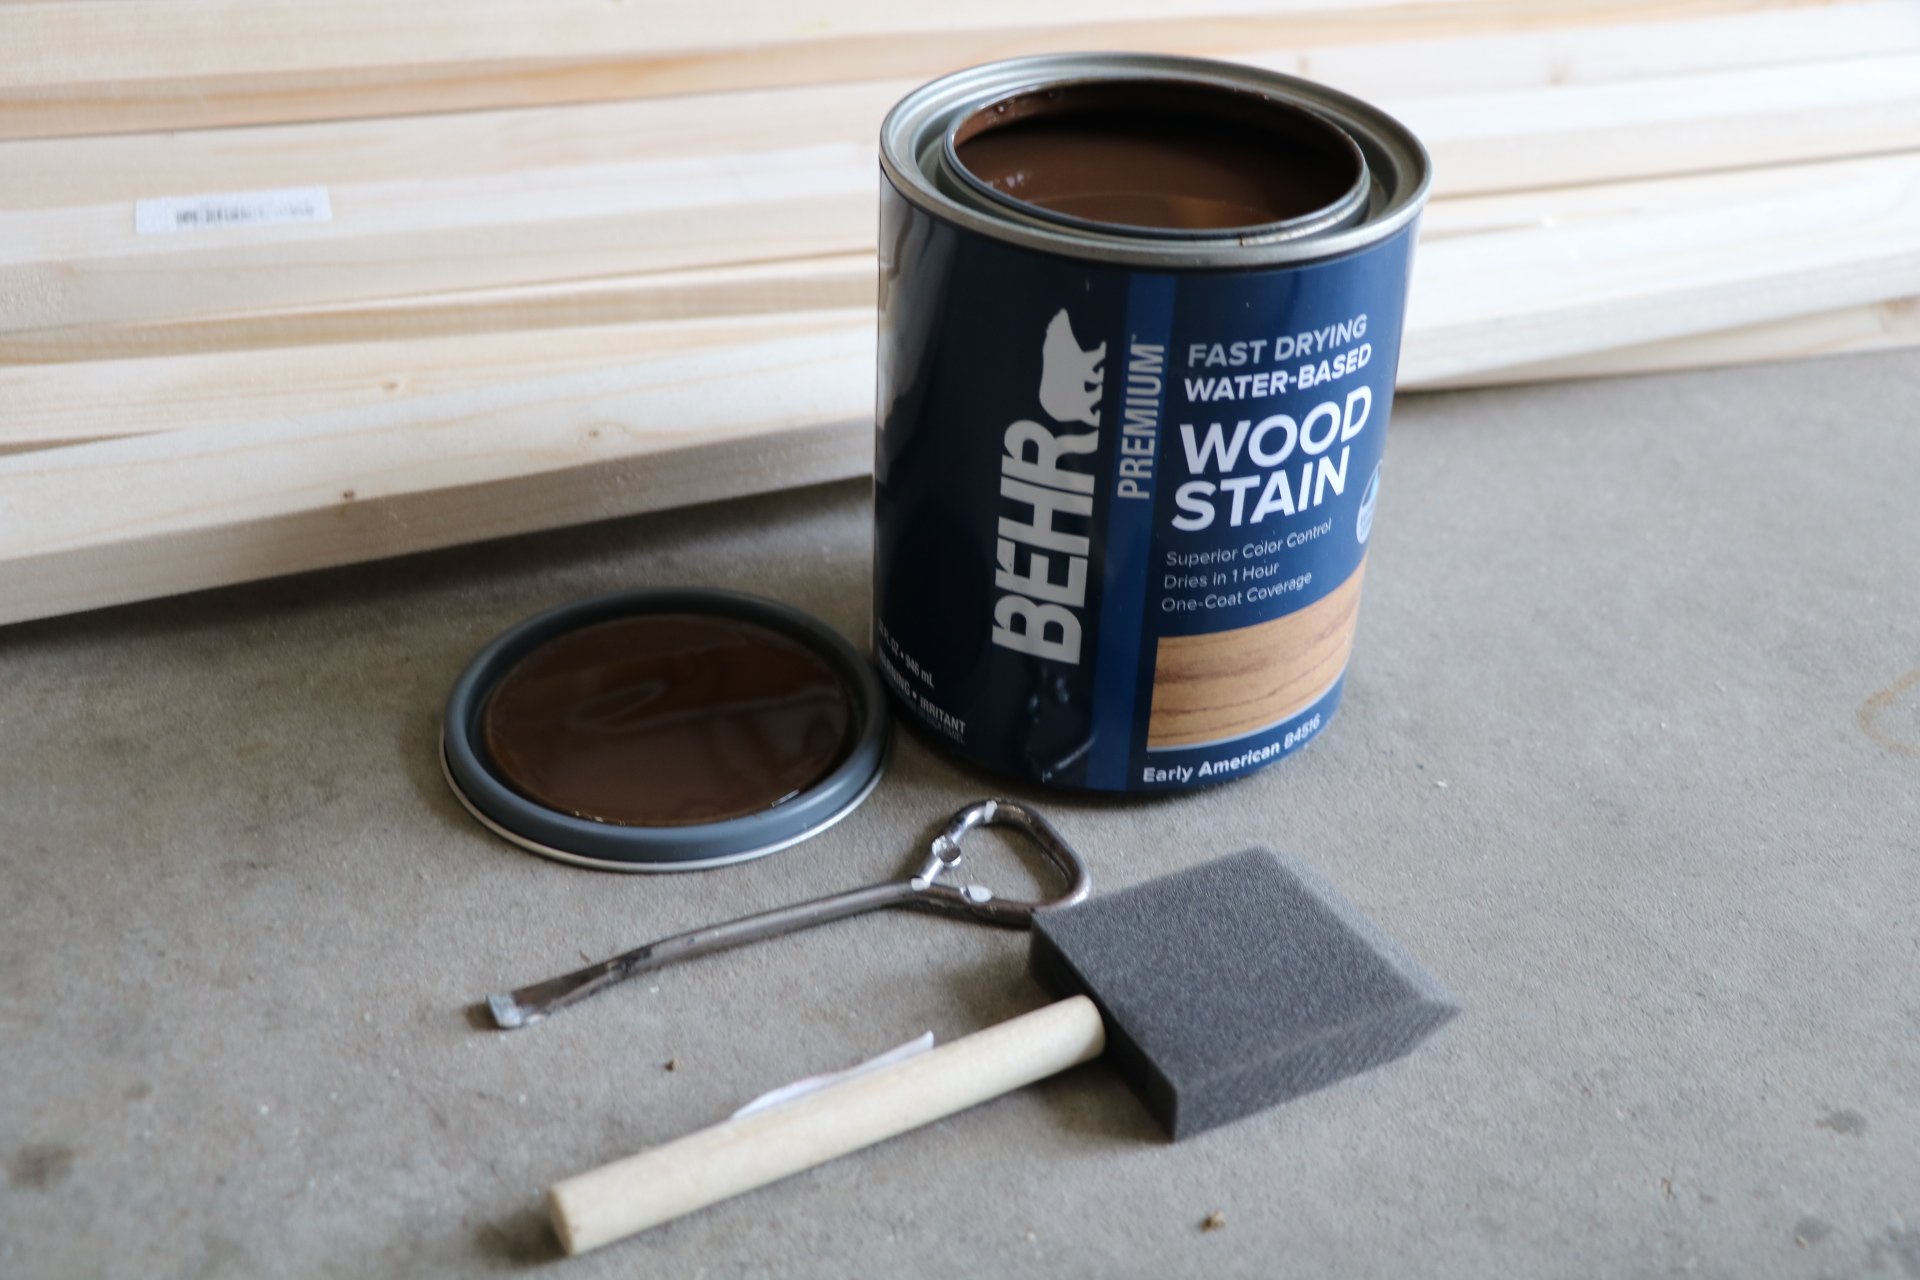
Stain, Early American by Behr
My favorite staining gloves, Venom Steel (seriously, nothing gets past these ones)
Brad nailer
Level
Disclosure: My content is reader-supported, which means that when you purchase through links on my site, I may earn an affiliate commission. Learn more here
Step One:
Ensure that each 1x2 is cut to the proper size. For my 8 ft wall, after taking into account the baseboards, I needed each wood slat to be 92.25”. I used my jigsaw, but you could also hand saw them or use a table saw.
Next, sand the front, sides and back of each slat using an orbital sander. This takes the longest but once you get into a rhythm, it can go by quickly.
Step Two:
Stain the front and sides of each piece of wood. No need to stain the back since it will be affixed to the wall. I found the most success using a staining sponge like the one pictured. You can also use a staining rag. ALWAYS wear heavy duty staining gloves!
Let everything dry. The good news is that this particular stain dried to the touch within about 20 minutes!
Step Three:
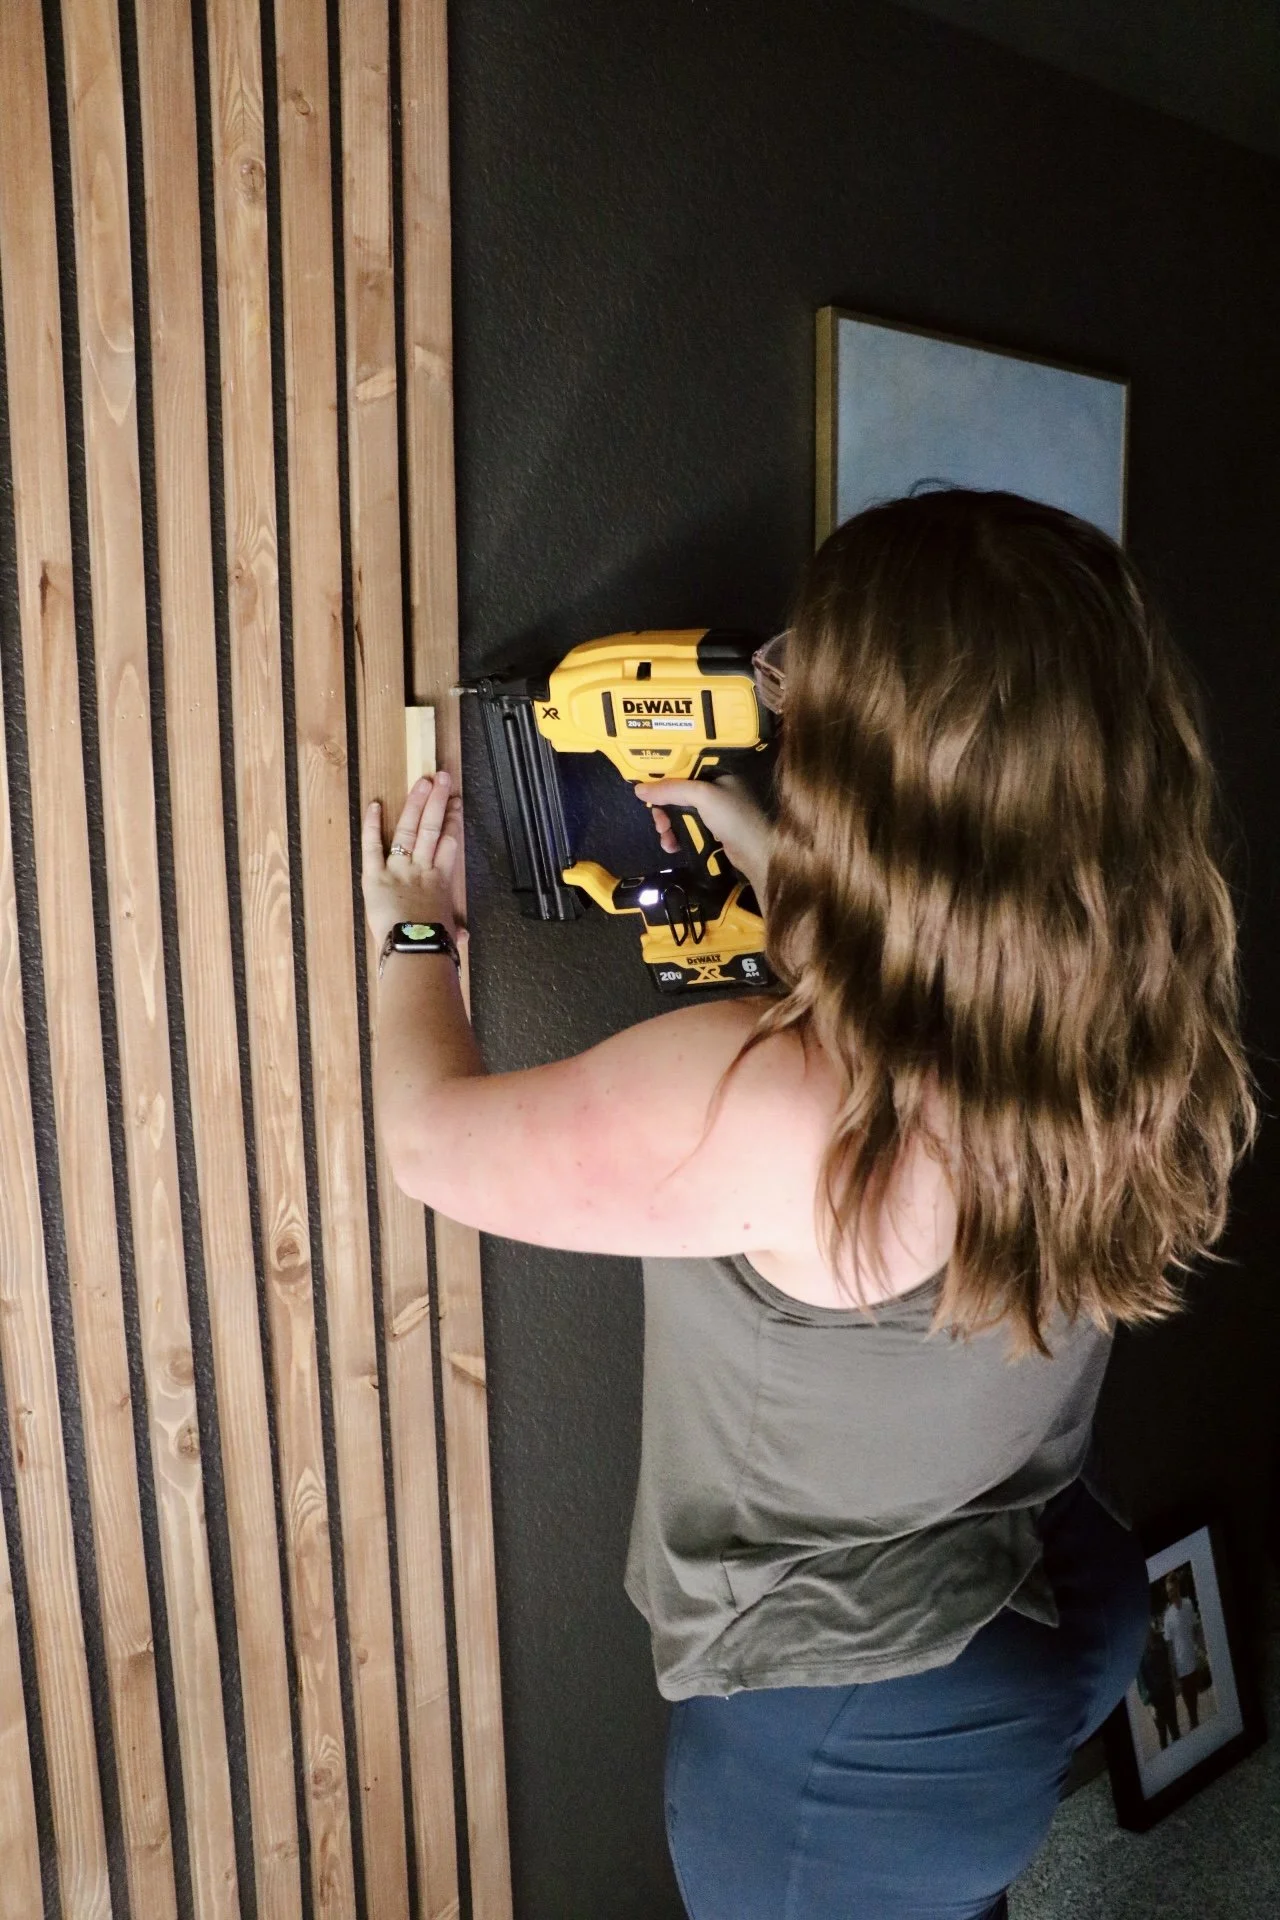
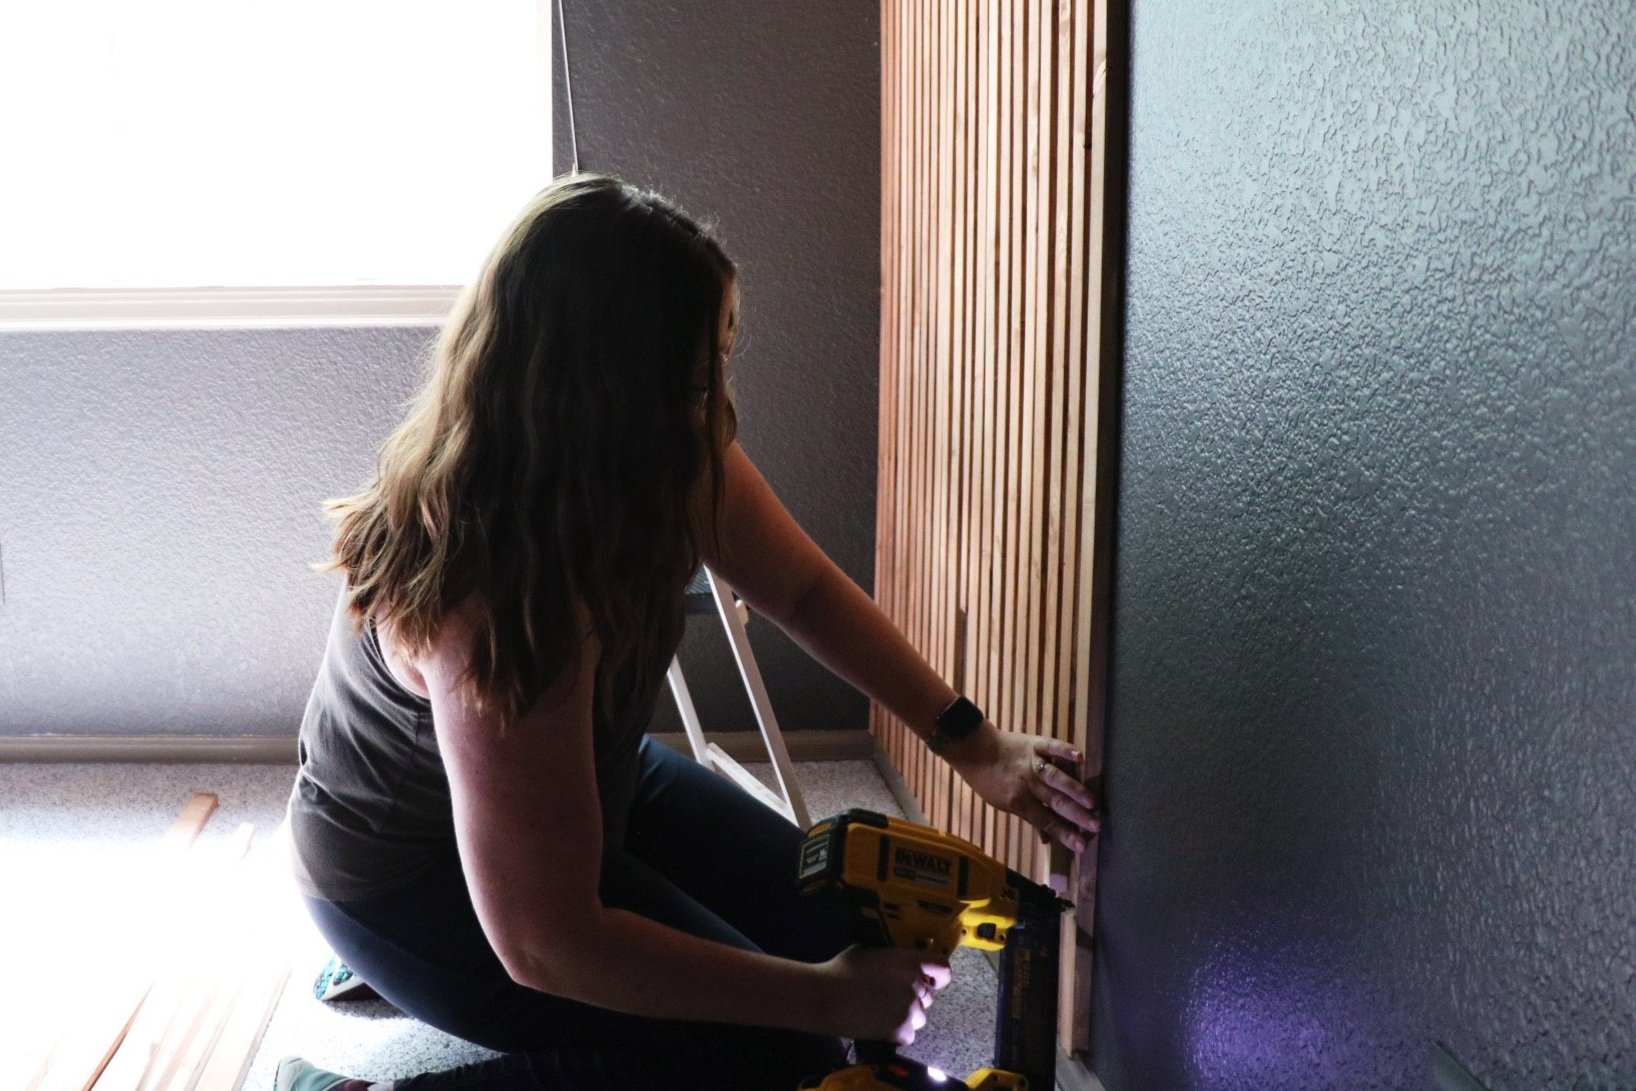
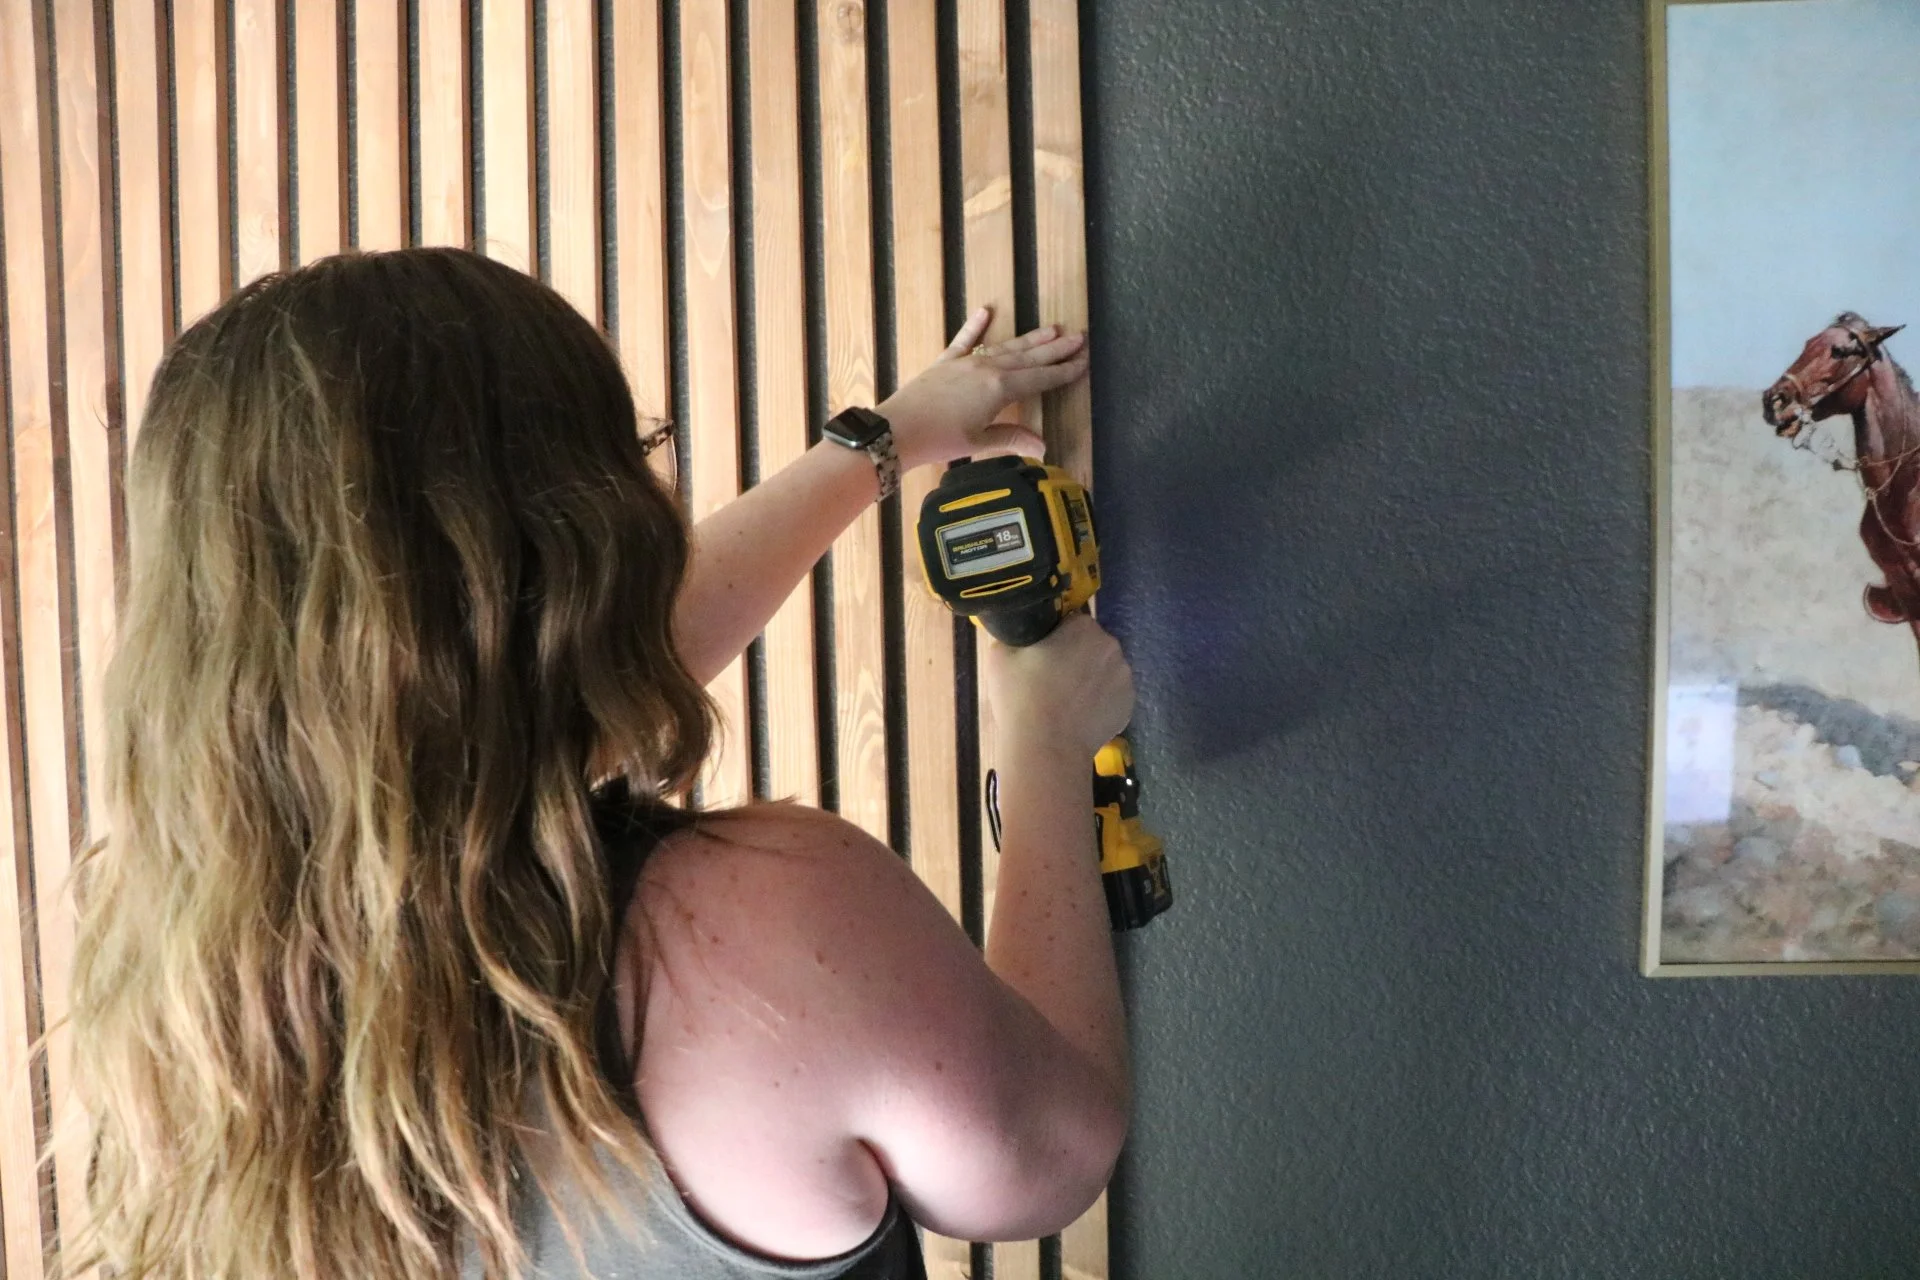
Install each 1x2 to the wall to create your DIY slat wall. Be sure to use a level for the first piece to ensure it’s being attached straight. Then, use a scrap 1x2 turned sideways to measure an equal distance in between each slat. I used my Brad nailer and drove nails into the wall at three points - the middle, the bottom, and the top. Slide the scrap 1x2 to each section before nailing it to the wall to ensure the entire wood piece is straight and evenly spaced.


And that’s all there is to it! I liked how this looked only going halfway across the wall, especially with the vintage art print we found hanging next to it. Just like I’d hoped, the wood adds warmth and texture to the room. I am considering continuing on with half slats underneath the art print, but that will have to wait for another day.
Comment below with any questions you have! And I’d love to see photos of your own DIY Slat Walls!

Walker seems to be a fan too!
Have you seen my previous slat wall installation at my client Justin’s home? Check it out here.