Hallway Closet Makeover
The challenge: no-spend project. The space: our entryway hall closet.
Using leftover materials I already had lying around the house, I took my boring coat closet from drab to fab in about two days. Read on to see how…

Before:
Nothing special to see here. Just a typical, messy coat closet that wasn’t functioning as well as it could, and certainly didn’t look as nice as I wanted it to.
On the floor are boots and shoes that we use day-to-day, whether on walks with the dog, shoveling snow, or putzing around the house.
The coats are a mixture of heavy winter parkas, light jackets, and vests. For the sake of space-saving, we decided to pack away the heavier ones during the summer months.
Up top include a random smattering of hats, gloves, and Walker-things like his leash and harness. It’s all just thrown up there and has caused frustration when in a hurry as it’s difficult to find anything quickly.
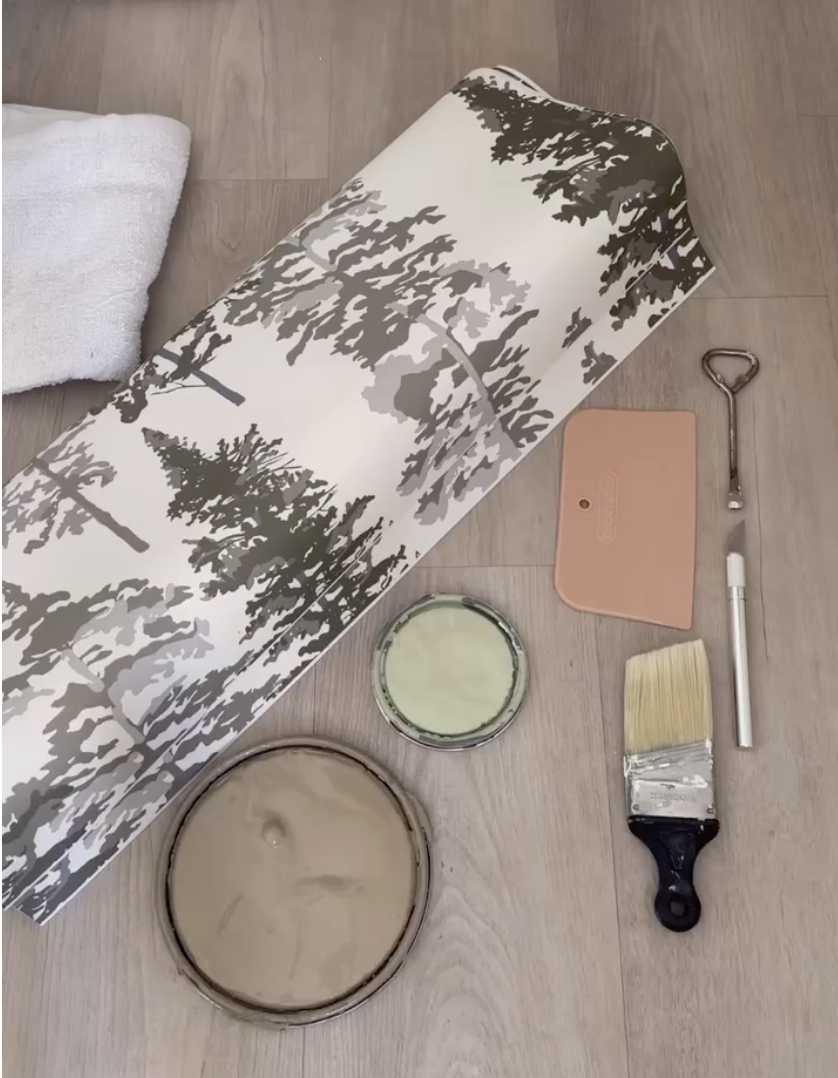
Materials (in case you don’t have leftovers like me!):
Peel & stick wallpaper
Smoother tool
Exacto knife
Paint (use semi-gloss for baseboards and doors)
Paint brush
Mini foam roller (for cabinets/doors)
Paint can opener
Rag
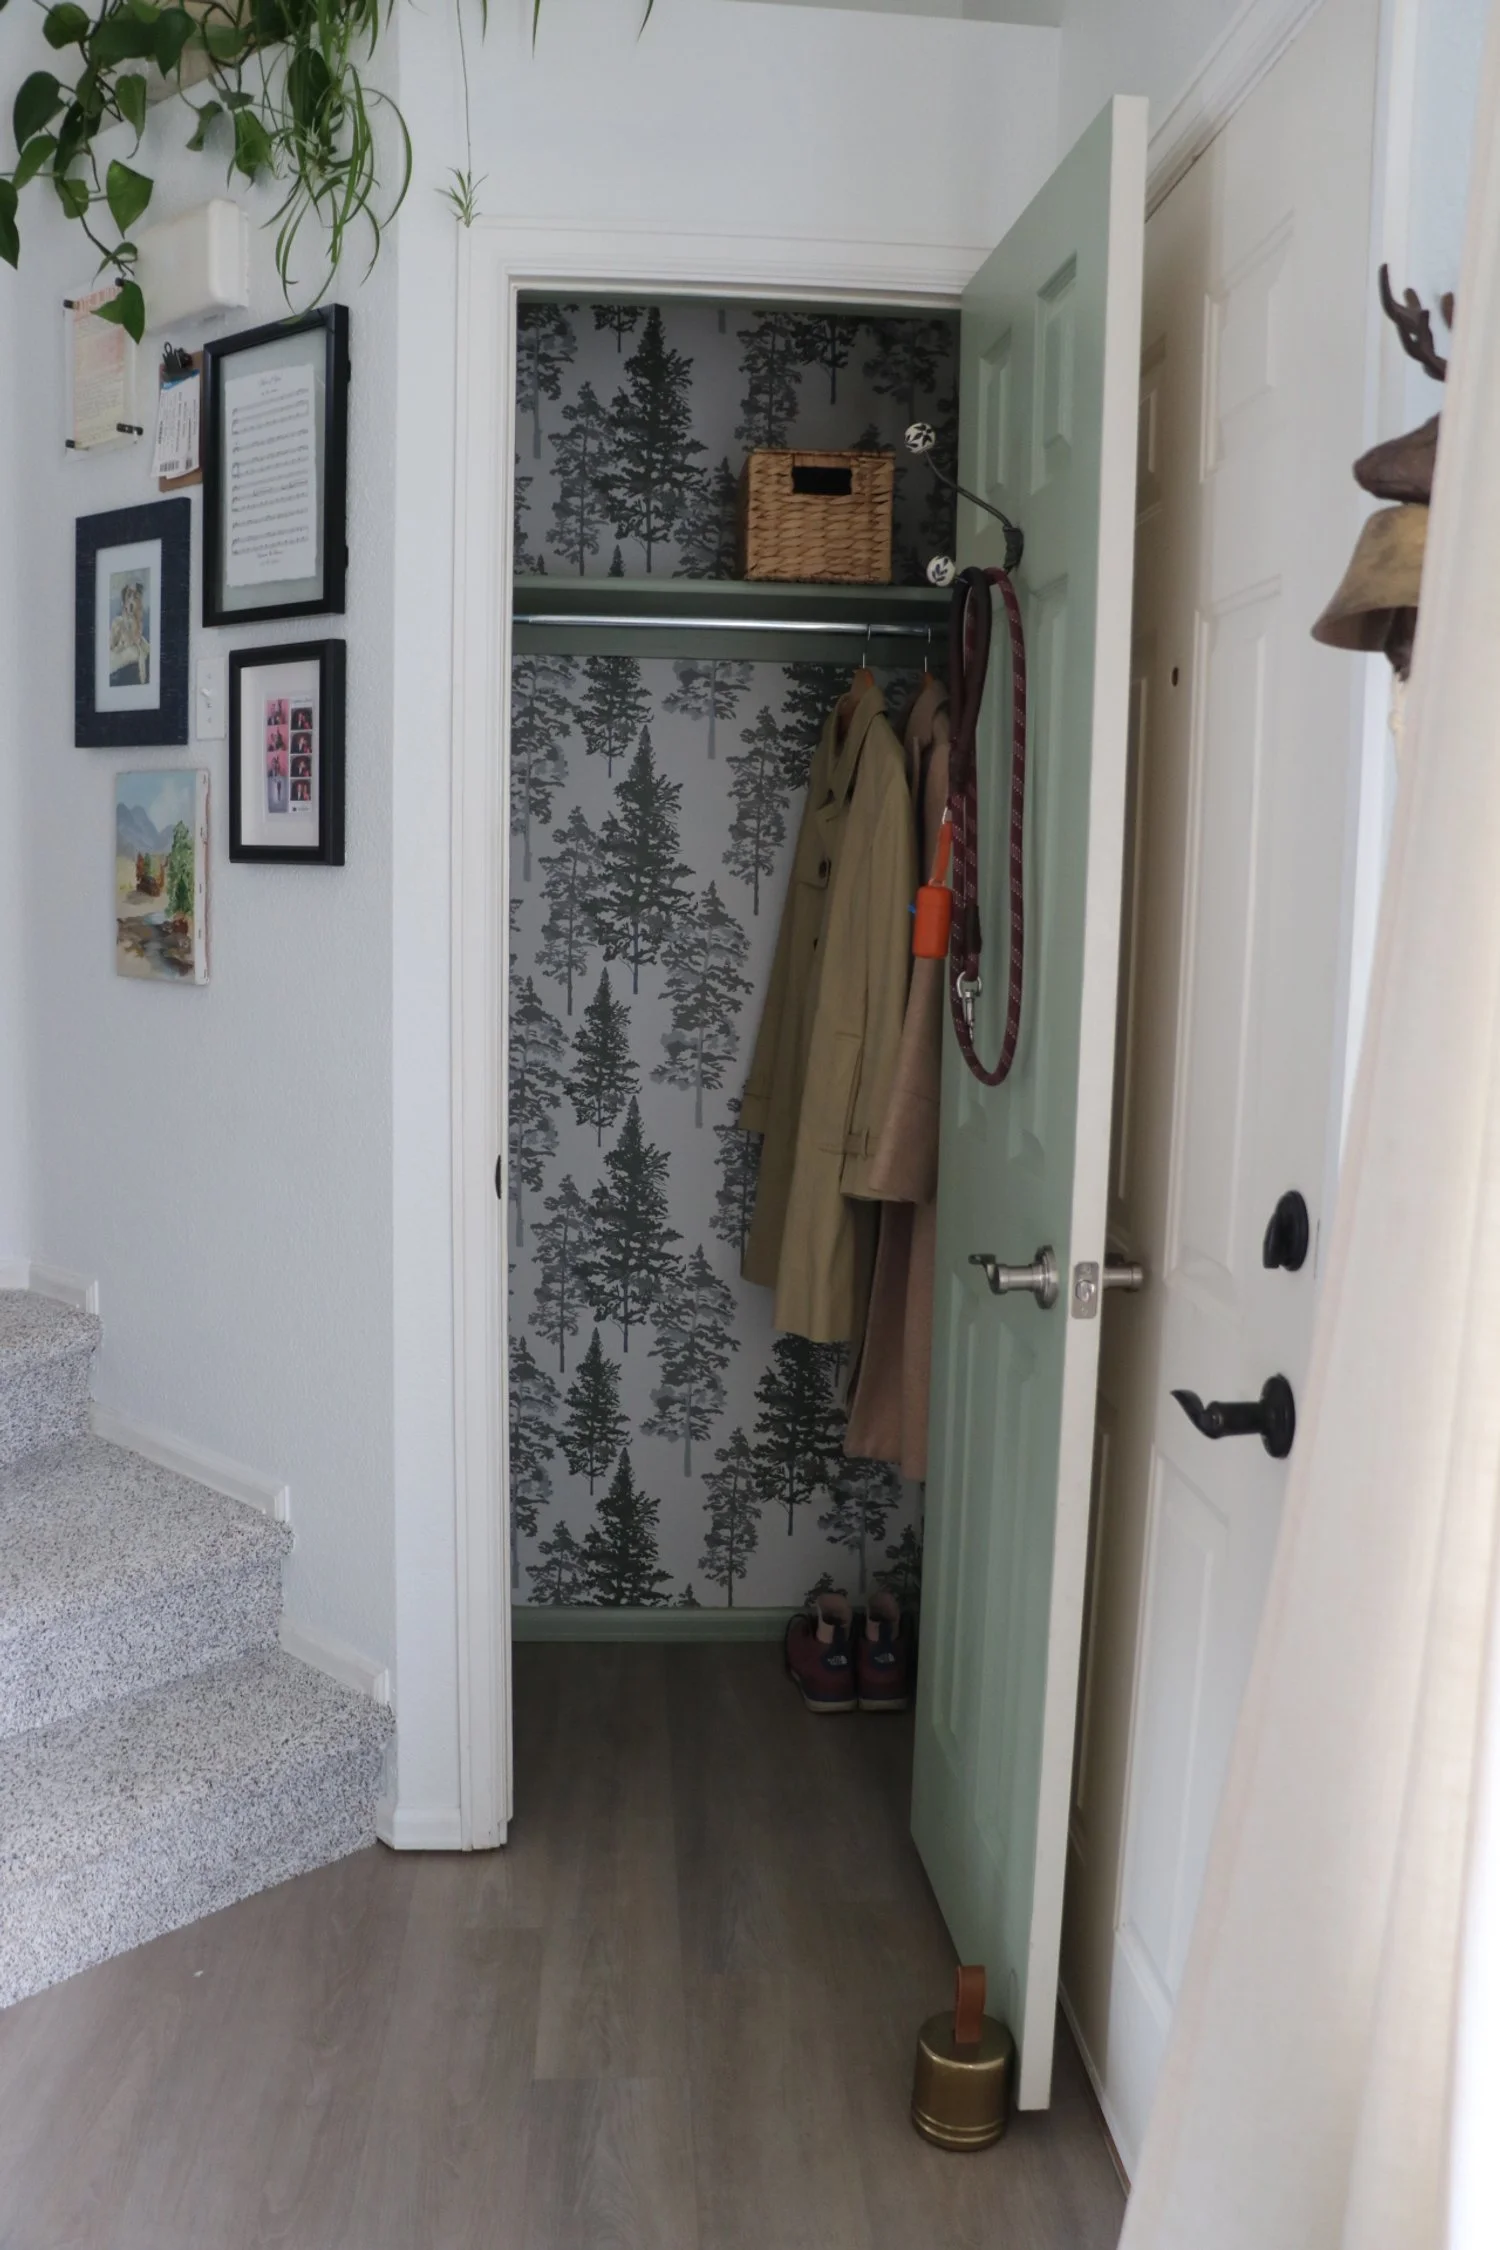
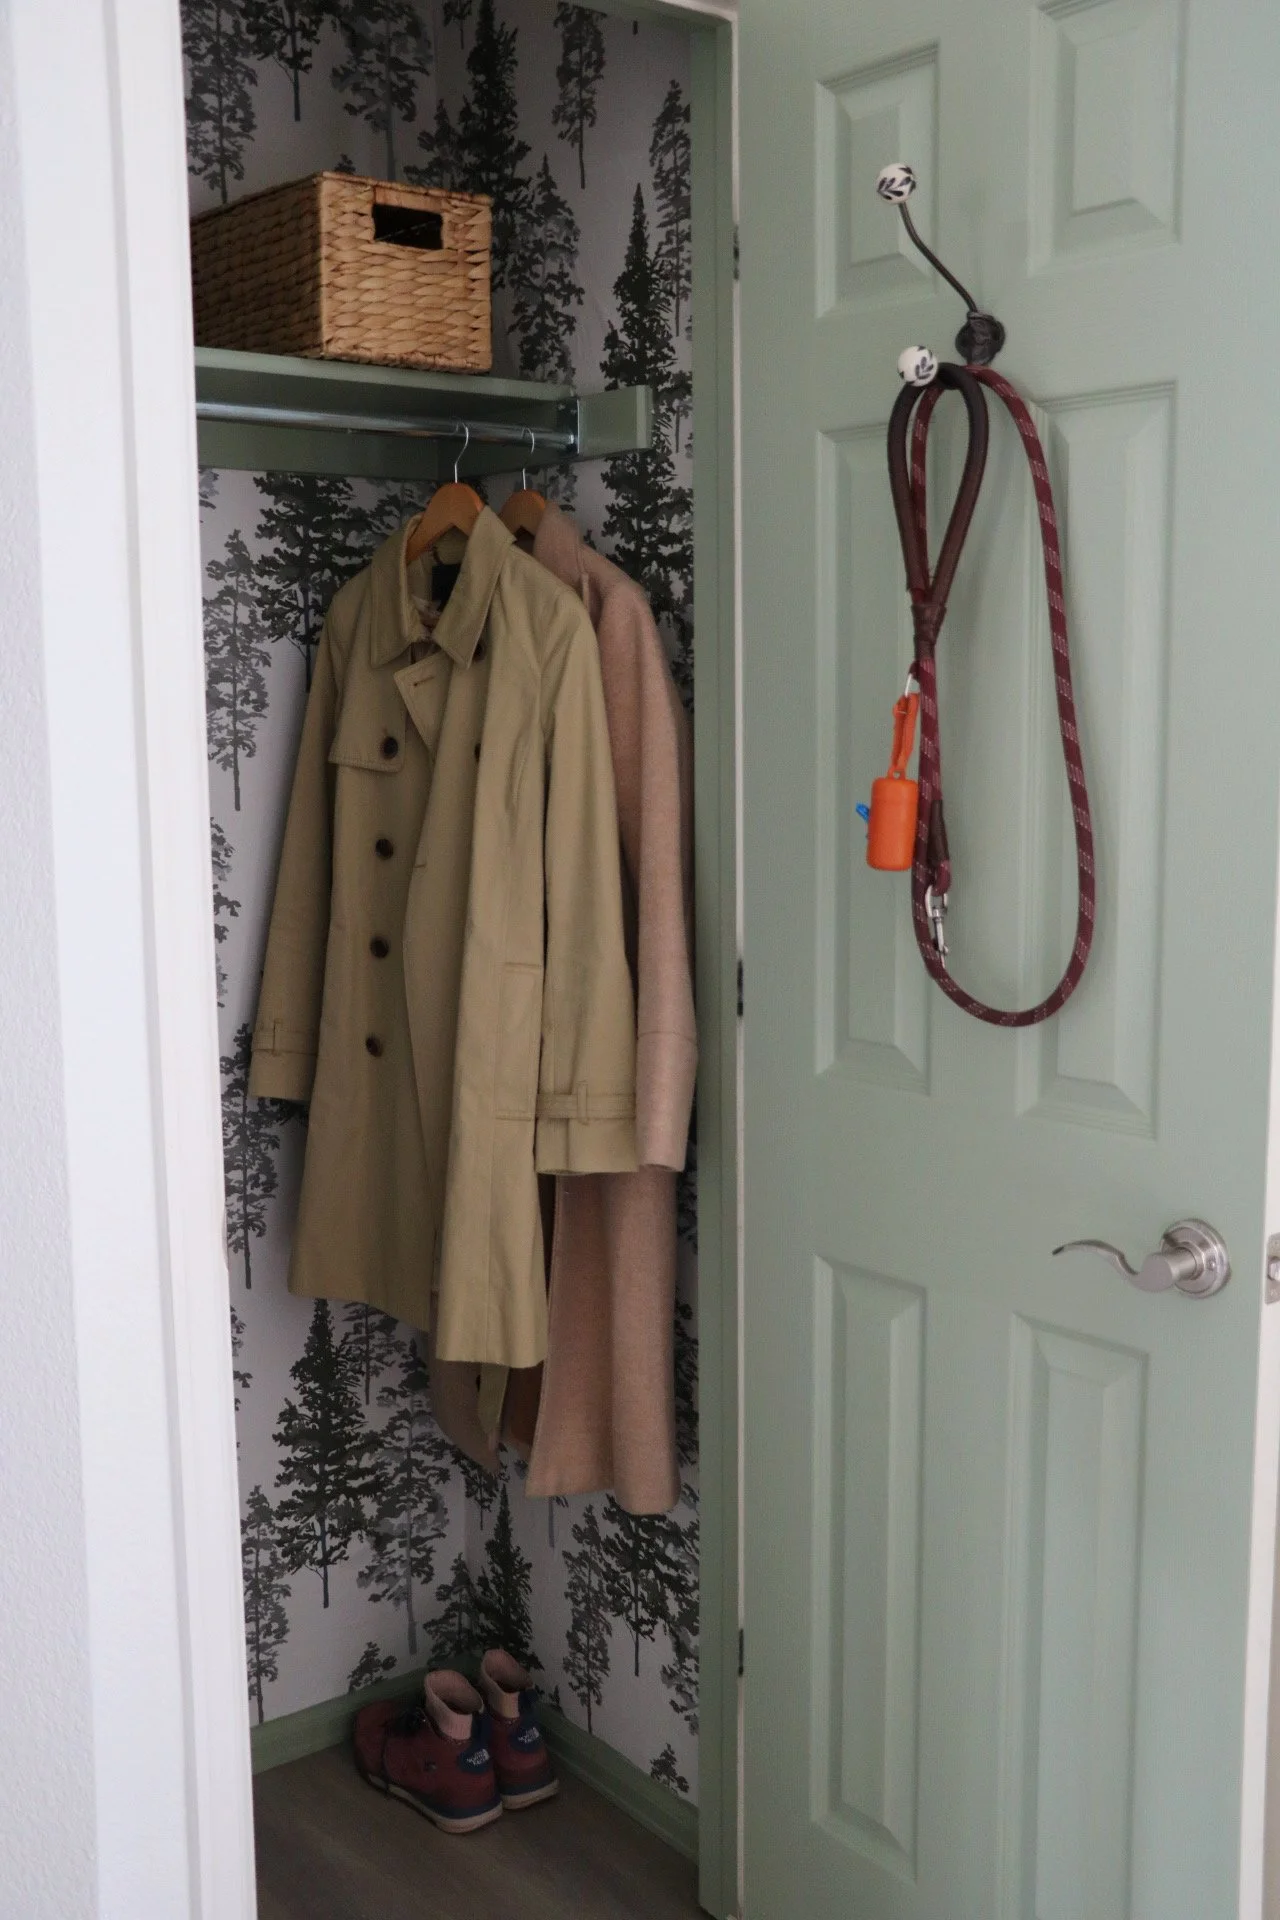
Decorative hook
Woven Baskets
Disclosure: My content is reader-supported, which means that when you purchase through links on my site, I may earn an affiliate commission. Learn more here.
Step 1:
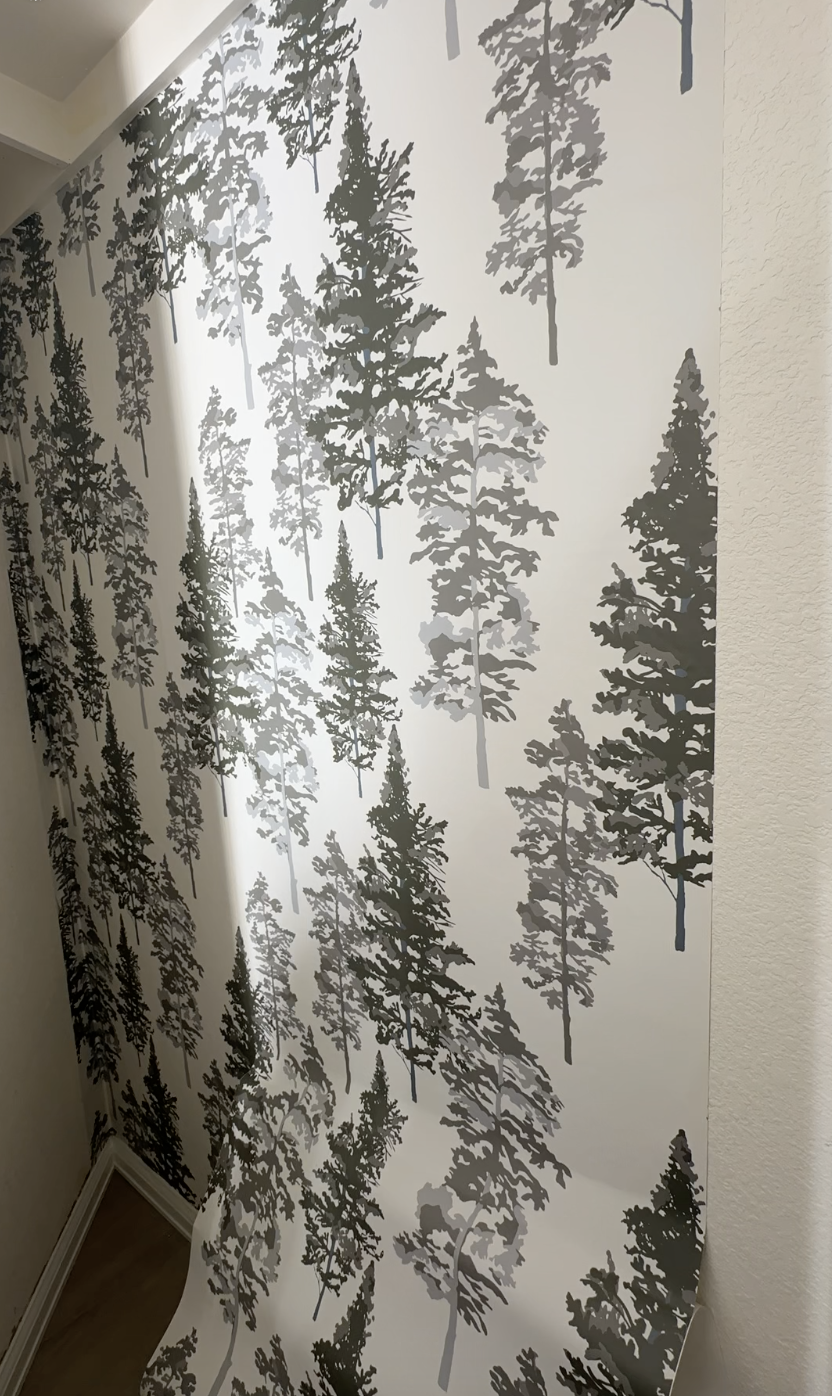
Clean, sweep, and scrub the whole closet, including all the walls. You need a squeaky clean slate for the peel and stick wallpaper to stick to. Peel off the backing to the wallpaper. Then, use your smoother tool to gently press onto the wall, smoothing out any bubbles or creases. A peel and stick wallpaper hack is to use a damp paper towel to help get out any pesky wrinkles. Trim off any excess paper with your excto knife.
Step 2:
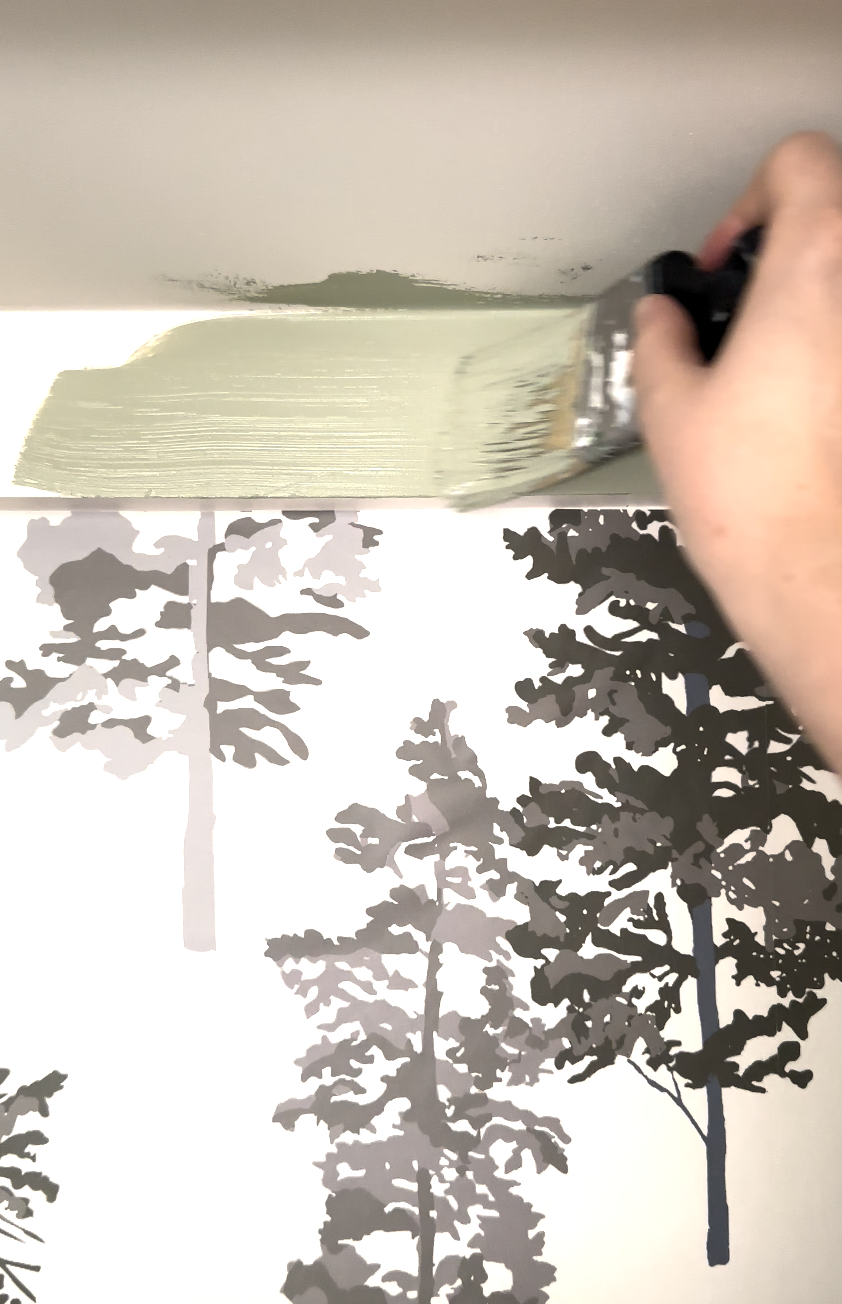
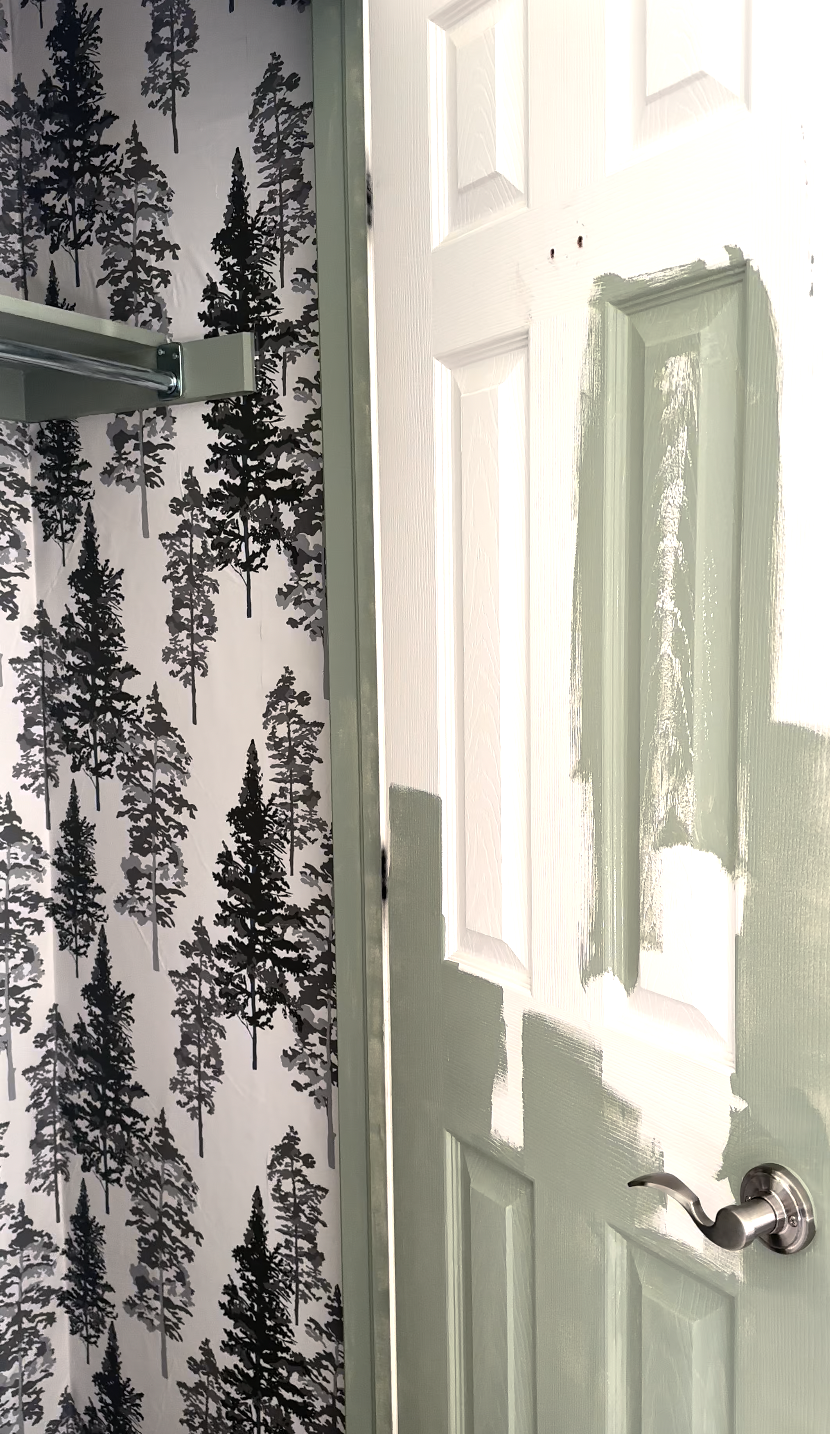
Using an angle sash brush, paint all the trim and baseboards with your paint. I chose Clary Sage by Sherwin Williams as a colorful pop against the trees in the wallpaper. The other option I considered was Warm Stone by Sherwin Williams, which would have also complemented the wallpaper pattern, but ultimately I wanted more color.
For the back of the closet door, I used a combination of my angle sash brush (for the detailed sections) and a mini foam roller (for the flat sections), which is my favorite way to paint a door. It achieves a smooth finish without the need for a paint sprayer. Do two coats on both the trim/baseboards and the door.
Step 3:
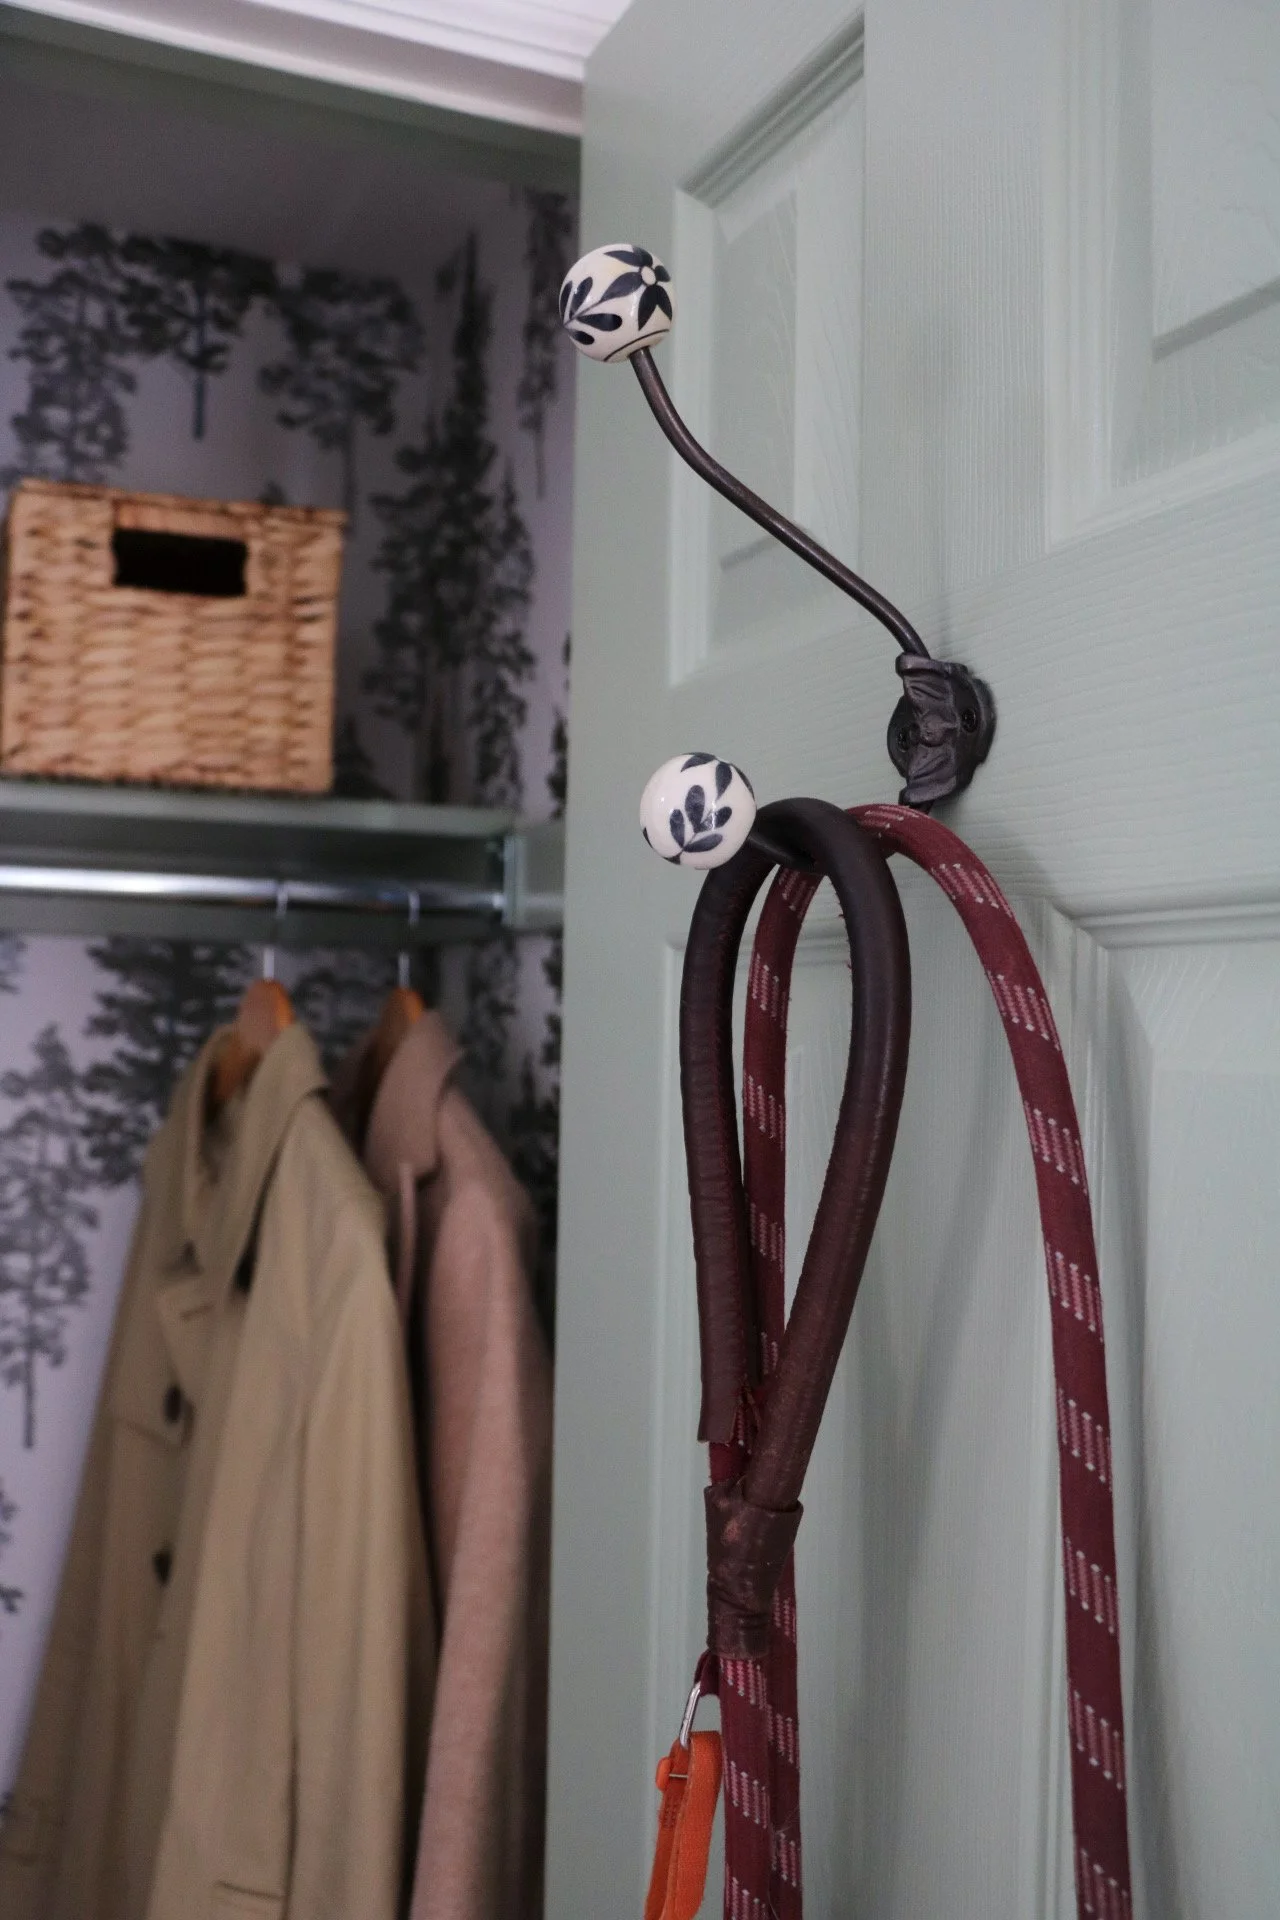
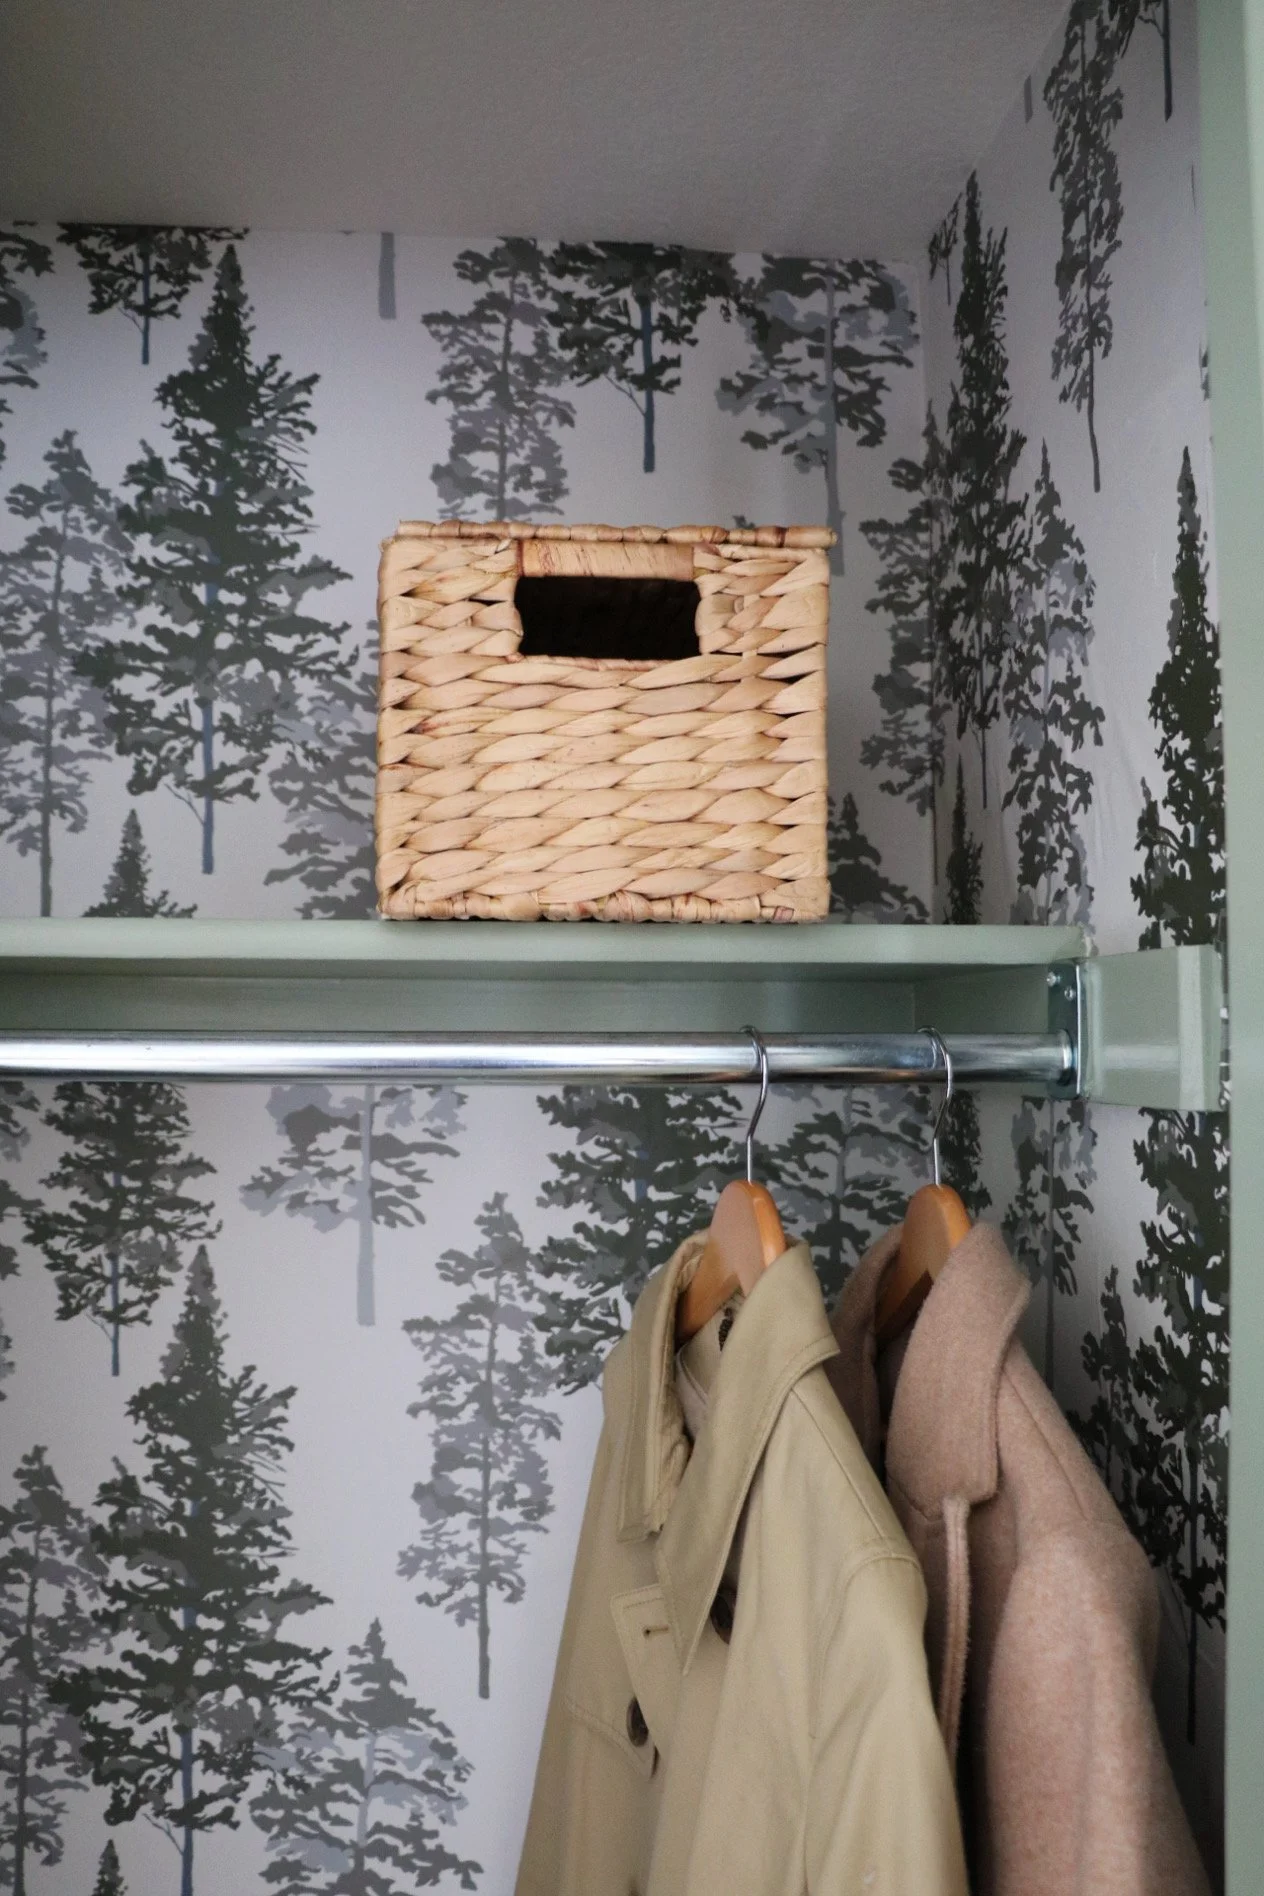
Add a decorative hook for dog leashes and woven baskets for hats, gloves, and scarves. Oh - we also got matching wooden hangers for all the coats, which really elevated the design and also was a sturdy alternative to the plastic white hangers previously used.
Step 4:
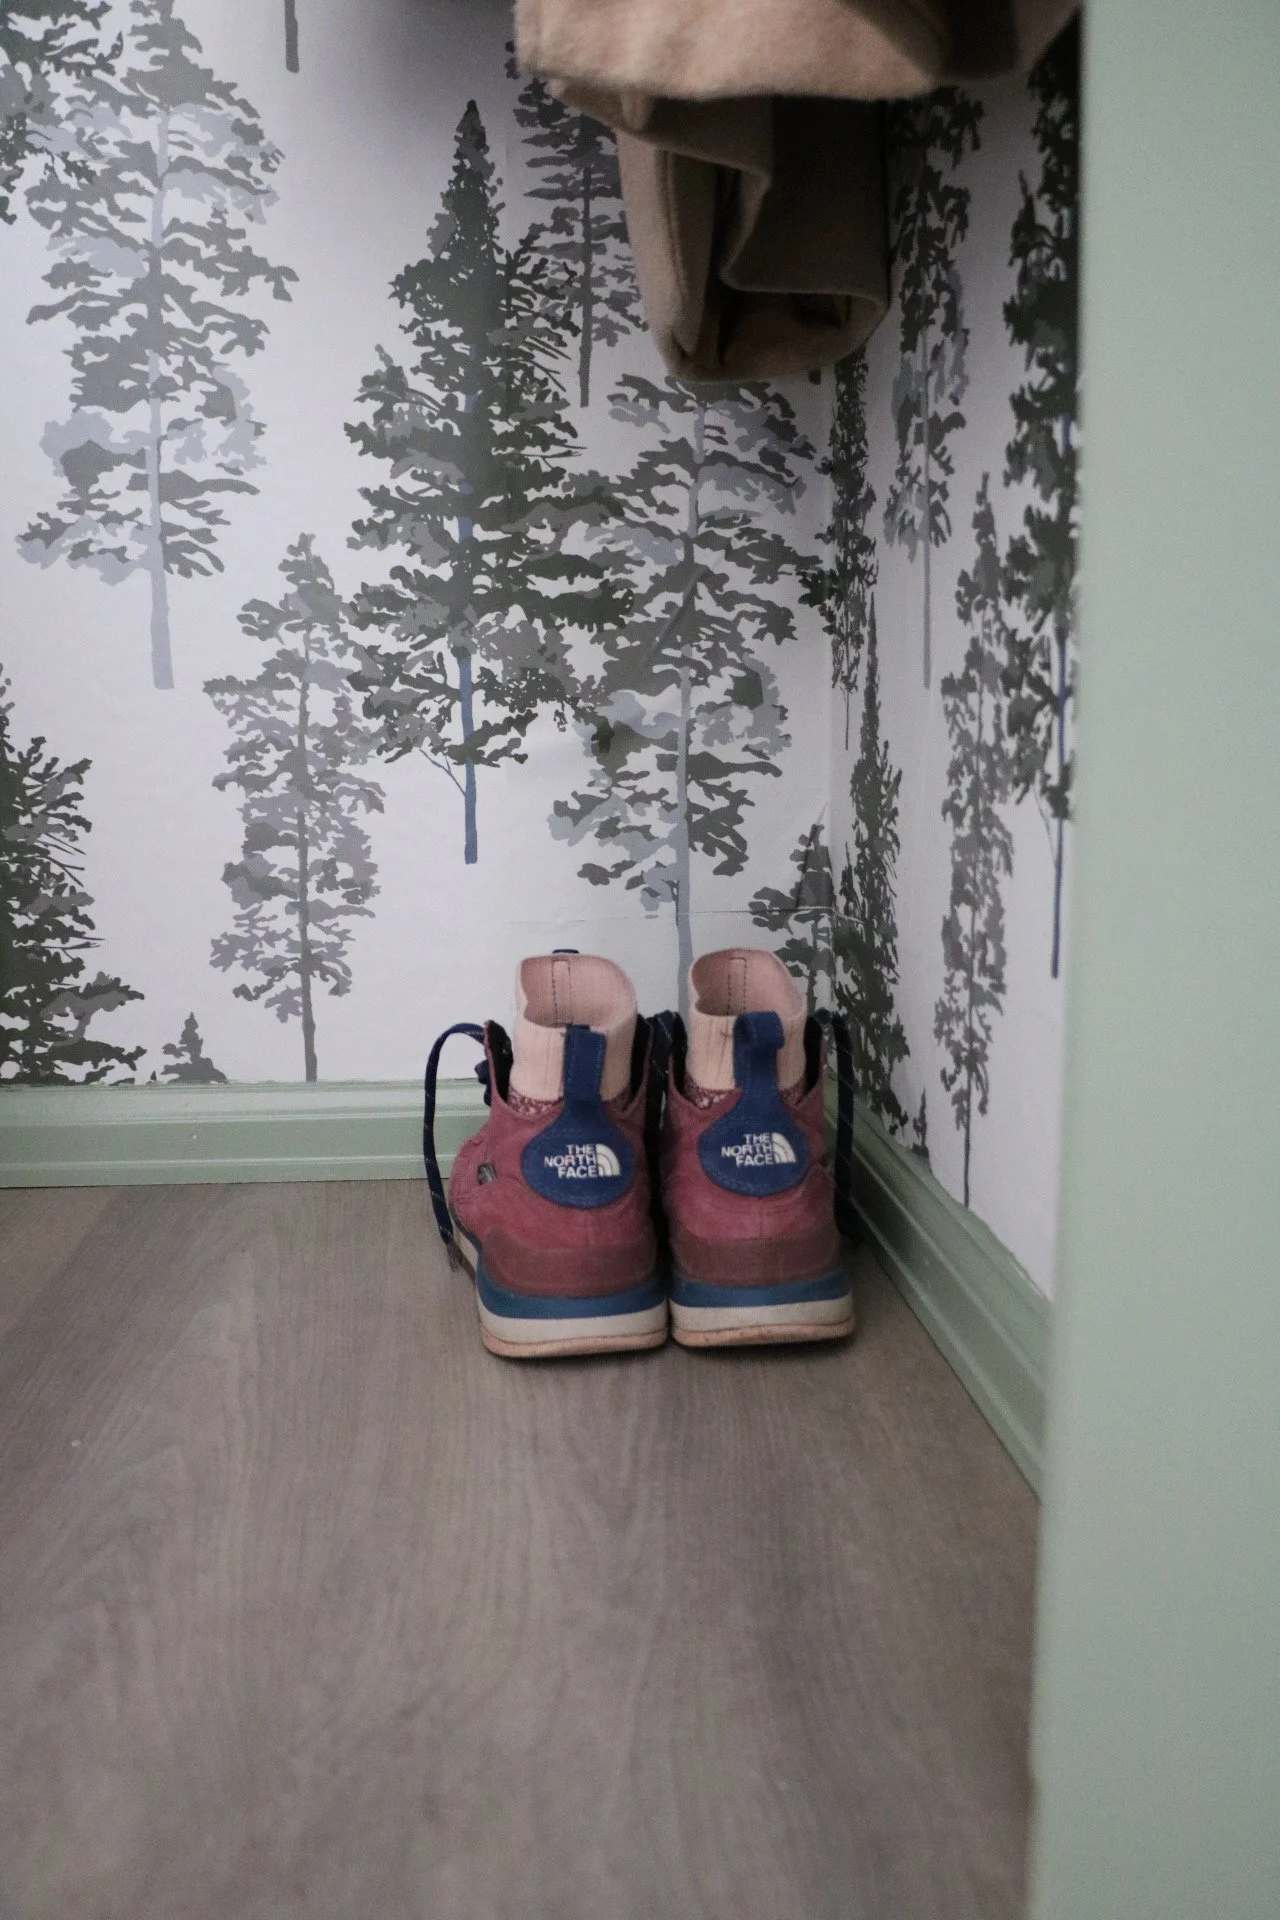
For a future project, I may decide to build out more robust shoe storage. So you could always do that next, or add a wooden shoe rack that matches the woven baskets. But for now, I just love how this looks with the hiking boots’ color contrasted with the wallpaper and trim.
There you have it! A hallway closet makeover, using leftover materials. It makes me smile every time I open the door to grab Walker’s leash or put on a coat. And you know what I decided? No more boring spaces in my house, even for the utility areas! So stay tuned for the next space I decide to makeover… the pantry has been calling my name….